Our most recent version of DevExtreme (v20.1) includes the official release of the DevExtreme File Manager. This client-side component emulates a familiar file manager experience by providing a built-in UI for your end users to browse, manage, and upload files to your web server.
Unfortunately, the component as it stands does not address the possibility of working with non-standard file systems, an example being if your end users needed to view and manage files located in different directories at the same time.
This blog post describes how to create a custom file manager to address this kind of use case. You will see how to:
- Use DevExtreme File Manager's standalone file system providers to access, browse, and manage remote files and directories.
- Build a custom file manager UI using the DevExtreme TreeList component. (Our TreeList component has a hierarchical display similar to the File Manager component.)
- Add command buttons to provide essential file manager functions for your users.
- Use the TreeList's drag and drop API to allow the user to move and copy files.
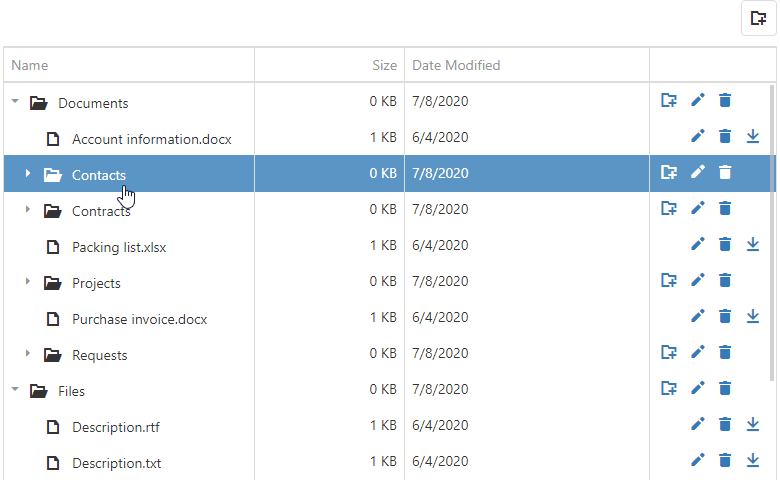
Custom File Manager
The standard DevExtreme File Manager component is divided into two key parts: a server-side file system and a client-side UI to display the file system contents.
In order to create a custom File Manager component to emulate this pattern, you'll need to:
- Set up both client and server file system providers
- Bind these providers to our TreeList component for the UI
From the client-side, a RemoteFileSystemProvider will manage file system items and send requests to a Web API service. On the server, a PhysicalFileSystemProvider connected to a physical file system will process requests from the Web API service.

Note: The code examples below are for the Angular framework. This feature also works with all other frameworks supported by
DevExtreme.
Learn more here:
Bind TreeList - Custom Data Source
To connect our DevExtreme TreeList component to a Web API service, you should:
- Create a custom data source
- Add empty
load, insert, update, and remove methods for this data source (you'll be implementing them in a moment)
- Bind the data source to the TreeList
<dx-tree-list id="treeList" [dataSource]="dataSource"   ...>
   ...
</dx-tree-list>

//The data source uses the RemoteFileSystemProvider API
this.dataSource = {
    key: "key",
    load: options => { ... },
    insert: values => {
        …
    },
    update: (key, values) => { ... },
    remove: key => { ... }
};
Then you will need to create a RemoteFileSystemProvider to manage your files and directories:
const provider = new RemoteFileSystemProvider({
    endpointUrl: "https://js.devexpress.com/Demos/Mvc/api/file-manager-file-system-scripts"
});
Learn more here:
TreeList - How to display and edit file system with the client-side RemoteFileSystemProvider
Browse Files/Folders
In order to add client-side file navigation support, the data source's load function needs to be implemented. Calling the getItems method in this method will allow file items to load on demand.
load: options => {
  const parentIds = options.parentIds || [""];
  const promises = parentIds.map(parentId => {
    const directory = new FileSystemItem(parentId, true);
    return provider.getItems(directory);
  });

  if (promises.length === 1) {
    return promises[0];
  }

  return Promise.all(promises).then(parts => {
    const result = [];
    return result.concat.apply(result, parts);
  });
},
On the server, the PhysicalFileSystemProvider will manage client requests to loads files and directories as a user browses the file system.
 public object FileSystem(FileSystemCommand command, string arguments) {
    // Configure File System Options
    var config = new FileSystemConfiguration {
        Request = Request,
        // Specify a file system provider.
        FileSystemProvider = new PhysicalFileSystemProvider(_hostingEnvironment.ContentRootPath + "/wwwroot"),
    };
    var processor = new FileSystemCommandProcessor(config);
    var result = processor.Execute(command, arguments);
    return result.GetClientCommandResult();
}
Add Command Buttons
Our DevExtreme Treelist can display a command column with buttons to execute custom actions.
For this custom file manager, you should create command buttons that allow users to add and delete files or directories, download files, etc. As an example, the code below shows a command column that includes buttons to create new directories, and rename, delete, and download files:
<dx-tree-list
  id="treeList"
  [dataSource]="dataSource"   ...>
   …
  <dxi-column type="buttons">
      <dxi-button name="add" ...></dxi-button>
      <dxi-button name="edit" hint="Rename"></dxi-button>
      <dxi-button name="delete"></dxi-button>
      <dxi-button name="download" ... ></dxi-button>
  </dxi-column>

</dx-tree-list>
Use the RemoteFileSystemProvider methods to implement corresponding data source functions for the buttons.
Back to implementation of the custom data source. The insert function creates a new directory. It gets the current file system item based on the item's parent path and then calls the createDirectory method:
insert: values => {
    …
    const parentPath = values.parentId || "";
    const directory = new FileSystemItem(parentPath, true);
    return provider.createDirectory(directory, values.name);
},
The update function for the data source renames files and directories. It finds a file or directory with the specified key and calls the renameItem method:
 update: (key, values) => {
     …

     return this.findItemByKey(key).then(item =>
        provider.renameItem(item, values.name)
        );
    }
The remove function uses the deleteItems method to delete items with the specified keys:
remove: key => {
    …

    return this.findItemByKey(key).then(item =>
    provider.deleteItems([item])[0]
    );
}
By default, the server-side PhysicalFileSystemProvider denies file management operations until you explicitly allow them. You should control the availability of the various file operations by setting the following properties to true or false: AllowDownload, AllowUpload, AllowCreate, and AllowDelete.
public object FileSystem(FileSystemCommand command, string arguments) {
   var config = new FileSystemConfiguration {
        Request = Request,
        FileSystemProvider = new PhysicalFileSystemProvider(_hostingEnvironment.ContentRootPath + "/wwwroot"),
        // Allow create, delete and modify files and folders, download files.
        AllowDownload= true,
        AllowUpload = true,
        AllowCreate = true,
        AllowDelete = true,
    };
...
}
Download Support
Add the download command button to the client-side TreeList to allow your users to download files.
 <dx-tree-list id="treeList" ...>
  …
  <dxi-column type="buttons">
    …
    <dxi-button
      name="download"
      icon="download"
      hint="Download"
      [visible]="isDownloadButtonVisible"
      [onClick]="onDownloadButtonClick">
    </dxi-button>
  </dxi-column>
</dx-tree-list>
To initiate file download, call downloadItems from the onDownloadButtonClick event handler.
onDownloadButtonClick(e) {
    this.provider.downloadItems([e.row.data]);
    e.event.preventDefault();
}
Make sure that the AllowDownload option is set to true to support download functionality on the server side.
var config = new FileSystemConfiguration {
    ...
    AllowDownload= true
};
Drag and Drop Support
While the DevExtreme File Manager does not support drag and drop operations, you can add this functionality using the DevExtreme TreeList's built-in functions. You should use the following events of the TreeList control to allow the user to move and copy files: OnDragChange, OnReorder, and OnDragMove.
To implement copy and move operations, use the getNodeByKey method to identify the directory that contains the selected files. Verify that the current and target directory are different: if they are the same location then you should cancel the operation (e.cancel=true).
Use the Ctrl key to check if a user is copying or moving an item during a drag and drop operation. Set the dragCopyMode property to true when the user holds the Ctrl key and copies items:
onDragChange(e) {
    const visibleRows = this.treeList.instance.getVisibleRows();
    const sourceNode = this.treeList.instance.getNodeByKey(e.itemData.key);
    let targetNode = visibleRows[e.toIndex].node;

    if (!targetNode.data.isDirectory) {
      e.cancel = true;
      return;
    }

    while (targetNode && targetNode.data) {
      if (targetNode.data.key === sourceNode.data.key) {
        e.cancel = true;
        return;
      }
      targetNode = targetNode.parent;
    }
    this.dragCopyMode = e.event.ctrlKey;
}

onDragMove(e) {
    const element = document.body;
    const hasCopyMarker = element.classList.contains("drag-copy-mode");
    const copyMode = e.event.ctrlKey;
    if (copyMode !== hasCopyMarker) {
      element.classList.toggle("drag-copy-mode", copyMode);
    }
  }
Once a directory is dragged, the control fires the onReorder event. The source (e.itemData) and target locations (e.toIndex) are either moved or copied (if the Ctrl key is pressed):
onReorder(e) {
    const visibleRows = e.component.getVisibleRows(),
      sourceData = e.itemData,
      targetData = visibleRows[e.toIndex].data;

    const destDirectory = e.dropInsideItem
      ? targetData
      : new FileSystemItem("", true);
    const editItemsFunc = this.dragCopyMode
      ? this.provider.copyItems
      : this.provider.moveItems;

    editItemsFunc
      .call(this.provider, [sourceData], destDirectory)[0]
      .then(() => this.treeList.instance.refresh());
}
Enable copy/move operations by setting the AllowMove and AllowCopy options to true:
var config = new FileSystemConfiguration {
    ...
    AllowMove = true,
    AllowCopy = true
};
Free DevExpress Products - Get Your Copy Today
The following free DevExpress product offers remain available. Should you have any questions about the free offers below, please submit a ticket via the
DevExpress Support Center at your convenience. We'll be happy to follow-up.