In this post, we’ll address the needs of front-end web developers and show you how to use the Vite library to dramatically increase launch/update speed for Javascript client applications.
Vite is a build tool based on a development server that assembles JavaScript code before launching an application. As you may already know, Vite helps reduce load times when making changes and allows you to view results almost instantly.
Vite creates code as ES modules – modules that modern browsers can use to load JavaScript. In the case of large dependencies, Vite pre-bundles these modules to reduce the number of browser requests to the web server. If you are unfamiliar with Vite, be sure to visit the following web page to learn more: Why Vite.
The framework-independent nature of Vite allows support for a variety of frameworks, but the most impressive results are for Vue and React. In the following sections, we’ll show you how to add Vite to your DevExtreme-powered React Reporting application.
Create a Sample DevExtreme App
To get started, generate a new application from a template with the DevExtreme CLI:
npx -p devextreme-cli devextreme new react-app devextreme-react-sample --template="typescript"
cd devextreme-react-sample
Add a view for the DevExpress Document Viewer:
npx devextreme add view document-viewer
Add a view for the DevExpress Report Designer:
npx devextreme add view report-designer
Configure the App to Use Vite and DevExpress Reports
First, modify the package.json file:
-
Add dependencies:
"@devexpress/analytics-core": "^22.2.3",
"devexpress-reporting": "^22.2.3"
-
Add devDependencies:
"@vitejs/plugin-react": "^1.3.0",
"vite": "^2.9.9"
-
Replace the scripts section with the following:
  "scripts": {
    "start": "vite",
    "build": "vite build",
    "preview": "vite preview",
    "build-themes": "devextreme build",
    "postinstall": "npm run build-themes"
  },
Then, modify the index.html file:
- Move the index.html file from the public folder to the project root folder.
- Remove %PUBLIC_URL% strings from the index.html file.
- Add an entry point to the index.html file:
    <body class="dx-viewport">
    <noscript>You need to enable JavaScript to run this app.</noscript>
    <div id="root"></div>
    <script type="module" src="/src/index.tsx"></script>
  </body>
- Add a vite.config.js file to the root folder with the following content:
            import { defineConfig } from 'vite'
            import react from '@vitejs/plugin-react'

            // https://vitejs.dev/config/
            export default defineConfig({
              plugins: [react()],
              build: {
                rollupOptions: {
                  treeshake: false
                }
              }
            })
- Add the following directive to the src/Content.tsx file::
import React from 'react';
Add the DevExpress Document Viewer and Report Designer Components
Steps to add the Document Viewer
Replace src/pages/document-viewer/document-viewer.tsx file content with the following:
import React from 'react';
import ko from 'knockout';
import 'devexpress-reporting/dx-webdocumentviewer';
import './document-viewer.scss';

class ReportViewer extends React.Component {
  constructor(props) {
    super(props);
    this.viewerRef = React.createRef();
    this.reportUrl = ko.observable("Invoice");
    this.requestOptions = {
      host: "https://localhost:5001/",
      invokeAction: "DXXRDV"
    };
  }
  render() {
    return (<div ref={this.viewerRef} data-bind="dxReportViewer: $data"></div>);
  }
  componentDidMount() {
    ko.applyBindings({
      reportUrl: this.reportUrl,
      requestOptions: this.requestOptions
    }, this.viewerRef.current);
  }
  componentWillUnmount() {
    ko.cleanNode(this.viewerRef.current);
  }
};

export default () => (
  <React.Fragment>
    <h2 className={'content-block'}>Document Viewer</h2>
    <div className={'content-block'}>
      <div className={'dx-card responsive-paddings'}>
        <div style={{ width: "100%", height: "700px" }}>
          <ReportViewer />
        </div>
      </div>
    </div>
  </React.Fragment>
);
Where the following property specifies the report name:
this.reportUrl = ko.observable("Invoice");
and the host one specifies the server-side app address:
host: https://localhost:5001/
Finally, add the following content to the src/pages/document-viewer/document-viewer.scss page:
@import url("../../../node_modules/devextreme/dist/css/dx.material.orange.light.css");
@import url("../../../node_modules/@devexpress/analytics-core/dist/css/dx-analytics.common.css");
@import url("../../../node_modules/@devexpress/analytics-core/dist/css/dx-analytics.material.orange.light.css");
@import url("../../../node_modules/devexpress-reporting/dist/css/dx-webdocumentviewer.css");
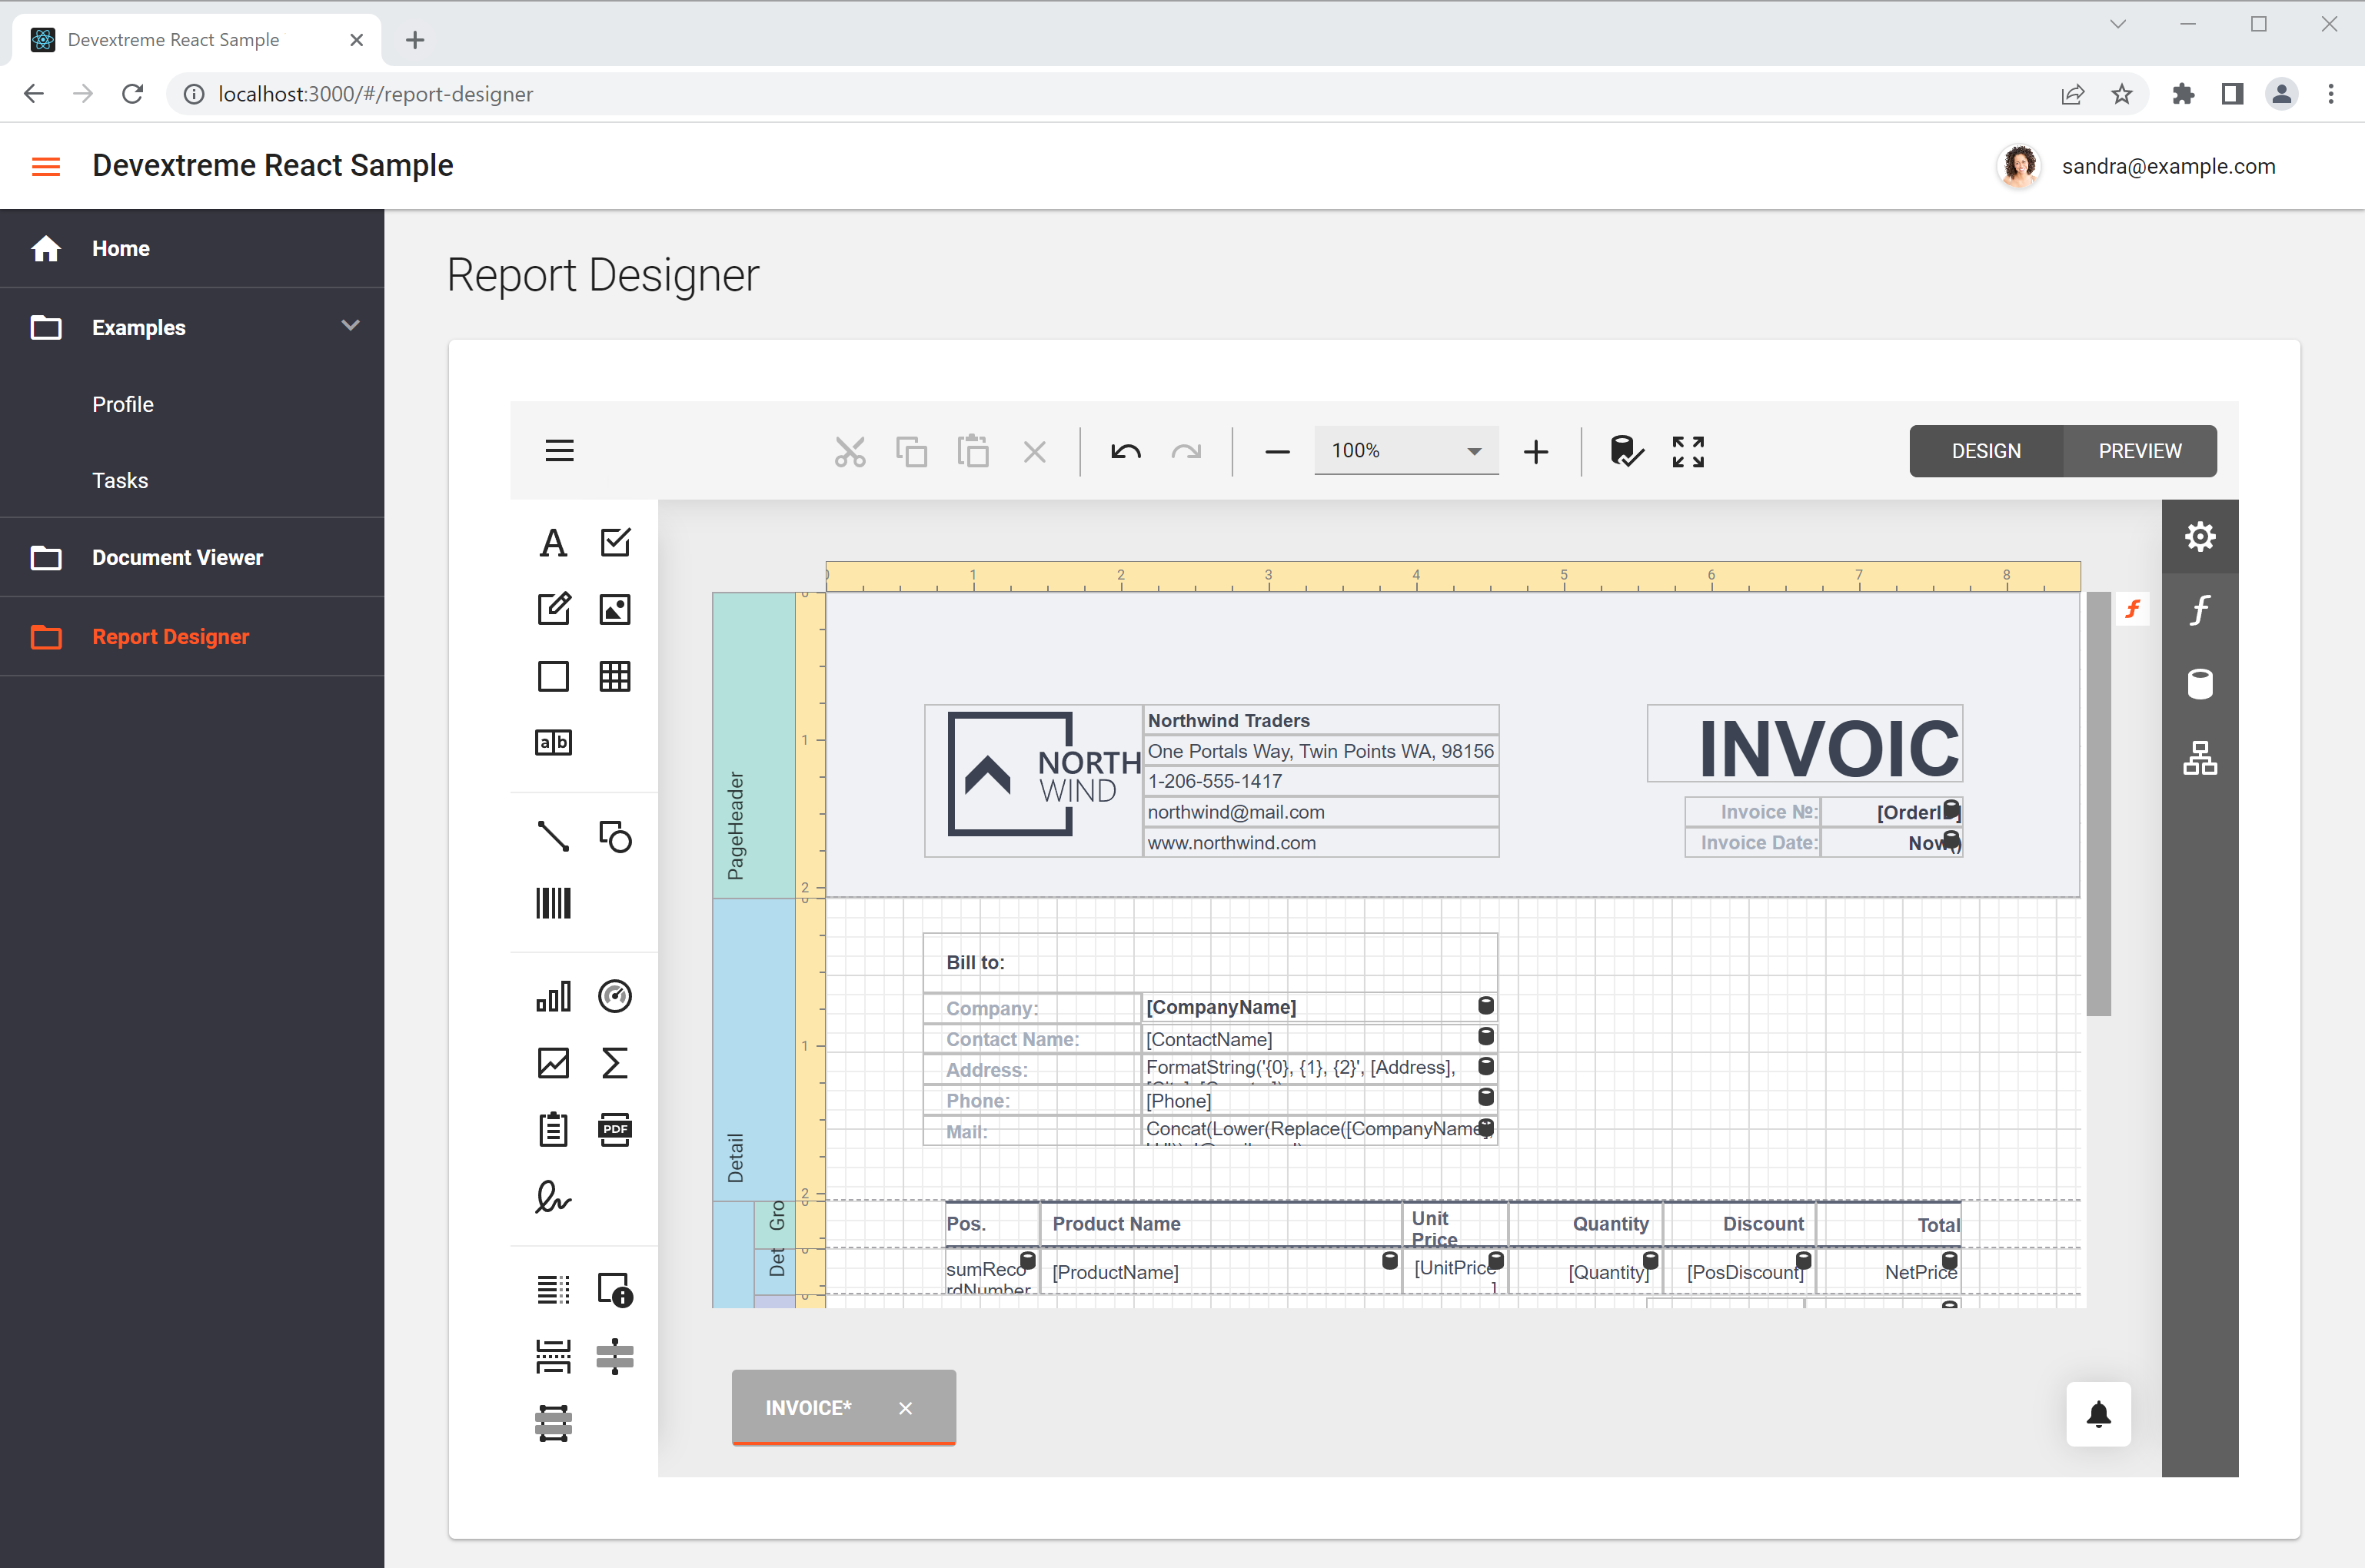
Steps to add DevExpress Report Designer
Replace src/pages/report-designer/report-designer.tsx file content with the following:
import React from 'react';
import ko from 'knockout';
import 'devexpress-reporting/dx-reportdesigner';
import './report-designer.scss';

class ReportDesigner extends React.Component {
  constructor(props) {
    super(props);
    this.designerRef = React.createRef();
    this.reportUrl = ko.observable("Invoice");
    this.requestOptions = {
      host: "https://localhost:5001/",
      getDesignerModelAction: "/DXXRD/GetDesignerModel"
    };
  }
  render() {
    return (<div ref={this.designerRef} data-bind="dxReportDesigner: $data"></div>);
  }
  componentDidMount() {
    ko.applyBindings({
      reportUrl: this.reportUrl,
      requestOptions: this.requestOptions
    }, this.designerRef.current);
  }
  componentWillUnmount() {
    ko.cleanNode(this.designerRef.current);
  }
};
export default () => (
  <React.Fragment>
    <h2 className={'content-block'}>Report Designer</h2>
    <div className={'content-block'}>
      <div className={'dx-card responsive-paddings'}>
        <div style={{ width: "100%", height: "700px" }}>
          <ReportDesigner />
        </div>
      </div>
    </div>
  </React.Fragment>
);
Where the following property specifies the report name:
this.reportUrl = ko.observable("Invoice");
and the host one specifies the server-side app address:
host: https://localhost:5001/
Thus, add the following content to the src/pages/report-designer/report-designer.scss page to complete this step:
@import url("../../../node_modules/devextreme/dist/css/dx.material.orange.light.css");
@import url("../../../node_modules/@devexpress/analytics-core/dist/css/dx-analytics.common.css");
@import url("../../../node_modules/@devexpress/analytics-core/dist/css/dx-analytics.material.orange.light.css");
@import url("../../../node_modules/@devexpress/analytics-core/dist/css/dx-querybuilder.css");
@import url("../../../node_modules/devexpress-reporting/dist/css/dx-webdocumentviewer.css");
@import url("../../../node_modules/devexpress-reporting/dist/css/dx-reportdesigner.css");
Run the Reporting Backend Application
Our web reporting components require a backend application to store and process reports. If you haven’t done this already, you must create an ASP.NET Core application as described in the following help topic: Report Designer Server-Side Configuration (ASP.NET Core).
Run the backend application to determine the address, and specify that address as the host option for the ReportViewer and ReportDesigner components in the src/pages/document-viewer/document-viewer.tsx and src/pages/report-designer/report-designer.tsx files, respectively.
If you have just created a backend application, you will have a TestReport created from the template. Instead of this simple report, you can load one of the reports that ships with our distribution. To load a report, open the Invoice module in our WinForms Reporting demo, switch to the Designer, and save the report as a REPX file. Open the TestReport report in the Visual Studio Report Designer and click Open/Import in the report’s smart tag to load your saved REPX file.
Run the Client App
Make certain that the backend application is running. Navigate to the devextreme-react-sample folder, and execute the following command:
npm install
npm run start
Once complete, the application should appear as follows:
Your Feedback Matters
As always, we welcome your thoughts.
Free DevExpress Products - Get Your Copy Today
The following free DevExpress product offers remain available. Should you have any questions about the free offers below, please submit a ticket via the
DevExpress Support Center at your convenience. We'll be happy to follow-up.