Blazor – Twitch Episode 2 Recap – Part 1

In our second live stream, Amanda and I talked about how to get data out of a database and visualize it by using our Blazor DxGrid control. We started with the application build during the previous stream including the automatic ThemeToggler control. You can read all about it in the Episode 1 Recap.
The database
For demo purposes I like to use the Chinook Database. You can download the SQL Script on GitHub. Make sure you pick the correct script. I used the one for MS-SQL Server with Auto incementing Keys.
The reason for using this database is because it’s simple and pre-populated with sample data.
Configuring EntityFramework
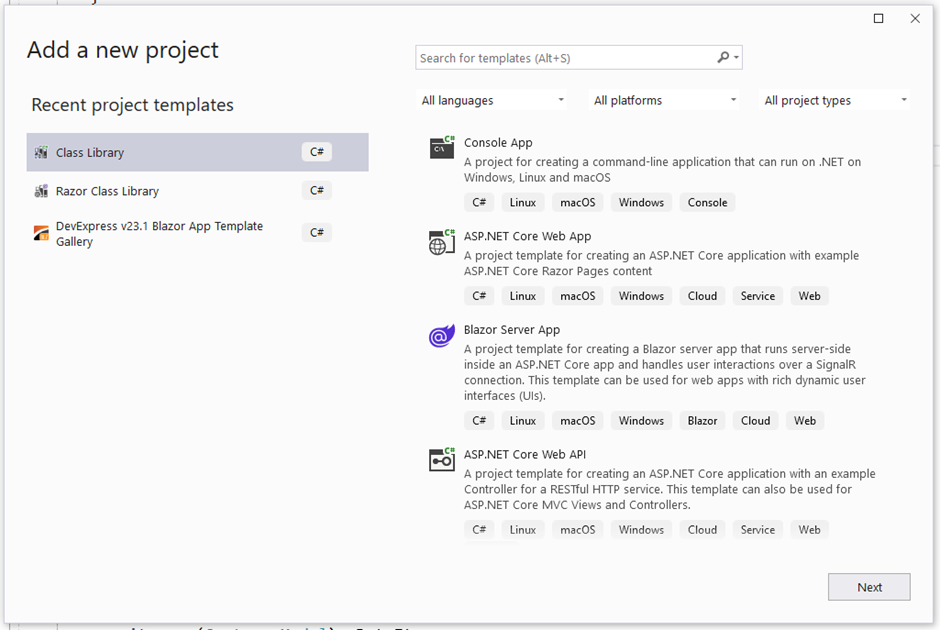
Once the database has been created on MS SQL-Server, we need to scaffold the DBContext and the EF Model classes. Since I like to think ahead, and keep things organized and maintainable, I have decided to add a new Class Library project to the solution which I have named: DxChinook.Data.EF.csproj.
After successful completion of the wizard, I add a reference in the DxBlazorChinook app:
<ItemGroup>
		<ProjectReference Include="..\DxBlazor.UI\DxBlazor.UI.csproj" />
		<ProjectReference Include="..\DxChinook.Data.EF\DxChinook.Data.EF.csproj" />
Because we want to use scaffolding for generating the DBContext and the Model classes, there are 2 packages we need to add to both the Blazor App and the Class Library:
<ItemGroup>
		<PackageReference Include="Microsoft.EntityFrameworkCore.SqlServer" Version="6.0.0" />
		<PackageReference Include="Microsoft.EntityFrameworkCore.Tools" Version="6.0.0" />
After doing a build to make sure all packages are available and loaded, we can open the Package Manager Console in Visual Studio, select the DxChinook.Data.EF project, and enter the Scaffold-DbContext command:
Scaffold-DbContext "Server=(LocalDB)\MSSQLLocalDB;Database=Chinook;Trusted_Connection=True;" Microsoft.EntityFrameworkCore.SqlServer -OutputDir Models

With the Scaffold-DbContext command, I’m specifying the -OutputDir Models option. This option will put the scaffolded code in a Models sub-folder in the project.
There is also a warning about potentially sensitive information. This is because in ChinookContext the following code has been written:

We can just safely remove the entire method from the code. Also the EntityFramework package references can be removed from the DxBlazorChinook app.
Since we need to register certain classes from this project to the DI container, I have renamed the DxChinook.Data.EF.Class1.cs file to RegisterServices.cs and changed the code to look like this:
public static class RegisterServices
{
    public static IServiceCollection RegisterDataServices(this IServiceCollection services, string connectionString)
    {
        services.AddDbContext<ChinookContext>(options =>
            options.UseSqlServer(connectionString), ServiceLifetime.Transient);

        return services;
    }
}
The static class contains an extension method for the IServiceCollection interface which – in this case – configures DbContext.
By using this approach, we can now go to DxBlazorChinook/Program.cs and call this method.
using DxBlazorChinook.Data;
using DxChinook.Data;
using DxChinook.Data.EF;
using Microsoft.AspNetCore.Components;
using Microsoft.AspNetCore.Components.Web;


var builder = WebApplication.CreateBuilder(args);

// ... code omitted for clarity ...

builder.Services.RegisterDataServices(
    builder.Configuration.GetConnectionString("ChinookConnection"));

builder.WebHost.UseWebRoot("wwwroot");

// ... code omitted for clarity ...
The last thing to do is add the connectionString in the appsettings.json:
{
  "connectionStrings": {
    "ChinookConnection": "data source=(localdb)\\mssqllocaldb;integrated security=SSPI;initial catalog=Chinook"
  },
  "Logging": {
    "LogLevel": {
      "Default": "Information",
      "Microsoft.AspNetCore": "Warning"
    }
  },
  "AllowedHosts": "*"
}
With this in place, we are ready to get data from the database into our DxGrid!
Using the DevExpress Blazor DxGrid
Now that we have done the necessary preparations, we’re ready to create a new Blazor Component in DxBlazorChinookApp/Pages. Let’s call it Customers.razor. I’ll cut the @page “/grid” from the Grid.razor and paste it into the Customers.razor and remove the rest of the sample code. (Now we don’t need to modify our navigation component to access the page)
@page "/grid"

@code {

}
Under the @page directive, I’ll also add @using DxChinook.Data.EF.Models and I’ll inject the ChinookContext by adding @inject ChinookContext dbCtx.
Since the DxGrid component is very versatile in the way it works with data, I switch over to the DevExpress Blazor Demo site to check which mechanism I want to use:
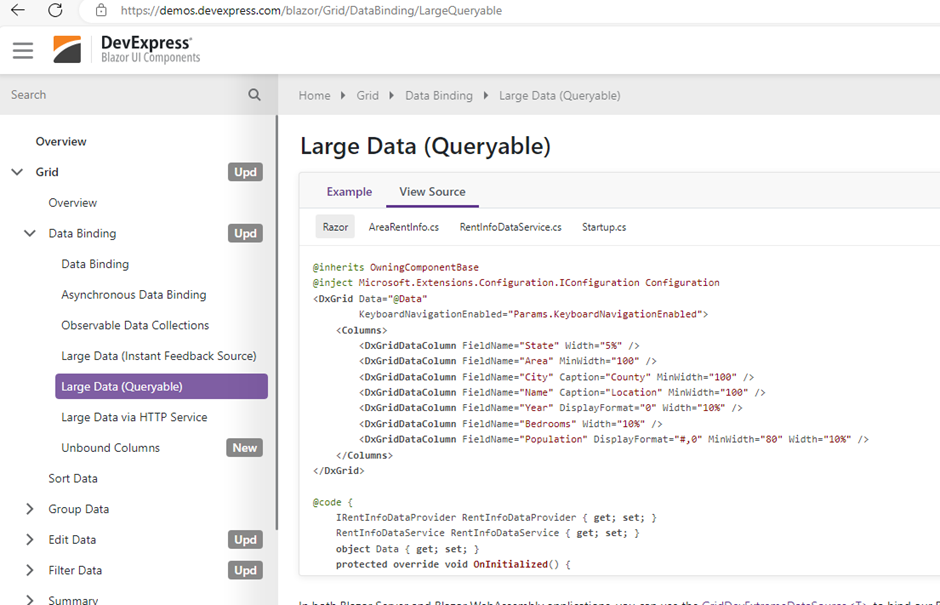
I end up on the “Binding to Large Data (Queryable)” example since this allows us to use server-side paging / filtering and sorting. It results in smaller packages of data being sent forward and back which improves the end-user experience – specifically on larger databases.
As I check the source code of the demo, I can copy some fragments out of the demo code and paste it in my Customers.razor page.
First, I copy the DxGrid code and remove all columns – since the model being used is different.
@page "/grid"
@using @DxChinook.Data.EF.Models
@inject ChinookContext ctx

<DxGrid Data="@Data">
    <Columns>

    </Columns>
</DxGrid>
Next, I copy the C# code from the @code block and paste it in my Customers page as well:
@code {
    object Data { get; set; }
    protected override void OnInitialized() {
        var dataSource = new GridDevExtremeDataSource<Customer>(ctx.Customers);
        dataSource.CustomizeLoadOptions = (loadOptions) => {
            // If underlying data is a large SQL table, specify
            // PrimaryKey and PaginateViaPrimaryKey.
            // This can make SQL execution plans more efficient.
            loadOptions.PrimaryKey = new[] { nameof(Customer.CustomerId) };
            loadOptions.PaginateViaPrimaryKey = true;
        };
        Data = dataSource;
    }
}
I have already changed some types and removed redundant code from the copied code.
VisualStudio Search & Replace with RegularExpressions
Before we can see any data in the DxGrid, we need to add the columns to the grid.
The quickest way of doing that is by mastering the Search & Replace with Regular Expressions. I recommend spending some time on how this works, because it can save you a ton of time!
So first I copied the properties from the Customer model. (Place your cursor on any Customer reference and hit F12. You’ll end up in the Customer.cs class.
Select the properties we want to appear as columns in the DxGrid, and copy and paste them in the Columns section of the Dx declaration and remove the = null!; initializers on the properties who have them.
Next, press Ctrl+H to open the Search & Replace and make sure the Use Regular Expressions feature is turned on.
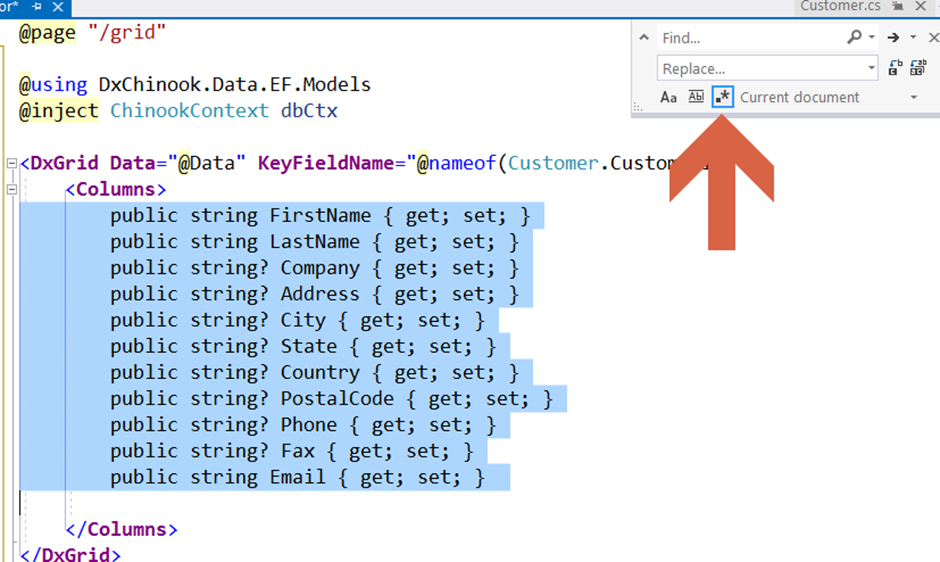
Now we can enter the following search expression:
public (.*) (.*) { get; set; }
And we’ll replace it with:
<DxGridDataColumn FieldName="@nameof(Customer.$2)" Caption="$2" />
Check that the Selection feature is selected and click Replace All. Within a second, the code has been transformed into DxGridDataColumn declarations!
If we run the application, you’ll see that the customers are being shown where the grid is fetching paged results from the database!
CRUD Operations with the DxGrid
So now let’s see how to implement CRUD operations with the DxGrid.
To make this work, let’s navigate to the DevExpress Blazor Demo site and check the examples on how this can be done.
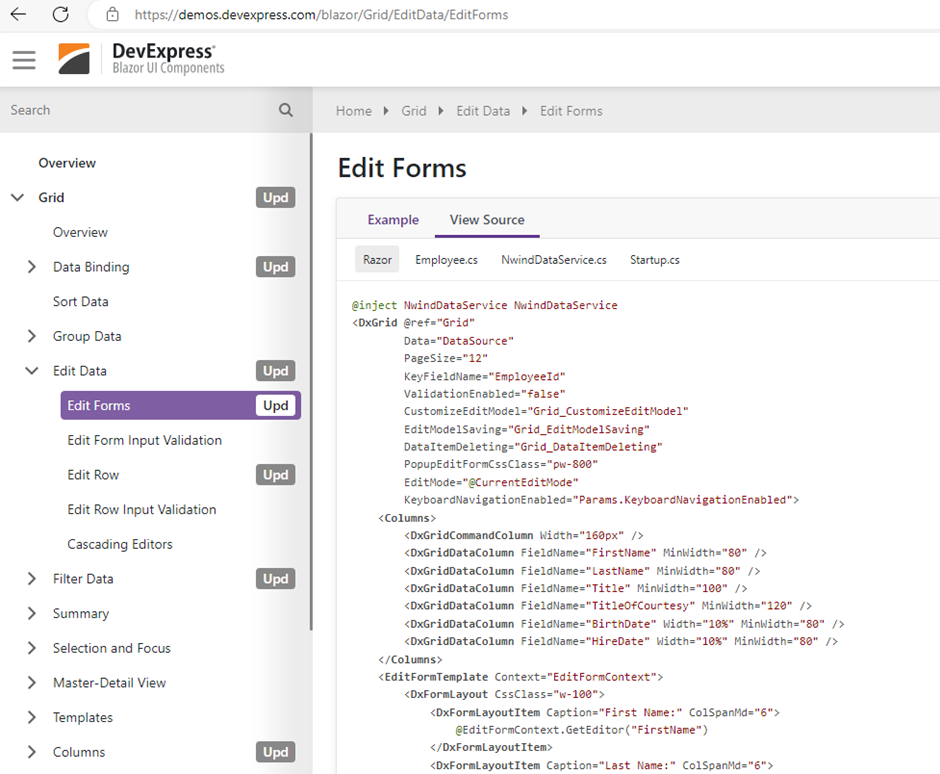
If I quickly screen through the example code, I notice a couple of things:
- There is an EditFormTemplate which determines how the edit form looks like.
- There are some events bound to the DxGrid for Initializing, storing, and deleting.
Let’s first copy the EditFormTemplate from the demo code into our Customers grid and remove the DxFormLayoutItem elements (since they are based on another model).
I can now quickly pull the same trick as I did with the columns, by pasting in the properties from the Customer class, selecting the pasted code.
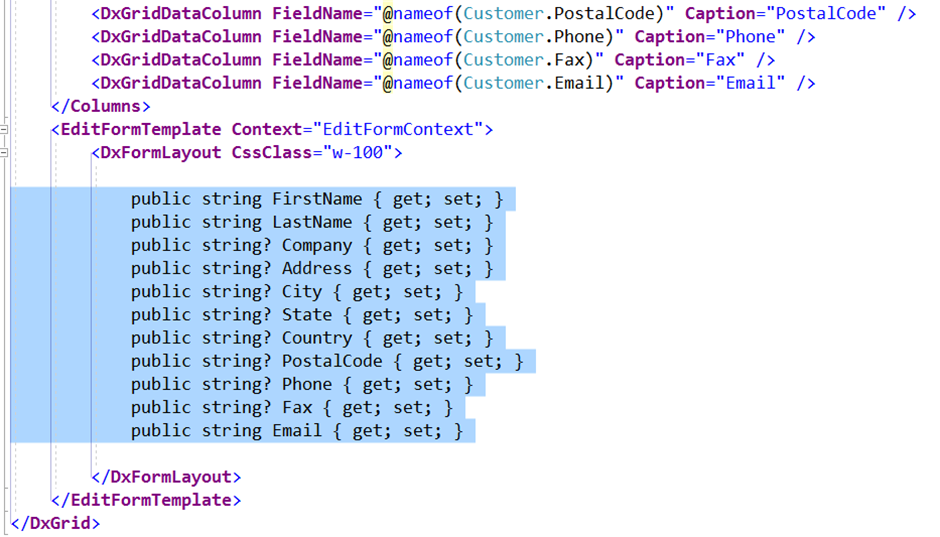
Now I can enter the following in the Search & Replace dialog:
Search:
public (.*) (.*) { get; set; }
Replace:
<DxFormLayoutItem Caption="$2" ColSpanMd="6">@EditFormContext.GetEditor(nameof(Customer.$2))</DxFormLayoutItem>
We’ll have an editor form constructed in seconds!
DxGrid CRUD Eventhandlers
We now need to tell the grid what to do when we start editing, saving or deleting. For this we need to code the following event-handlers:
<DxGrid Data="@Data"
        CustomizeEditModel="Grid_CustomizeEditModel"
        EditModelSaving="Grid_EditModelSaving"
        DataItemDeleting="Grid_DataItemDeleting"

  ... code omitted for clarity ...
The first one allows us to initialize the model being edited with some default data. We can do something like:
void Grid_CustomizeEditModel(GridCustomizeEditModelEventArgs e)
{
    if (e.IsNew)
    {
        var item = (CustomerModel)e.EditModel;
        item.FirstName = "John";
        item.LastName = "Doe";
    }
}
The second handler will deal with the actual storage and in our case if will look like this:
string serverError = string.Empty;
async Task Grid_EditModelSaving(GridEditModelSavingEventArgs e)
  {
      serverError = string.Empty;
      var item = (Customer)e.EditModel;
      try
      {

          if (e.IsNew)
              await ctx.AddAsync<Customer>(item);
          else
          {
              // get item from db and replace properties edited
              var db = await ctx.FindAsync<Customer>(item.CustomerId);
              if (db != null)
              {
                  db.FirstName = item.FirstName;
                  db.LastName = item.LastName;
                  db.Company = item.Company;
                  db.Address = item.Address;
                  db.City = item.City;
                  db.State = item.State;
                  db.Country = item.Country;
                  db.PostalCode = item.PostalCode;
                  db.Phone = item.Phone;
                  db.Fax = item.Fax;
                  db.Email = item.Email;
              }
          }
          await ctx.SaveChangesAsync();
      }
      catch (Exception err)
      {
          e.Cancel = true;
          serverError = err.InnerException == null
                ? err.Message
                : err.InnerException.Message;

      }
  }
The last handler – for deleting – will look like this:
async Task Grid_DataItemDeleting(GridDataItemDeletingEventArgs e)
{
    var item = (Customer)e.DataItem;
    serverError = string.Empty;
    try
    {
        var db = await ctx.FindAsync<Customer>(item.CustomerId);
        if (db != null)
        {
            ctx.Customers.Remove(db);
            await ctx.SaveChangesAsync();
        }
    }
    catch (Exception err)
    {
        e.Cancel = true;
        serverError = err.InnerException == null ? err.Message : err.InnerException.Message;
    }
}
Again, with some error handling in place.
Before we’re able to use the CRUD features of the DxGrid, there are a couple of things we need to do in the DxGrid’s declaration – bind the events, specify the editing mode and keyfield and last, add a command column.
The event binding, editing mode and keyfield can be set like this:
<DxGrid Data="@Data"
        CustomizeEditModel="Grid_CustomizeEditModel"
        EditModelSaving="Grid_EditModelSaving"
        DataItemDeleting="Grid_DataItemDeleting"
        EditMode="GridEditMode.PopupEditForm"
        KeyFieldName="@nameof(Customer.CustomerId)">
    <Columns>
      <DxGridCommandColumn Width="160px" />
      <DxGridDataColumn FieldName="@nameof(Customer.LastName)"
                        Caption="LastName" />
  ... code omitted for clarity ...
The command column allows us to change the state of the grid from browsing to inserting, updating or deleting.
If we now run the application, we’ll have a screen which allows us to – more or less - manage customers.
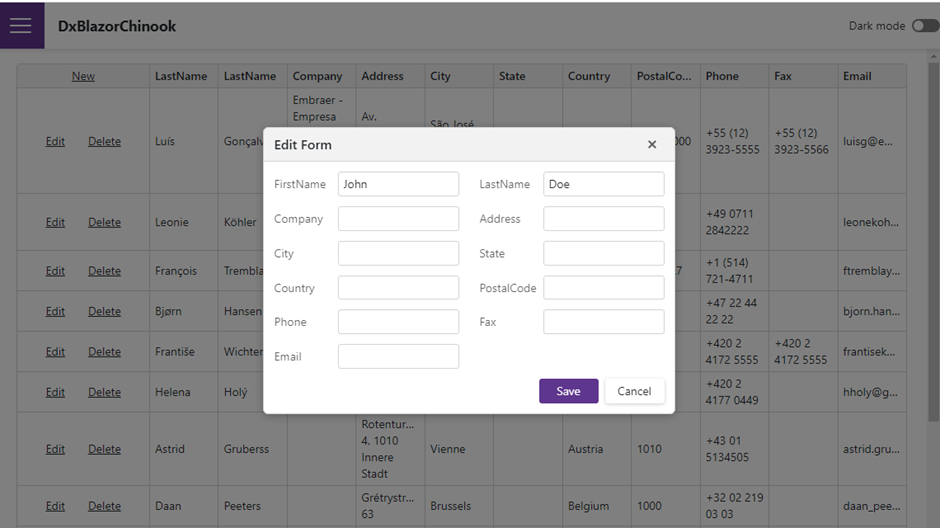
More or Less?
Modifying an existing customer works as expected. Now try adding a new customer and click directly on Save (without entering any data). As you can see nothing happens.
This is because an exception occurs, but this is not displayed and therefore the operation is cancelled in the UI.
async Task Grid_EditModelSaving(GridEditModelSavingEventArgs e)
{
    // ... code omitted for clarity ...
        await ctx.SaveChangesAsync(); // <-- DB raises exception
    }
    catch (Exception err)
    {
        e.Cancel = true;             // <-- EditForm stays open
        serverError = err.InnerException == null
              ? err.Message
              : err.InnerException.Message;
    }
}
Do you remember that in the event code, I added the serverError?
Let’s visualize that by adding a dxFormLayoutItem in the EditForm template like this:
<DxFormLayoutItem Caption="" ColSpanSm="12" BeginRow="true"
    CssClass="formlayout-validation-summary"
    Visible="@(!string.IsNullOrEmpty(serverError))">
    <Template>
        <div class="validation-errors" style="color:red;">
            @serverError
        </div>
    </Template>
</DxFormLayoutItem>
If we now run again and perform the new / save action, we’ll see what’s happening:
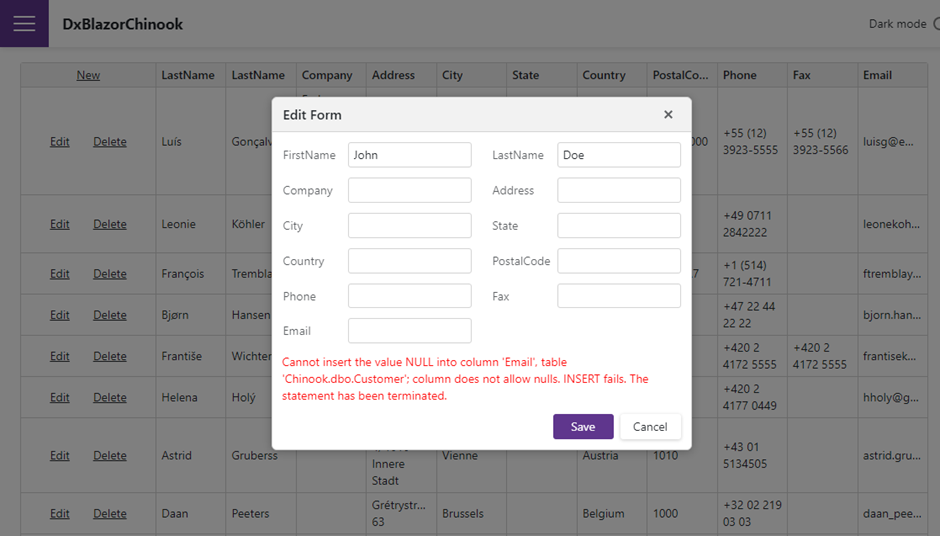
An exception was raised by the database which is now projected back to the UI.
An average hacker would be extremely happy to get this information.
Another thing with the current setup is that the UI is working directly with EF models. This is something I wouldn’t recommend.
It is better to use models optimized for the UI where some (or all) properties will be copied from the EF Models into the UI Models and back. This is pattern is called DTO (Data Transformation Objects).
Though we have setup a functional app to manage data from the database, there are some things that can be done more efficiently.
Read in the Part 2 Post what I have changed to get a better architecture and how to reduce the amount of code in the Customers.razor.
The code for these changes can be downloaded from the Github repo. I have created a separate branch for this.
Free DevExpress Products - Get Your Copy Today
 Don Wibier (DevExpress)