JavaScript — Consume the DevExpress Backend Web API with Svelte (Part 5. Authenticate Users and Protect Data)

In the first part of this post series, I described how to set up a Svelte Kit project to load data from the DevExpress Web API service. The second part described how I queried metadata from the service, in order to display captions customized in the Application Model. Part 3 covered sorting and filtering of data, as examples of data retrieval customized dynamically by the user at runtime. In Part 4 I added editing functionality to the demo app, including validation.
You can find source code for each stage of the demo in the GitHub repository. Here is a GitHub sample for the current post: Stage 5- Authenticate users and protect data.
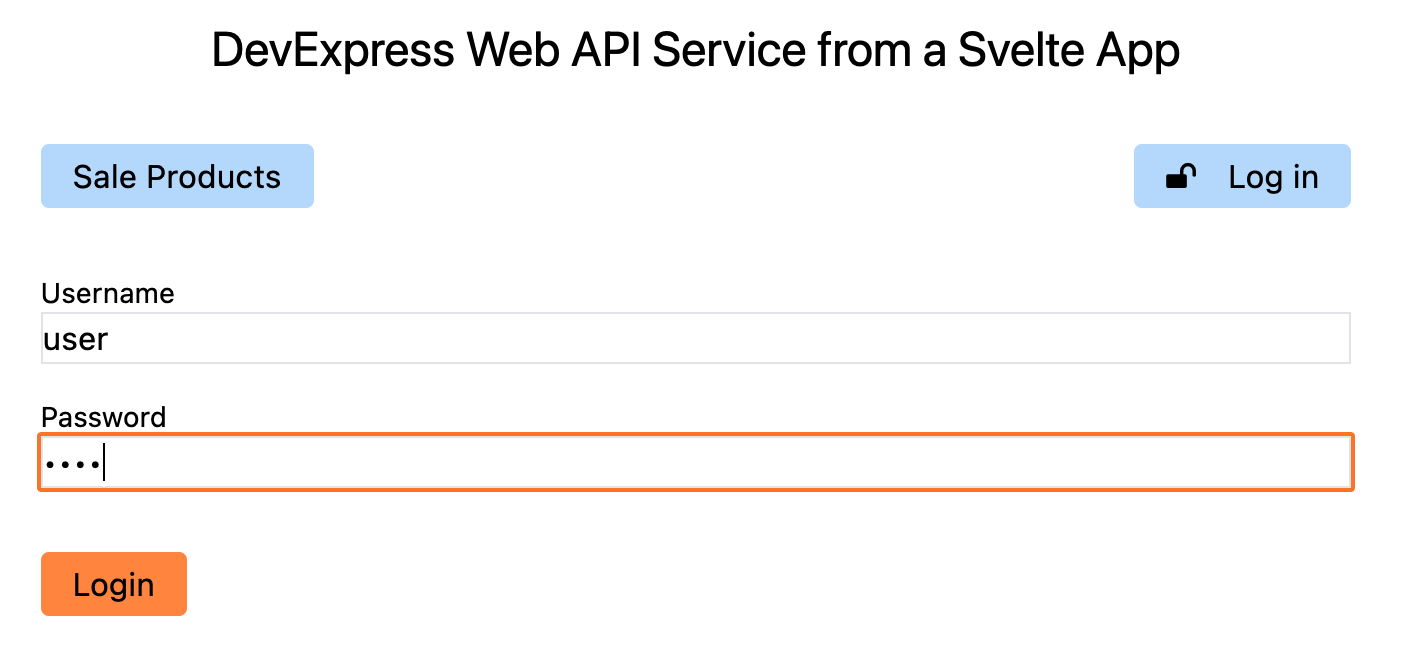
Table of Contents
- Stage 1 — Get started and load data / GitHub sample
- Stage 2 — Localize UI captions / GitHub sample
- Stage 3 — Sort and filter data / GitHub sample
- Stage 4 — Edit and validate data / GitHub sample
- Stage 5 — Authenticate users and protect data / GitHub sample (this post)
- Stage 6 — Preview and download reports / GitHub sample
- Stage 7 — Mail Merge or download Office documents / GitHub sample
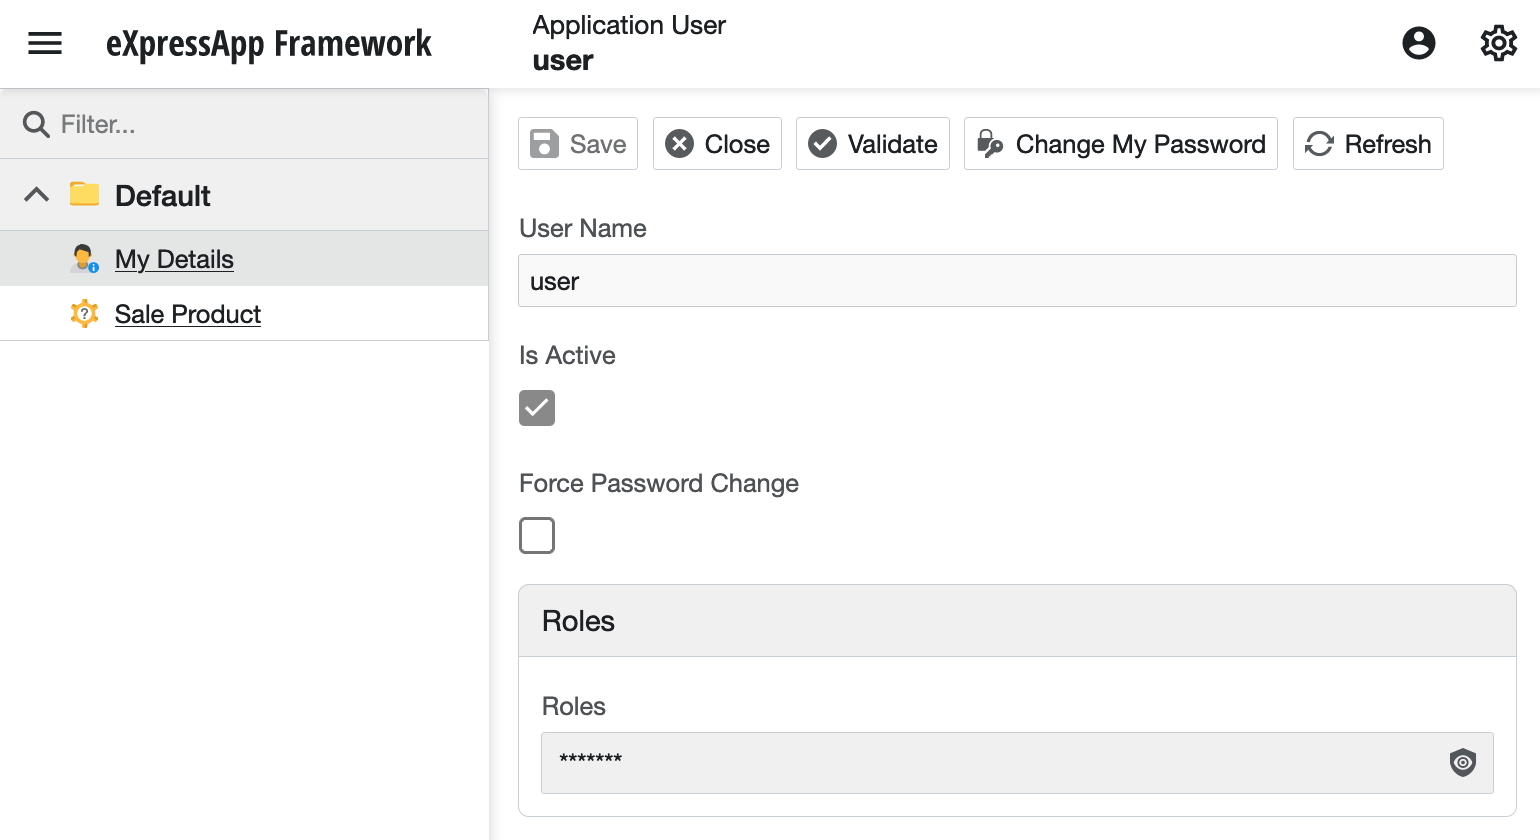
Add Application User into Your Entity Data Model for Security Functionality
Several persistent data types are used for the role-based access control system implemented in the Web API Service. Some of these can be used directly from DevExpress assemblies, others should be implemented for your application.
Note that some of the types in the sample project can be generated automatically, if you create a new project using the Visual Studio wizard and select the options to activate authentication modules. Some code is included in this post for reference purposes, and it is possible that details of the sample application code have been modified, even if they started out with the auto-generated code. In your own real-world project you will need to make your own changes!
The topic Authenticate Web API in the DevExpress documentation explains some details about JWT and OAuth authentication, I recommend reading it.
In the Module project, add two types to the
BusinessObjects folder:
-
The type
ApplicationUserin the fileApplicationUser.cs(this class is helpful to add custom fields to your 'User' entity like Email, Birthday, etc.) -
The type
ApplicationUserLoginInfoin the fileApplicationUserLoginInfo.cs
Now edit the file
XAFAppDbContext.cs
in the same folder and add properties for the persistent types.
This includes a few entries required for correct handling of
the basic library types that underly these data structures.
Also add the instructions to the method
OnModelCreating:
[TypesInfoInitializer(typeof(XAFAppContextInitializer))]
public class XAFAppEFCoreDbContext : DbContext {
  ...
  public DbSet<SaleProduct> SaleProducts { get; set; }

  public DbSet<ModelDifference> ModelDifferences { get; set; }
  public DbSet<ModelDifferenceAspect> ModelDifferenceAspects { get; set; }
  public DbSet<PermissionPolicyRole> Roles { get; set; }
  public DbSet<ApplicationUser> Users { get; set; }
  public DbSet<ApplicationUserLoginInfo> UserLoginInfos { get; set; }

  protected override void OnModelCreating(ModelBuilder modelBuilder) {
    base.OnModelCreating(modelBuilder);
    modelBuilder.HasChangeTrackingStrategy(ChangeTrackingStrategy.ChangingAndChangedNotificationsWithOriginalValues);
    modelBuilder.Entity<ApplicationUserLoginInfo>(b => {
      b.HasIndex(nameof(DevExpress.ExpressApp.Security.ISecurityUserLoginInfo.LoginProviderName), nameof(DevExpress.ExpressApp.Security.ISecurityUserLoginInfo.ProviderUserKey)).IsUnique();
    });
    modelBuilder.Entity<ModelDifference>()
        .HasMany(t => t.Aspects)
        .WithOne(t => t.Owner)
        .OnDelete(DeleteBehavior.Cascade);
  }
}
To register the types with the module, edit the file
Module.cs
and add the highlighted lines:
public sealed class XAFAppModule : ModuleBase {
  public XAFAppModule() {
    AdditionalExportedTypes.Add(typeof(XAFApp.Module.BusinessObjects.ApplicationUser));
    AdditionalExportedTypes.Add(typeof(DevExpress.Persistent.BaseImpl.EF.PermissionPolicy.PermissionPolicyRole));
    AdditionalExportedTypes.Add(typeof(DevExpress.Persistent.BaseImpl.EF.ModelDifference));
    AdditionalExportedTypes.Add(typeof(DevExpress.Persistent.BaseImpl.EF.ModelDifferenceAspect));

    RequiredModuleTypes.Add(typeof(DevExpress.ExpressApp.SystemModule.SystemModule));
    RequiredModuleTypes.Add(typeof(DevExpress.ExpressApp.Objects.BusinessClassLibraryCustomizationModule));
    RequiredModuleTypes.Add(typeof(DevExpress.ExpressApp.Validation.ValidationModule));

    DevExpress.ExpressApp.Security.SecurityModule.UsedExportedTypes = DevExpress.Persistent.Base.UsedExportedTypes.Custom;
  }

...
}
Finally, modify the code in the method
UpdateDatabaseAfterUpdateSchema, in
DatabaseUpdate/Updater.cs, to generate roles and
user objects. In many applications you will have some
bootstrapping code along similar lines, but in this case there
are two different roles and two different users created for
demo purposes: the admin with all rights, and the
user with limited permissions (but full access to the
SaleProduct data type).
Follow this link to see the highlighted lines for the new code.
Activate Authentication for the Blazor Server App
The project for the Blazor Server app already has most of the
building blocks in place. To keep it on the same level as the
Web API project, here are the changes you need to make to
Startup.cs, in order to activate authentication and authorization for
this app.
public void ConfigureServices(IServiceCollection services) {
  ...
  services.AddXaf(Configuration, builder => {
    ...
    builder.ObjectSpaceProviders
      .AddSecuredEFCore().WithDbContext<XAFApp.Module.BusinessObjects.XAFAppEFCoreDbContext>((serviceProvider, options) => {
      ...
      })
      .AddNonPersistent();
    builder.Security
      .UseIntegratedMode(options => {
        options.RoleType = typeof(PermissionPolicyRole);
        options.UserType = typeof(ApplicationUser);
        options.UserLoginInfoType = typeof(ApplicationUserLoginInfo);
      })
      .AddPasswordAuthentication(options => {
        options.IsSupportChangePassword = true;
      });
  });

  var authentication = services.AddAuthentication(CookieAuthenticationDefaults.AuthenticationScheme);
  authentication
    .AddCookie(options => {
      options.LoginPath = "/LoginPage";
    });
  services.AddAuthorization(options => {
    options.DefaultPolicy = new AuthorizationPolicyBuilder(
      CookieAuthenticationDefaults.AuthenticationScheme)
        .RequireAuthenticatedUser()
        .RequireXafAuthentication()
        .Build();
  });
}

public void Configure(IApplicationBuilder app, IWebHostEnvironment env) {
  ...
  app.UseRouting();

  app.UseAuthentication();
  app.UseAuthorization();

  app.UseXaf();
  ...
}
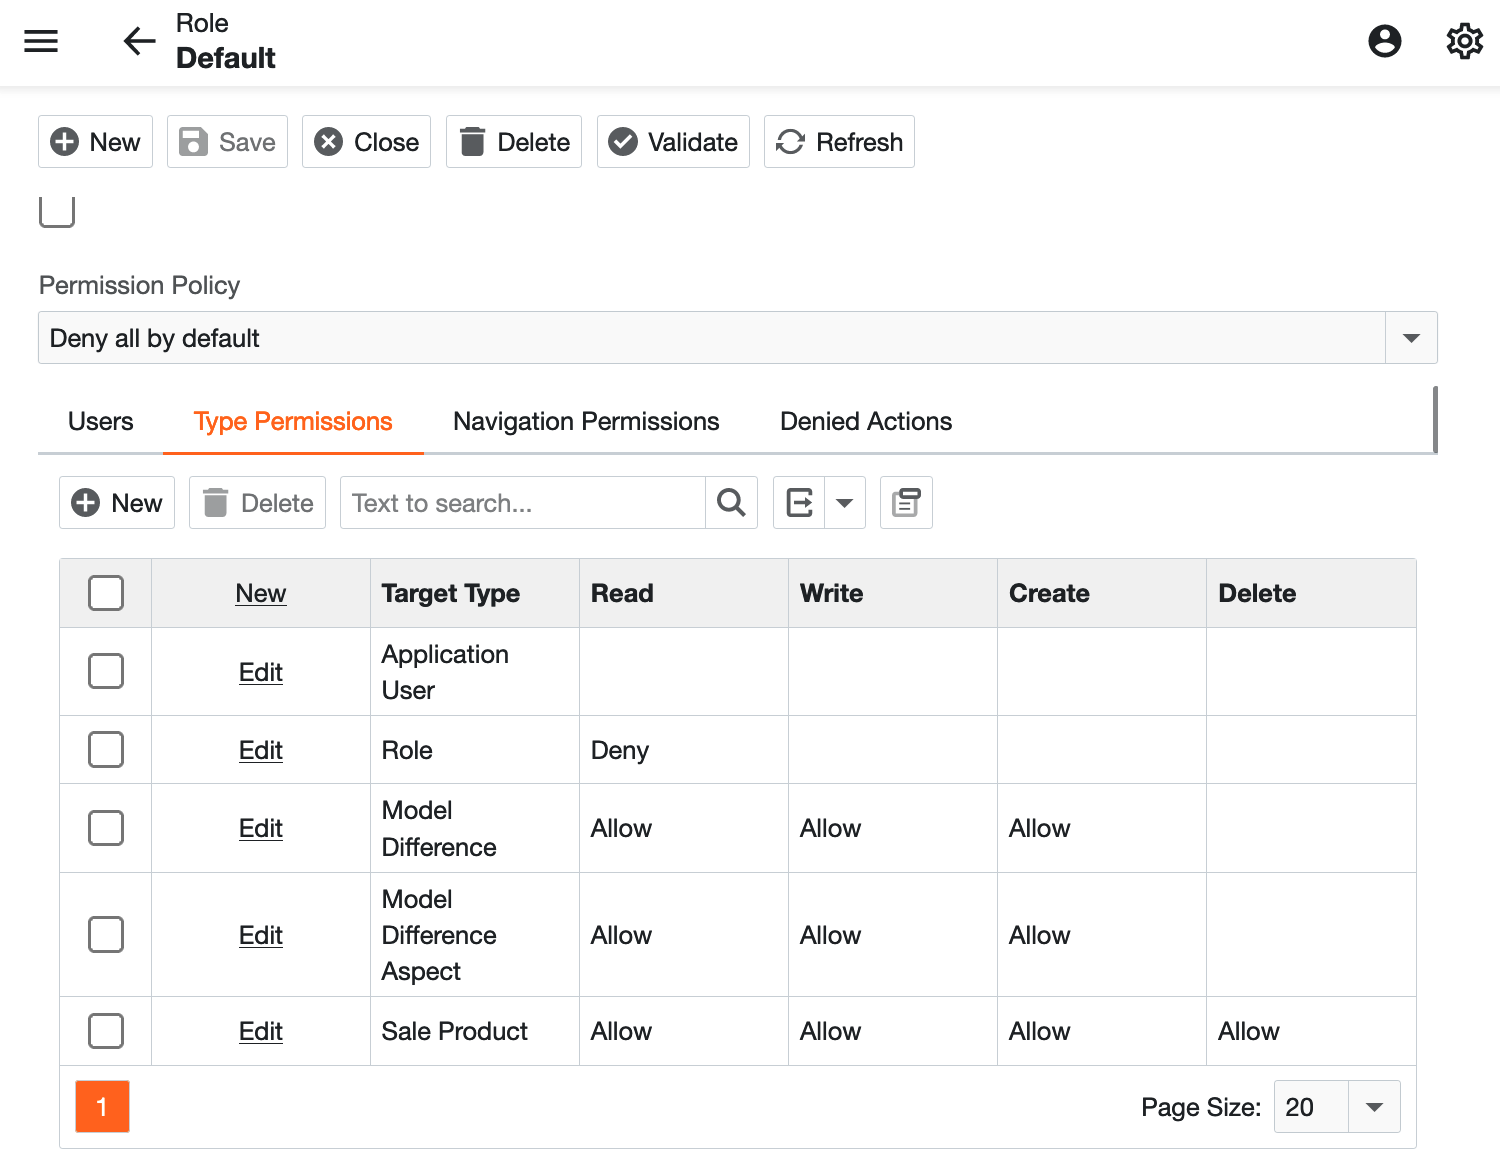
With these changes in place, you can run the first quick test: log in to the Blazor app using either the user or the admin account. The password is set from your own updater code, in case you changed it from the demo code above — in the sample app, the passwords are also user and admin.
You will notice that the Blazor app automatically adjusts its
UI to hide elements that the current user is not permitted to
access. The UI for the admin user is complete, since
the role used by that account has the flag
IsAdministrative set to true.
Note that the security system in the Web API Service is described in detail for XAF. Please check out the documentation for all the details.

A great advantage of having the default UI for the Blazor app available is that you don’t need to create your own admin user interface to maintain users and permissions. Of course it is possible to build this functionality into your own application, but for many applications it may not be necessary.
You may even see it as a security advantage that the features which manipulate users and permissions don’t need to be available through the same website you make publicly available to end users.
Add Cookie and JWT Support to the Web API Service
In contrast to the Blazor Server app, the Web API Service
project is missing a few more required elements. Begin by
adding two NuGet packages to
the csproj file. Of course you can run a NuGet instruction instead of editing
the file manually.
DevExpress.ExpressApp.Security.AspNetCore-
Microsoft.AspNetCore.Authentication.JwtBearer
  <ItemGroup>
    ...
    <PackageReference Include="DevExpress.ExpressApp.Security.AspNetCore" Version="22.2.4" />
    <PackageReference Include="Microsoft.AspNetCore.Authentication.JwtBearer" Version="7.0.0" />
  </ItemGroup>
The package JwtBearer is optional. In the sample
setup, I will enable both cookie-based and JWT authentication.
In reality, you may be able to decide for one or the other of
these approaches, or of course
use OAuth2
instead or in addition. Cookies are more useful if you have
interactive clients accessing the system, since they can be
handled automatically and safely by browsers. If other types of
clients, such as server-side processes, will access your
service, the JWT is usually easier to deal with.
Now add the block named Authentication to the file
appsettings.json
in the Web API Service project.
...
  "Authentication": {
    "Jwt": {
      "Issuer": "XafAppWebApi",
      "Audience": "http://localhost:5173",
      "IssuerSigningKey": "XafAppWebApiSecretKeyReplaceThisTextWithYourOwnRandomSecretKey"
    }
  },
...
In a real deployment and possibly even in development, you
should create your own secret key and store it safely.
Here’s a topic from Microsoft
that explains the best practices. You should also consider
setting the Issuer and
Audience depending on your requirements.
This Microsoft blog post
provides a useful overview.
To handle requests for user login, a controller is required in
your service project. This is a standard file which the Visual
Studio wizard can generate for you. Add
AuthenticationController.cs
to the path API/Security in the project.
Now edit
Services/ObjectSpaceProviderFactory.cs. A few changes are required here, since the factory needs to
store and apply a reference to the security strategy object.
public sealed class ObjectSpaceProviderFactory : IObjectSpaceProviderFactory {
  readonly ISecurityStrategyBase security;
  readonly ITypesInfo typesInfo;
  readonly IDbContextFactory<XAFApp.Module.BusinessObjects.XAFAppEFCoreDbContext> dbFactory;

  public ObjectSpaceProviderFactory(ISecurityStrategyBase security, ITypesInfo typesInfo, IDbContextFactory<XAFApp.Module.BusinessObjects.XAFAppEFCoreDbContext> dbFactory) {
    this.security = security;
    this.typesInfo = typesInfo;
    this.dbFactory = dbFactory;
  }

  IEnumerable<IObjectSpaceProvider> IObjectSpaceProviderFactory.CreateObjectSpaceProviders() {
    yield return new SecuredEFCoreObjectSpaceProvider<XAFApp.Module.BusinessObjects.XAFAppEFCoreDbContext>((ISelectDataSecurityProvider)security, dbFactory, typesInfo);
    yield return new NonPersistentObjectSpaceProvider(typesInfo, null);
  }
}
The final change to the Web API Service project is to the file
Startup.cs. The service must be configured to use apply the
authentication functionality, using partly standard ASP.NET
Core calls and partly XAF types. All changes apply to the
ConfigureServices method:
public void ConfigureServices(IServiceCollection services) {
  services
    .AddScoped<IObjectSpaceProviderFactory, ObjectSpaceProviderFactory>()
    .AddSingleton<IWebApiApplicationSetup, WebApiApplicationSetup>();

  services.AddXafAspNetCoreSecurity(Configuration, options => {
    options.RoleType = typeof(PermissionPolicyRole);
    options.UserType = typeof(ApplicationUser);
    options.UserLoginInfoType = typeof(ApplicationUserLoginInfo);
    options.SupportNavigationPermissionsForTypes = false;
  })
  .AddAuthenticationStandard(options => {
    options.IsSupportChangePassword = true;
  });
   services.AddAuthentication(JwtBearerDefaults.AuthenticationScheme)
    .AddJwtBearer(options => {
      options.TokenValidationParameters = new TokenValidationParameters()
      {
        ValidIssuer = Configuration["Authentication:Jwt:Issuer"],
        ValidAudience = Configuration["Authentication:Jwt:Audience"],
        ValidateIssuerSigningKey = true,
        IssuerSigningKey = new SymmetricSecurityKey(Encoding.UTF8.GetBytes(Configuration["Authentication:Jwt:IssuerSigningKey"]))
      };
    })
    .AddCookie();

  services.AddAuthorization(options => {
    options.DefaultPolicy = new AuthorizationPolicyBuilder(
      JwtBearerDefaults.AuthenticationScheme, CookieAuthenticationDefaults.AuthenticationScheme)
      .RequireAuthenticatedUser()
      .RequireXafAuthentication()
      .Build();
  });

  services.AddDbContextFactory<XAFApp.Module.BusinessObjects.XAFAppEFCoreDbContext>((serviceProvider, options) => {
    ...
    options.UseSecurity(serviceProvider);
  }, ServiceLifetime.Scoped);

  services.AddScoped<IDataService, XAFApp.WebApi.Core.ValidatingDataService>();

...
}
Test JWT Authentication and Authorization (RBAC) Using External Tools
Now you can test authentication using the Web API Service. The
endpoint /api/Authentication/LogIn returns a
Set-Cookie header, while
/api/Authentication/AuthenticateJwt returns the
JWT.
> curl -i -X POST http://localhost:5273/api/Authentication/LogIn -H 'Content-Type: application/json' -d '{ "userName": "user", "password": "user" }'
HTTP/1.1 200 OK
Content-Length: 0
Date: Tue, 09 May 2023 13:26:03 GMT
Server: Kestrel
Cache-Control: no-cache,no-store
Expires: Thu, 01 Jan 1970 00:00:00 GMT
Pragma: no-cache
Set-Cookie: .AspNetCore.Cookies=CfDJ8F0ijYVZUtBNoNc2zG7jNbdWJzHUn-Q8F8ejrTxzJdn9EY4jnfu1qnt2WKc4hbNfhqY4hwOwF43yku9lIlwOM8f9RhrKTarX7zEKYmYyYEZSpVs1QnP8tdUWJJQypTDkwtTTADFlyNvZUK95Tt146L0kv8mcEnhbbm8qm0mE4xg_1W-CSTiz8LQCcsYPrE1TUsVxdA696EWI5JTkJeJ4i2r5zC2NKtuFwE3YNIjQ8He9FgJ1qjYewEKYFVgjfLS5FwnMuBIwWa1N6rgI3LPWsQmbkccsEmsVTT7py-4OEHiSJ2CZKCiymmehsfrJnf10UygVRcc0ug0yM3VIeYaerrbJONRQOS1UbyTLu_V11WmfO721GqjKLJYiKGO_uUOqvy2effDCmLpZQ2fk1LTJYSN8OcIQW49tnfXgoouKHjzUp-hFwtQ25wEY_rXUM5ZY1OEGckAxn2whtup7Q4dqW_IJwEgAOpBT4jU2vQJNUSD__SuX6wZ8OMjk_1lw79UjukQfT4Hn3dyXkyultcnge6jSla6Zk8eMRTRyo61o66eCCUpbT93jI4VmlrS6Vqfd7C_5mOd_JM8hLTvE10xCfrqQu4uD7_1fEU7siNvKv4UmF78hqn3jYySzu3C0Drnz7U1ejaLUtlYFAifNTNvYtiiKyLmmV3eThBg5KsMQyO_6aK_obFsRO-Fc3MVyk_9GlA; expires=Wed, 10 May 2023 13:26:04 GMT; path=/; samesite=lax; httponly
> curl -i -X POST http://localhost:5273/api/Authentication/AuthenticateJwt -H 'Content-Type: application/json' -d '{ "userName": "user", "password": "user" }'
HTTP/1.1 200 OK
Content-Type: text/plain; charset=utf-8
Date: Tue, 09 May 2023 13:27:29 GMT
Server: Kestrel
Transfer-Encoding: chunked
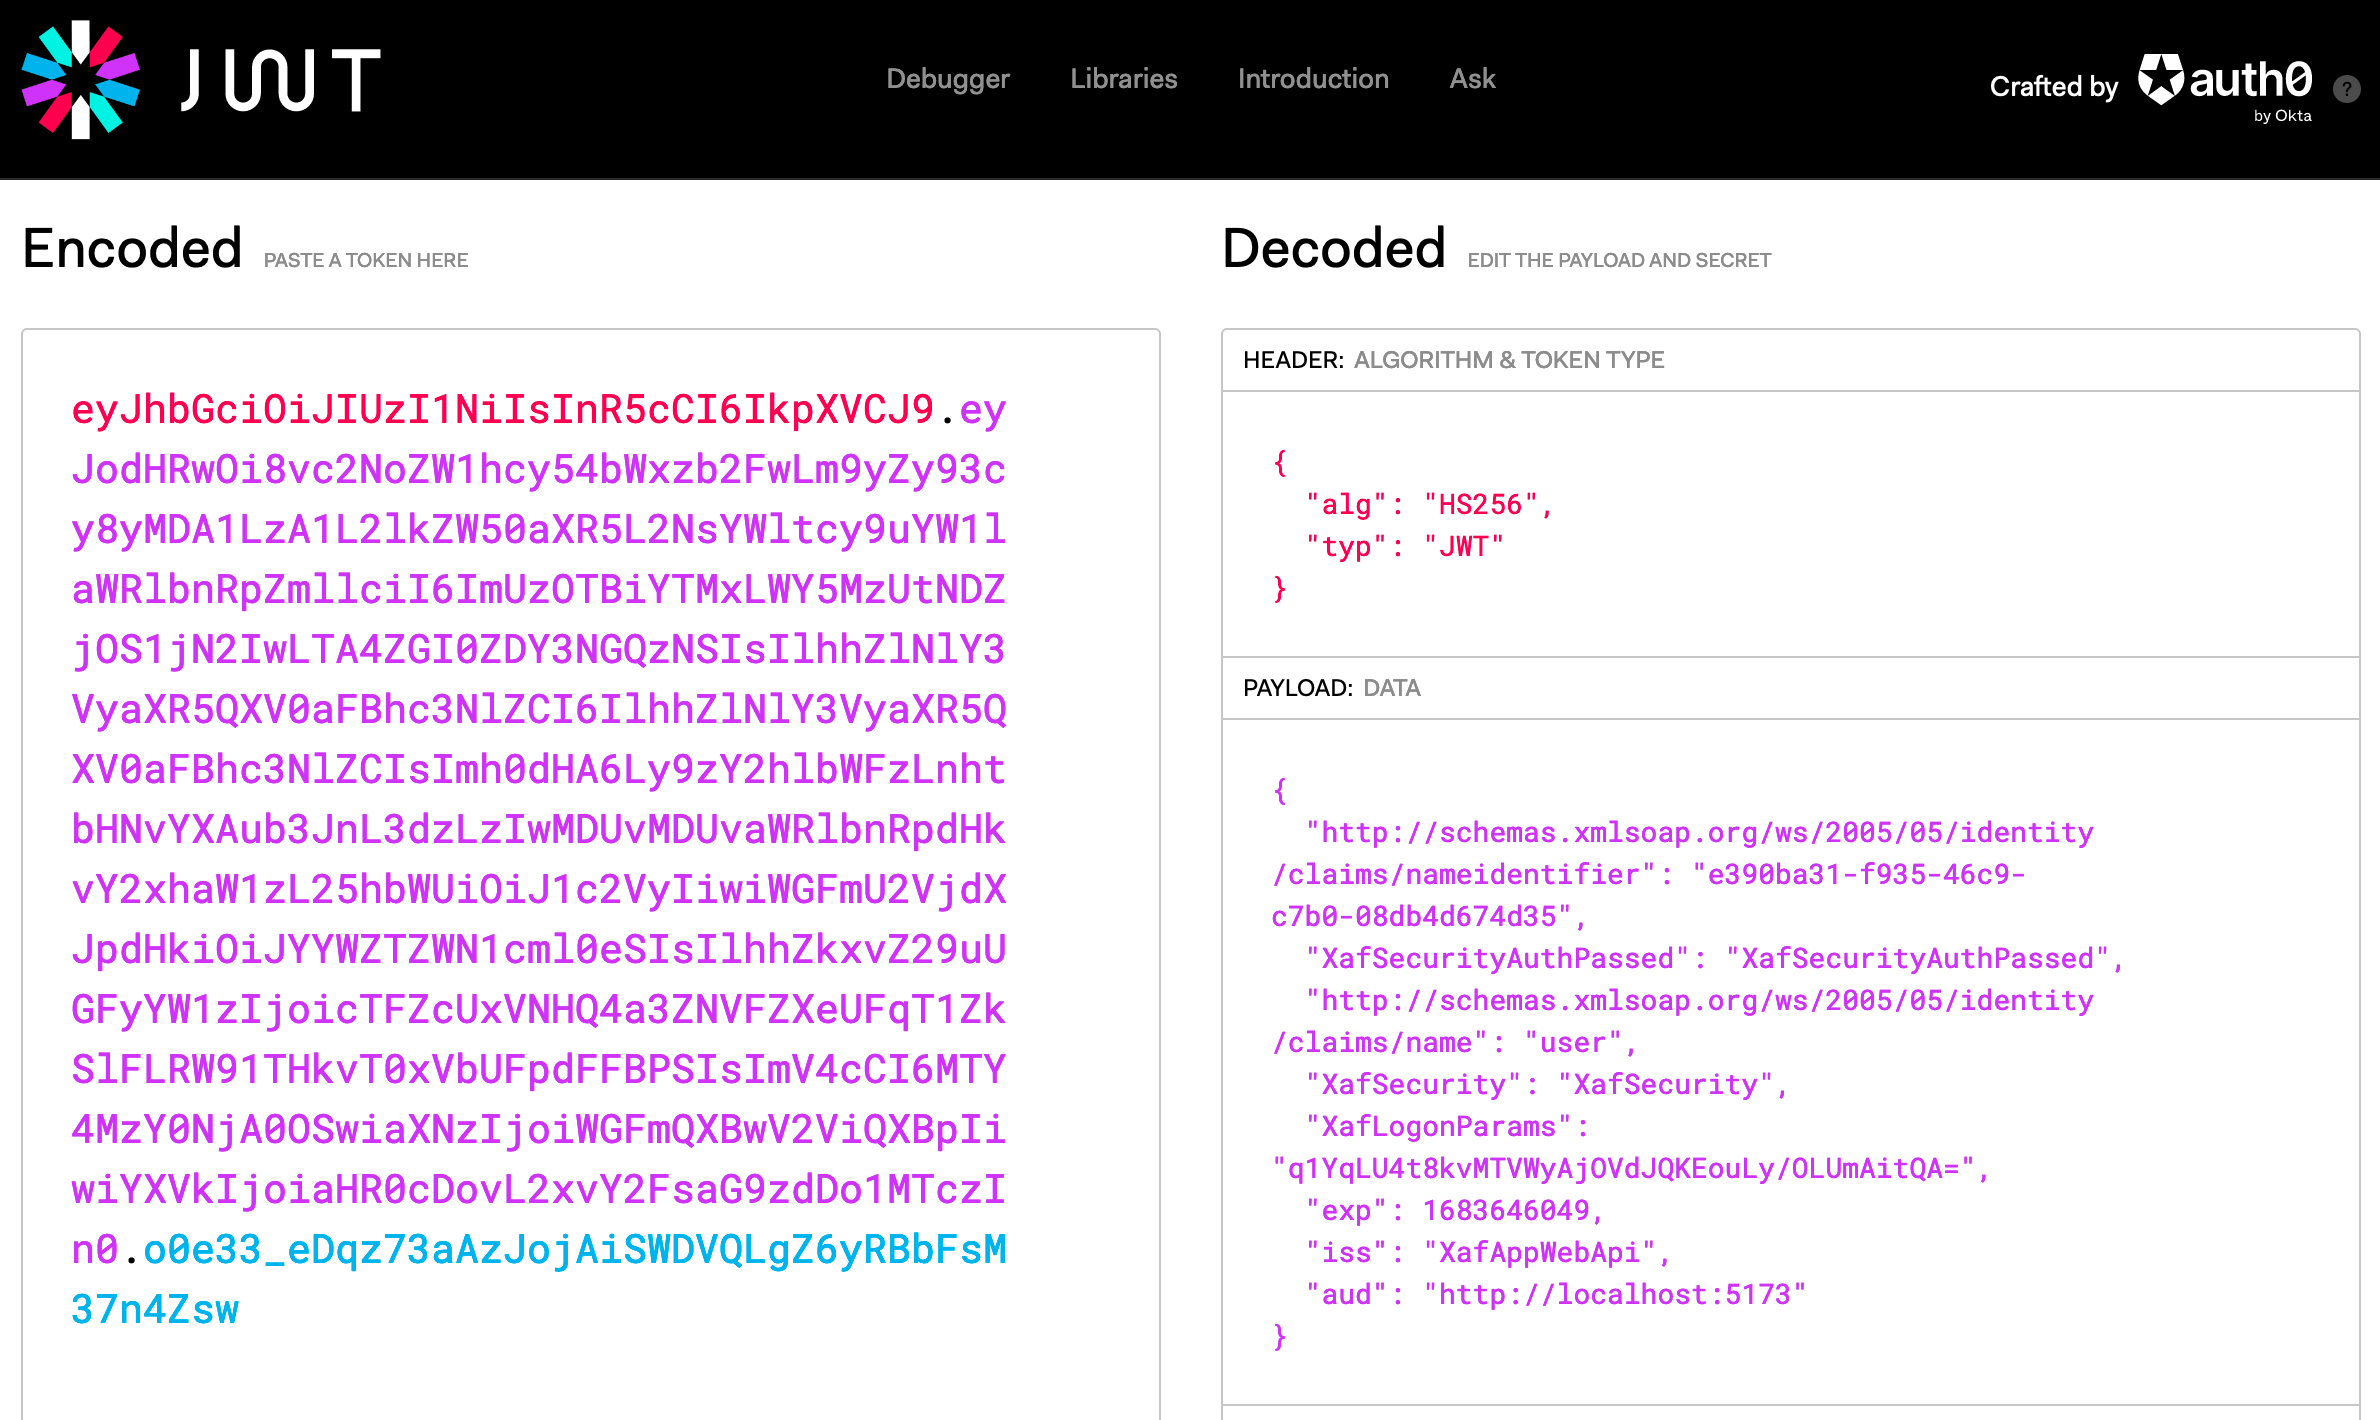
eyJhbGciOiJIUzI1NiIsInR5cCI6IkpXVCJ9.eyJodHRwOi8vc2NoZW1hcy54bWxzb2FwLm9yZy93cy8yMDA1LzA1L2lkZW50aXR5L2NsYWltcy9uYW1laWRlbnRpZmllciI6ImUzOTBiYTMxLWY5MzUtNDZjOS1jN2IwLTA4ZGI0ZDY3NGQzNSIsIlhhZlNlY3VyaXR5QXV0aFBhc3NlZCI6IlhhZlNlY3VyaXR5QXV0aFBhc3NlZCIsImh0dHA6Ly9zY2hlbWFzLnhtbHNvYXAub3JnL3dzLzIwMDUvMDUvaWRlbnRpdHkvY2xhaW1zL25hbWUiOiJ1c2VyIiwiWGFmU2VjdXJpdHkiOiJYYWZTZWN1cml0eSIsIlhhZkxvZ29uUGFyYW1zIjoicTFZcUxVNHQ4a3ZNVFZXeUFqT1ZkSlFLRW91THkvT0xVbUFpdFFBPSIsImV4cCI6MTY4MzY0NjA0OSwiaXNzIjoiWGFmQXBwV2ViQXBpIiwiYXVkIjoiaHR0cDovL2xvY2FsaG9zdDo1MTczIn0.o0e33_eDqz73aAzJojAiSWDVQLgZ6yRBbFsM37n4Zsw
Using a helper like the decoder on jwt.io, you can find out what a JWT contains. This can certainly be an interesting exercise if you deal with authentication for the first time.
The successful execution of the calls to the Web API proves that the service is now set up to answer login requests. The final important detail to check is that access to data is not possible anymore, without logging in:
> curl -i http://localhost:5273/api/odata/SaleProduct
HTTP/1.1 302 Found
Content-Length: 0
Date: Tue, 09 May 2023 13:39:36 GMT
Server: Kestrel
Location: http://localhost:5273/Account/Login?ReturnUrl=%2Fapi%2Fodata%2FSaleProduct
WWW-Authenticate: Bearer
Very good, this proves that the service does not return data of
the SaleProduct type without authentication
anymore. If you are curious, you can play with this further to
verify that you can manually pass a valid JWT, or even a
cookie, and see data returned as long as the user has the
correct permissions assigned.
Use Cookie Authentication from the Svelte App
The fetch implementation provided by Svelte Kit
has
several extra featurescompared to the
standard fetch API, and among these is automated handling of cookies and
authorization headers. What remains is to add a page to the app
that handles user logins, and to make sure that cookies are
channeled to the correct places — there are some exceptions
here since the service which returns the cookies runs on a
different port in the demo deployment.
Begin by adding the two files
+page.svelte
and
+page.server.js
to the project in the folder src/routes/account.
The component implements a combination of two forms:
{#if userName}
	<p class="font-bold mb-8">
		You are logged in as "{userName}"
	</p>
	<form method="POST" action="?/logout" use:enhance>
		<button type="submit">Logout</button>
	</form>
{:else}
	<form method="POST" action="?/login" use:enhance>
		<label for="userName">Username</label>
		<input type="text" name="userName" id="userName" value={form?.userName || ''} />
		<label for="password">Password</label>
		<input type="password" name="password" id="password" />
		<button type="submit">Login</button>

		{#if form?.error}
			<div class="error">{form.error}</div>
		{/if}
	</form>
{/if}
In contrast to previous forms, named actions are used in this
case: login and logout, which are
displayed depending on the current login state. The forms are
otherwise very basic, since all the handling occurs in the
action implementations in +page.server.js. This is
the login action:
login: async (event) => {
	const formData = Object.fromEntries(await event.request.formData());
	const response = await fetch('http://webapi:5273/api/Authentication/LogIn', {
		method: 'POST',
		headers: {
			'Content-Type': 'application/json'
		},
		body: JSON.stringify(formData)
	});
	if (!response.ok) {
		if (response.status === 401) {
			return { ...formData, error: 'Invalid username or password' };
		} else {
			throw error(500, 'Error logging in');
		}
	} else {
		console.log(`Login successful for user ${formData.userName}`);
		copyCookies(response, event);
		event.cookies.set('webapiDemoUserName', formData.userName, { path: '/' });
	}
},
The process is straight-forward. A fetch request
is executed, as you have previously tested at the command line,
passing the userName and
password fields that are (hopefully!) included in
the form data. If anything goes wrong with that request, an
error is returned for display in the UI. If all is good, you
know that the response must now contain the
set-cookie header, and a small helper copies this
cookie to the event for further processing in the
Svelte Kit framework. It uses a library called
set-cookie-parser, which you need to install with
a command like pnpm i -D set-cookie-parser.
function copyCookies(response, event) {
	const cookies = setCookie.parse(response);
	for (const cookie of cookies) {
		event.cookies.set(cookie.name, cookie.value, cookie);
	}
}
Note that this handling is only necessary because the endpoint used in the demo for the Web API Service is not recognized as being the “same” as the URL that the app itself runs on. This is because the port number is different! Depending on your deployment scenario, you may not need to copy your cookies.
At the end of the login action, the code also sets
an application-level cookie called
webapiDemoUserName. To take advantage of this, add
the file
src/routes/+layout.server.js
with the following code:
export function load({ cookies }) {
	const userName = cookies.get('webapiDemoUserName');
	return { userName };
}
Then, edit
src/routes/+layout.svelte, establish a variable userName and use it to
display a login link, or the user name itself, depending on
login state.
<script>
	...

	export let data;
	$: ({ userName } = data);
</script>

<h1 class="text-2xl mt-4 mb-8 text-center">XAF Web API Service from a Svelte app</h1>

<div class="w-9/12 max-w-prose m-auto">
	<nav class="mb-8 flex gap-2">
		<a href="/saleProducts">Sale Products</a>
		<a class="ml-auto" href="/account">
			{#if userName}
				<span class="fa fa-user-circle-o mr-4" />Account "{userName}"
			{:else}
				<span class="fa fa-unlock mr-4" />Log in
			{/if}
		</a>
	</nav>
...
The last new part is a fetch hook, which is required for the same reason explained above: the data service does not run on the same port as the app itself. As before, this may not apply to all deployment scenarios, but it provides a good opportunity to demonstrate the flexibility of the Svelte Kit framework. The hook function simply reestablishes the cookies when they are needed — it’s up to you to implement such a mechanism according to your own rules.
For the demo, add the following code to a new file
src/hooks.server.js:
export function handleFetch({ event, request, fetch }) {
	if (request.url.startsWith('http://webapi:5273/api')) {
		request.headers.set('cookie', event.request.headers.get('cookie'));
	}
	return fetch(request);
}
Consider How RBAC Works with the Web API Service
Now the sample is almost ready, but you may wonder at this point how and when you are actually going to check for permissions. The answer is that you won’t do that at all, or at least not explicitly. As you have seen on the command line, the Web API Service will only return protected data if it receives a valid authorization header or cookie. Right now, there is no built-in feature to detect whether a certain permission is available to a given set of credentials, or not. We have plans to introduce such a separate feature in the future, or of course you could add this to the service yourself.
Technically, the current situation is not bad. You need one call to attempt to fetch data from a URL, and either you’ll receive it if permissions are sufficient, or you won’t if they’re not. In some cases you may only want to find out whether a permission is available, and then this method seems a little less than elegant — but it is efficient enough since you could never make the distinction without at least one call to the service!
To distinguish the success or failure of a data call, check the
code in
src/lib/dataLoading.js. Around line 29 you’ll find the fetch call:
...
const odataUrl = `http://webapi:5273/api/odata/${shortTypeName}`;
const fetchUrl = `${odataUrl}${queryString}`;

const dataSource = fetch(fetchUrl)
	.then((res) => {
		if (res.ok) return res;
		throw new Error(`HTTP error, status: ${res.status}`);
	})
	.then((res) => res.json())
	.then((res) => res.value);
...
The Web API Service currently returns a status
302 redirection if a user does not have the
necessary permissions to execute a call. This is slightly
suboptimal since an actual redirection on the service call
level does not make sense in practice — another detail we are
looking into.
Meanwhile, if you want to detect whether the call “worked” or
not, I recommend passing a flag to the fetch call
to prevent automatic handling of any redirections:
const dataSource = fetch(fetchUrl, { redirect: 'manual' })
With this parameter, the status 302 is returned to
your code, and you can detect it in res.status and
handle it any way you like. For the demo, the error text
generated in the exception will be displayed on screen.
However, this is only meant to illustrate exactly what happens,
and it is up to you to handle this by redirection to a login
form, or some other technique, in your real application
projects.
Test Authenticated Data Access from the Svelte App
When you bring up the Svelte application after all these
changes have been made, and navigate to the
Sale Products list at
http://localhost:5173/saleProducts, you see the
HTTP error output now, as I described in the previous section.
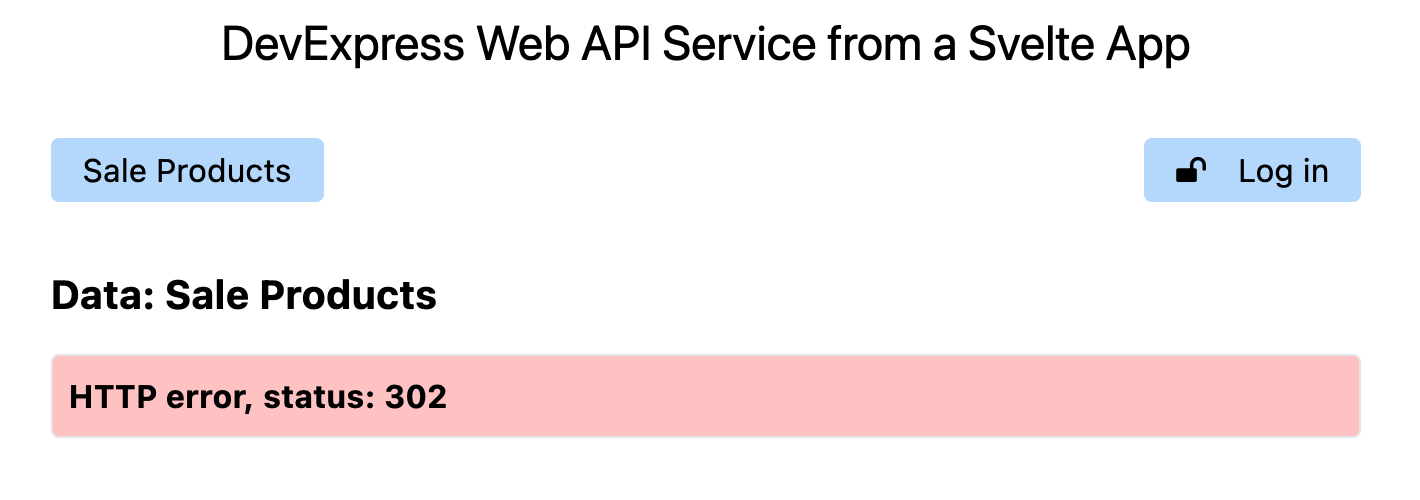
Navigate to the login form and use either account (there is currently no difference in the permissions, as far as the demo uses them) to log in.

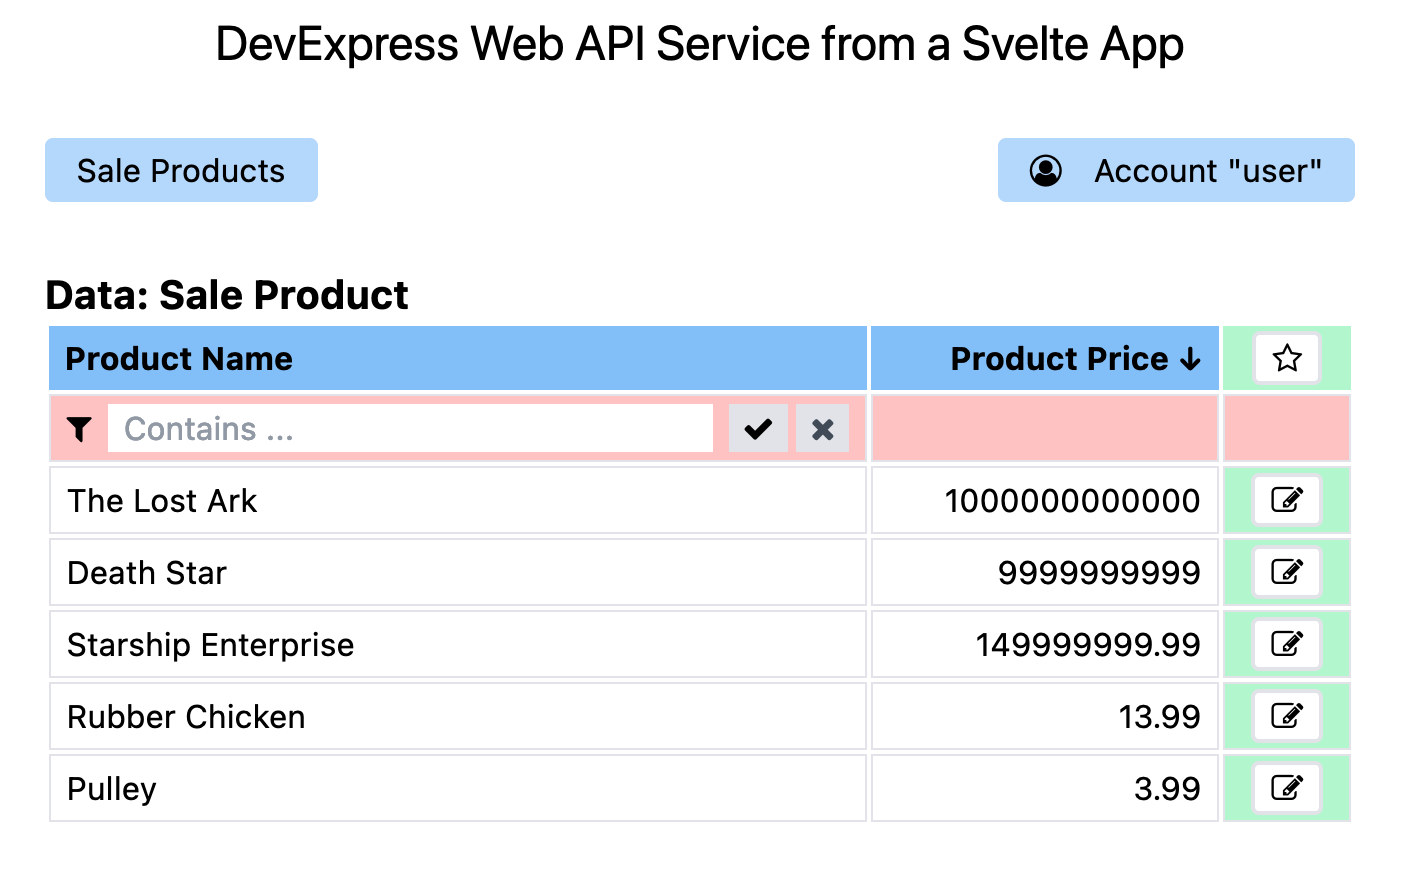
Now navigate back to the Sale Product list and you will see the data. All the existing functionality works as before!
Finally, you can use the Logout button on the account page, which removes the cookies from the browser.
Use JWT Authentication from the Svelte App
The cookie-based mechanism described above is the recommended approach for client apps. Additionally, I will now describe the required steps to use a JWT instead. But please note that this technique should not generally be used in client apps! The main reason why this is a bad idea is that the token retrieved from the backend must be stored securely on the client side — this is not impossible, but it’s an extra challenge that has a much safer solution in the cookie-based mechanism.
JWT access is typically used when services communicate with one another, and the concern over token safety is less pressing since the token can be kept safer on the server. In any case, since the server-side client does not use a browser, dealing with cookies would not be convenient anymore, so JWT becomes the solution of choice. Servers can be written JavaScript just like clients, and I hope that an example for JWT integration in the demo scenario will be useful for many purposes. Just remember not to implement your production client by storing the JWT in a cookie!
To allow the demo user to log in to the app using a JWT, edit
svelte-frontend/src/routes/account/+page.svelte
and add a button to the form. It uses the
formaction attribute so that a separate
server-side code block is executed when the form is submitted
by this button.
<input type="password" name="password" id="password" />
<button type="submit">Login</button>
<button type="submit" formaction="?/loginJWT">Login JWT</button>
...
Now edit
svelte-frontend/src/routes/account/+page.server.js
and add the action loginJWT to the
actions object. The code is similar to the
existing login action (and it’s duplicated to
avoid confusion, but of course it could be refactored), but the
fetch endpoint is different. The JWT is retrieved
by the fetch call now, and it is stored in a
cookie named webapiDemoJwt (again, better don’t do
this in production!).
},
loginJWT: async (event) => {
	const formData = Object.fromEntries(await event.request.formData());
	const response = await fetch('http://webapi:5273/api/Authentication/AuthenticateJwt', {
		method: 'POST',
		headers: {
			'Content-Type': 'application/json'
		},
		body: JSON.stringify(formData)
	});
	if (!response.ok) {
		if (response.status === 401) {
			return { ...formData, error: 'Invalid username or password' };
		} else {
			throw error(500, 'Error logging in');
		}
	} else {
		console.log(`JWT retrieved for user ${formData.userName}`);
		event.cookies.set('webapiDemoUserName', formData.userName, { path: '/' });
		event.cookies.set('webapiDemoJwt', await response.text(), { path: '/' });
	}
},
logout: async (event) => {
Modify the logout action to remove the new cookie
together with the existing webapiDemoUserName one:
logout: async (event) => {
...
	if (!response.ok) {
		throw error(500, 'Error logging out');
	} else {
		console.log(`Logout successful for user ${event.cookies.get('xafDemoUserName')}`);
		copyCookies(response, event);
		event.cookies.set('webapiDemoUserName', '', { path: '/' });
		event.cookies.set('webapiDemoJwt', '', { path: '/' });
	}
}
To provide visual feedback for this demo and let the user know
whether the current login uses a JWT, make changes to the
layout pages. In
svelte-frontend/src/routes/+layout.server.js,
change the load function as follows, to check for
the JWT cookie and return a flag to the client.
export function load({ cookies }) {
	const userName = cookies.get('webapiDemoUserName');
	const jwt = cookies.get('webapiDemoJwt');
	return { userName, hasJwt: !!jwt };
}
In svelte-frontend/src/routes/+layout.svelte,
import the new flag hasJwt and use it to display
an indicator.
<script>
	import '../app.css';
	import 'fork-awesome/css/fork-awesome.css';

	export let data;
	$: ({ userName, hasJwt } = data);
</script>

...
			{#if userName}
				<span class="fa fa-user-circle-o mr-4" />Account "{userName}"{hasJwt ? ' (JWT)' : ''}
			{:else}
				<span class="fa fa-unlock mr-4" />Log in
			{/if}
Finally, modify
svelte-frontend/src/hooks.server.js. So far, this
file copies required cookies only because the standard
mechanisms ignore them if the service runs on a different base
URL. Now the same technique is used to pass the
Authorization header with the JWT, if this login
method is currently used.
export function handleFetch({ event, request, fetch }) {
	if (request.url.startsWith('http://webapi:5273/api')) {
		const jwt = event.cookies.get('webapiDemoJwt');
		if (jwt) {
			// We are working in JWT mode, so set the Authorization header
			request.headers.set('Authorization', `Bearer ${jwt}`);
		} else {
			request.headers.set('cookie', event.request.headers.get('cookie'));
		}
	}
	return fetch(request);
}
The client app now supports logging in using both approaches.
The basic mechanism of retrieving a JWT and passing it for
follow-up requests in an Authorization header can
be used in applications where the browser does not automate
cookie handling — keep in mind that the safety of the JWT is a
very important separate concern when you go this way!
Conclusion
As usual, here is the link to the GitHub branch for this post: “stage-5”.
Next time I will add the capability of retrieving reports from the Web API Service.
Thank you for reading and following along!
Your Feedback Matters!
Please take a moment to reply to the following questions – your feedback will help us shape/define future development strategies.
Free DevExpress Products - Get Your Copy Today
 Oliver Sturm (DevExpress)