Reporting — Material Design Support for Web Apps (v22.1)

As always, thank you for your continued support and for choosing DevExpress Reports. With our most recent release (v22.1), DevExtreme-powered web applications can now apply Material Design themes to our Document Viewer and Report Designer (alongside other DevExtreme components) for consistent styling and modern appearance.
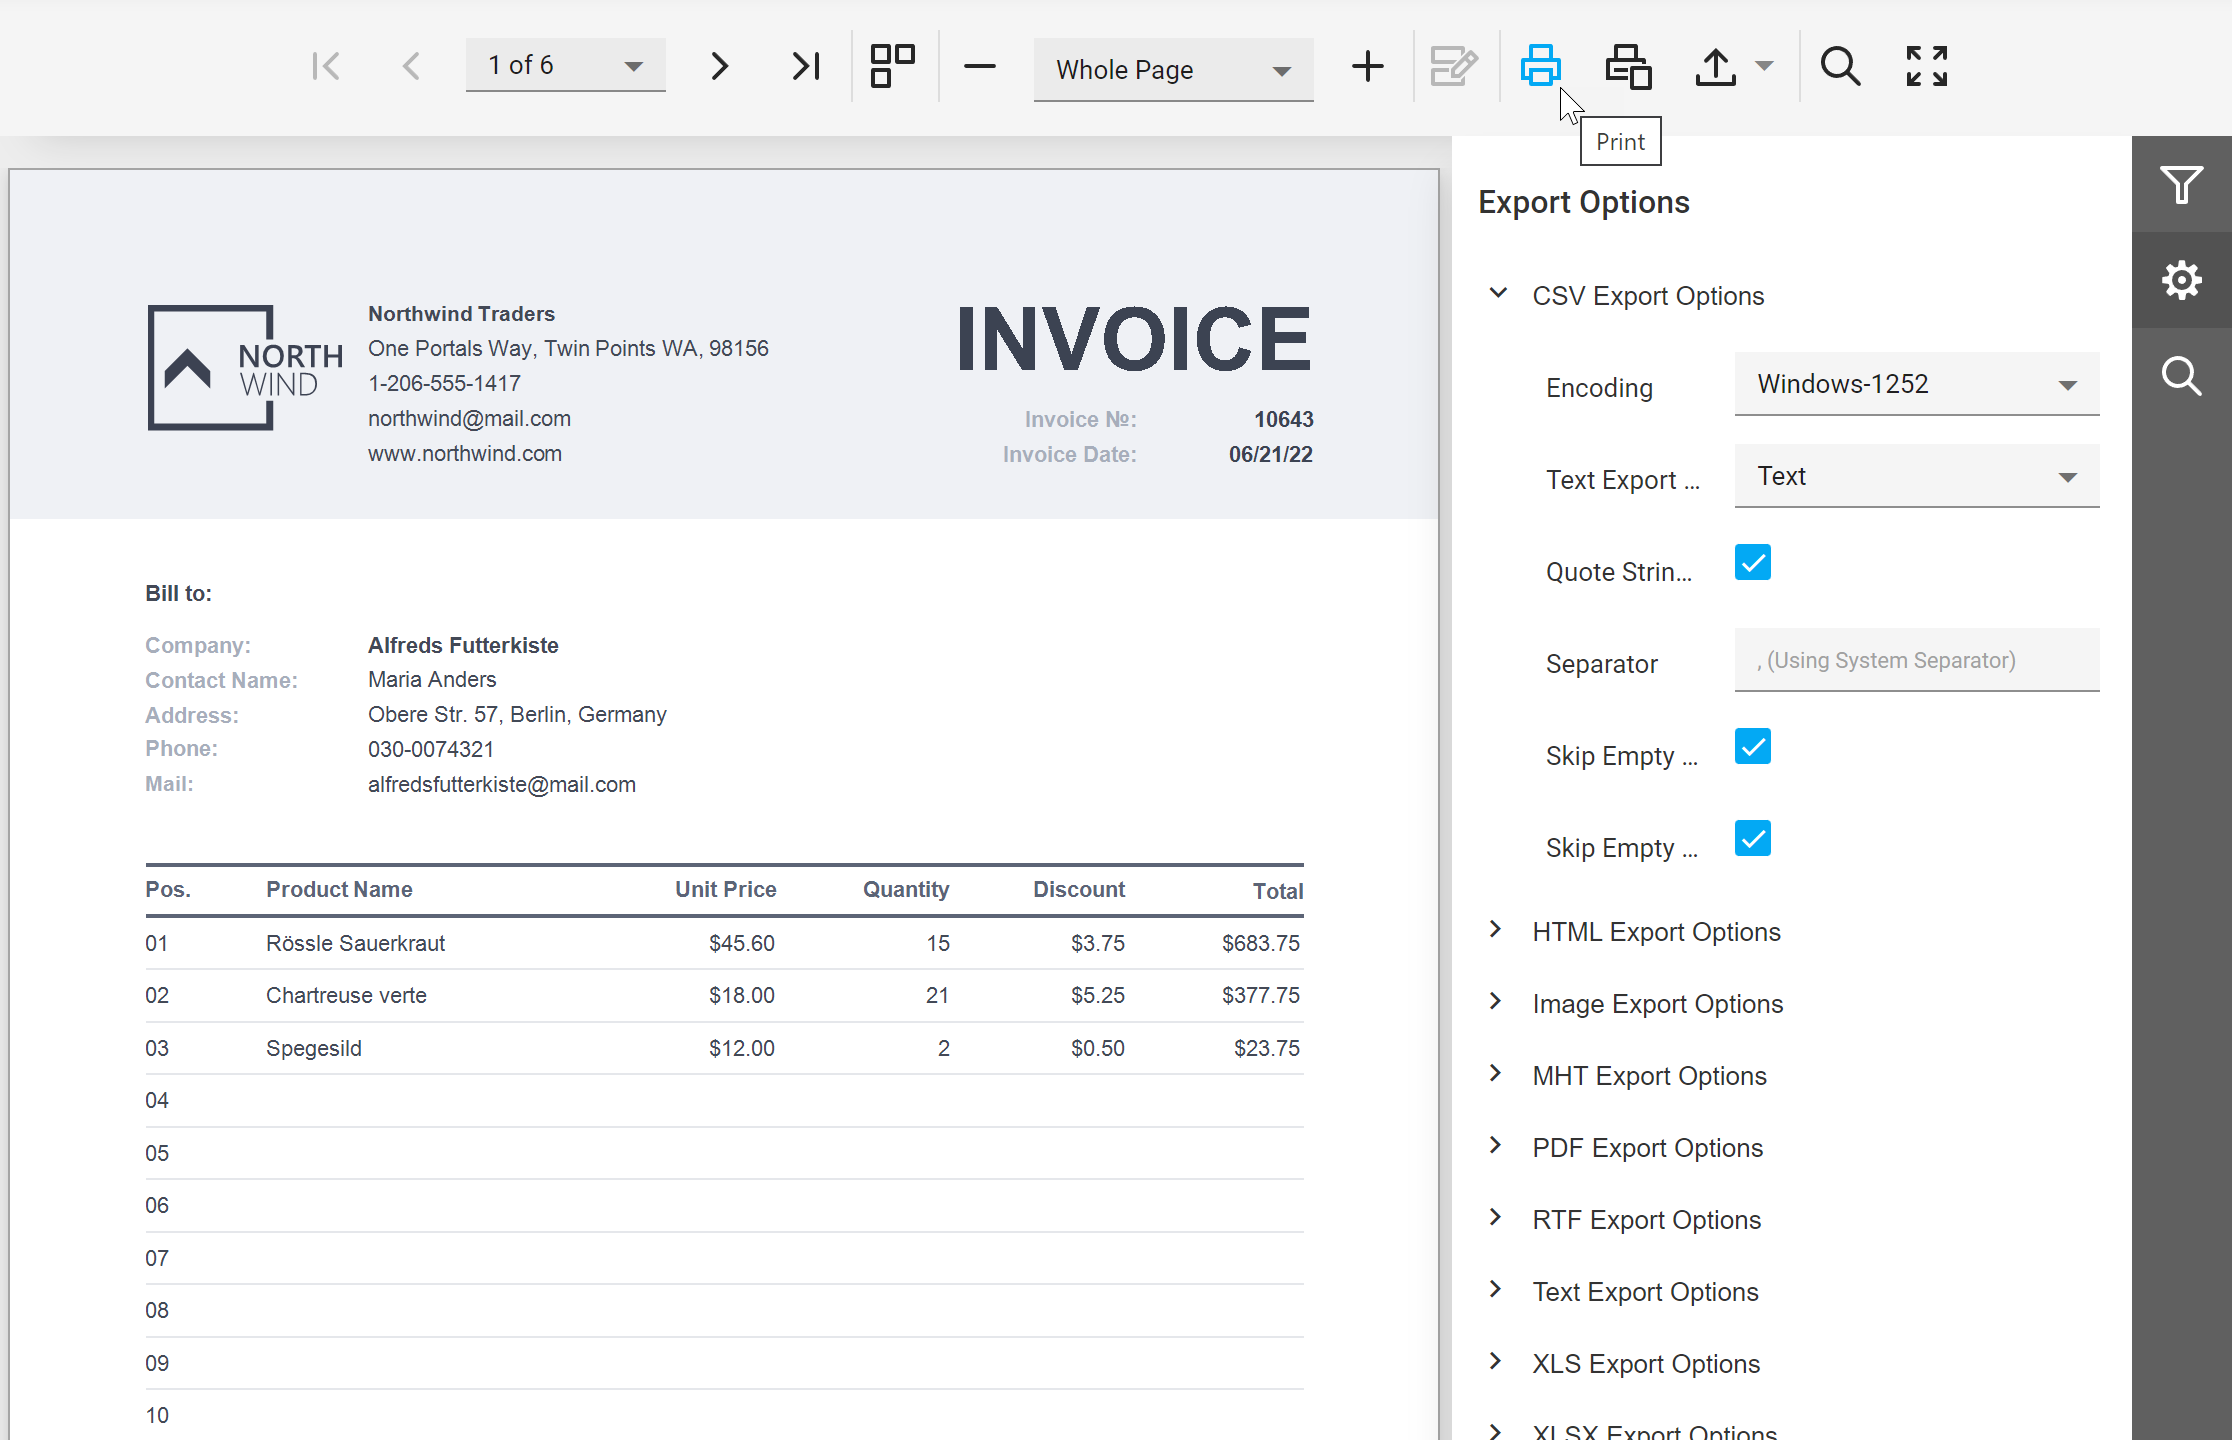
Document Viewer
Report Designer

How to Apply Themes
All theme style classes are included in the following CSS files:
- dx.material.(blue | lime | orange | purple | teal).(light | dark).css
- dx-analytics.material.(blue | lime | orange | purple | teal).(light | dark).css
As you’d expect, our Blue Light theme requires both dx.material.blue.light.css and dx-analytics.material.blue.light.css files.
To apply the new themes, you must replace css theme files in your application with the appropriate material theme file listed above. If your application uses the npm package manager, you can find theme stylesheets in the following locations:
- node_modules/devextreme/dist/css/ (dx.material css files)
- node_modules/@devexpress/analytics-core/dist/css/ (dx-analytics.material css files)
DevExpress Web Reporting themes are based on DevExtreme themes. For more information on your preferred application development platform, please review the following help topics: ASP.NET Web Forms, ASP.NET MVC, ASP.NET Core, Angular, React, and Vue frameworks.
Sample DevExtreme React Reporting Application
Let’s dive into details and create a sample DevExtreme React application. We’ll incorporate the DevExpress Document Viewer and apply our Orange Dark Material Design theme.
Generate a New DevExtreme Application
Generate a new application from template with the DevExtreme CLI:
npx -p devextreme-cli devextreme new react-app orange-dark-sample
cd orange-dark-sample
Add a new DocumentViewer view:
npx devextreme add view DocumentViewer
Change the Theme
To change the theme, we’ll open the src\themes\metadata.base.json and src\themes\metadata.additional.json files and assign our Orange Dark Material Design theme to the baseTheme field:
{
    // ...
    "baseTheme": "material.orange.dark",
    // ...
}
Once complete, we’ll run a command to rebuild themes:
npm run build-themes
Add the Document Viewer Component
To install DevExpress Reporting packages, we’ll run the following:
npm install devextreme devexpress-reporting @devexpress/analytics-core
Note: Make certain that the following DevExpress packages (within the package.json file) refer to the same version (v22.1+):
- @devexpress/analytics-core
- devexpress-reporting
- devextreme
- devextreme-react
- devextreme-themebuilder
If a version mismatch exists, specify the correct version and run npm install.
Add the Document Viewer component to the view in the src\pages\DocumentViewer\DocumentViewer.js file, as described in the following help topic: Document Viewer Integration in React Application. The file should include the following content:
import React from 'react';
import ko from 'knockout';
import 'devexpress-reporting/dx-webdocumentviewer';
import './DocumentViewer.scss';

class ReportViewer extends React.Component {
constructor(props) {
    super(props);
    this.reportUrl = ko.observable("TestReport");
    this.requestOptions = {
    host: "https://localhost:0000/",
    invokeAction: "DXXRDV"
    };
}
render() {
    return (<div ref="viewer" data-bind="dxReportViewer: $data"></div>);
}
componentDidMount() {
    ko.applyBindings({
    reportUrl: this.reportUrl,
    requestOptions: this.requestOptions
    }, this.refs.viewer);
}
componentWillUnmount() {
    ko.cleanNode(this.refs.viewer);
}
};

export default () => (
  <React.Fragment>
    <h2 className={'content-block'}>Document Viewer</h2>
    <div className={'content-block'}>
      <div className={'dx-card responsive-paddings'}>
        <div style={{ width: "100%", height: "1000px" }}>
          <ReportViewer />
        </div>
      </div>
    </div>
  </React.Fragment>
);
Note: the host address uses “https://localhost:0000/” by default. You must specify the appropriate address/port when the host backend application executes.
Switch the Document Viewer Theme
Open the src\pages\DocumentViewer\DocumentViewer.scss file and enter the following directives that define the appropriate stylesheets to apply:
@import url("../../../node_modules/jquery-ui/themes/base/all.css");
@import url("../../../node_modules/devextreme/dist/css/dx.material.orange.dark.css");
@import url("../../../node_modules/@devexpress/analytics-core/dist/css/dx-analytics.common.css");
@import url("../../../node_modules/@devexpress/analytics-core/dist/css/dx-analytics.material.orange.dark.css");
@import url("../../../node_modules/devexpress-reporting/dist/css/dx-webdocumentviewer.css");
Orange Dark Material Design theme:
- node_modules/devextreme/dist/css/dx.material.orange.dark.css
- node_modules/@devexpress/analytics-core/dist/css/dx-analytics.material.orange.dark.css
Run the Reporting Backend Application
As you may already know, our web reporting components require a backend application to store and process reports. If you haven’t done this already, you must create an ASP.NET Core application as described in the following help topic: Document Viewer Server-Side Application (ASP.NET Core).
Run the backend application to determine the address, and specify that address as the host option for the ReportViewer component in the src\pages\DocumentViewer\DocumentViewer.js file.
If you have just created backend application, you will have a TestReport created from the template. Instead of this simple report, you can load one of the reports that ships with our distribution. To load a report, open the Invoice module in our WinForms Reporting demo, switch to the Designer, and save the report as a REPX file. Open the TestReport report in the Visual Studio Designer and click Open/Import in the report’s smart tag to load your saved REPX file.
Run the Client Application
Make certain that the backend application is running. Navigate to the orange-dark-sample folder, and execute the following command:
npm run start
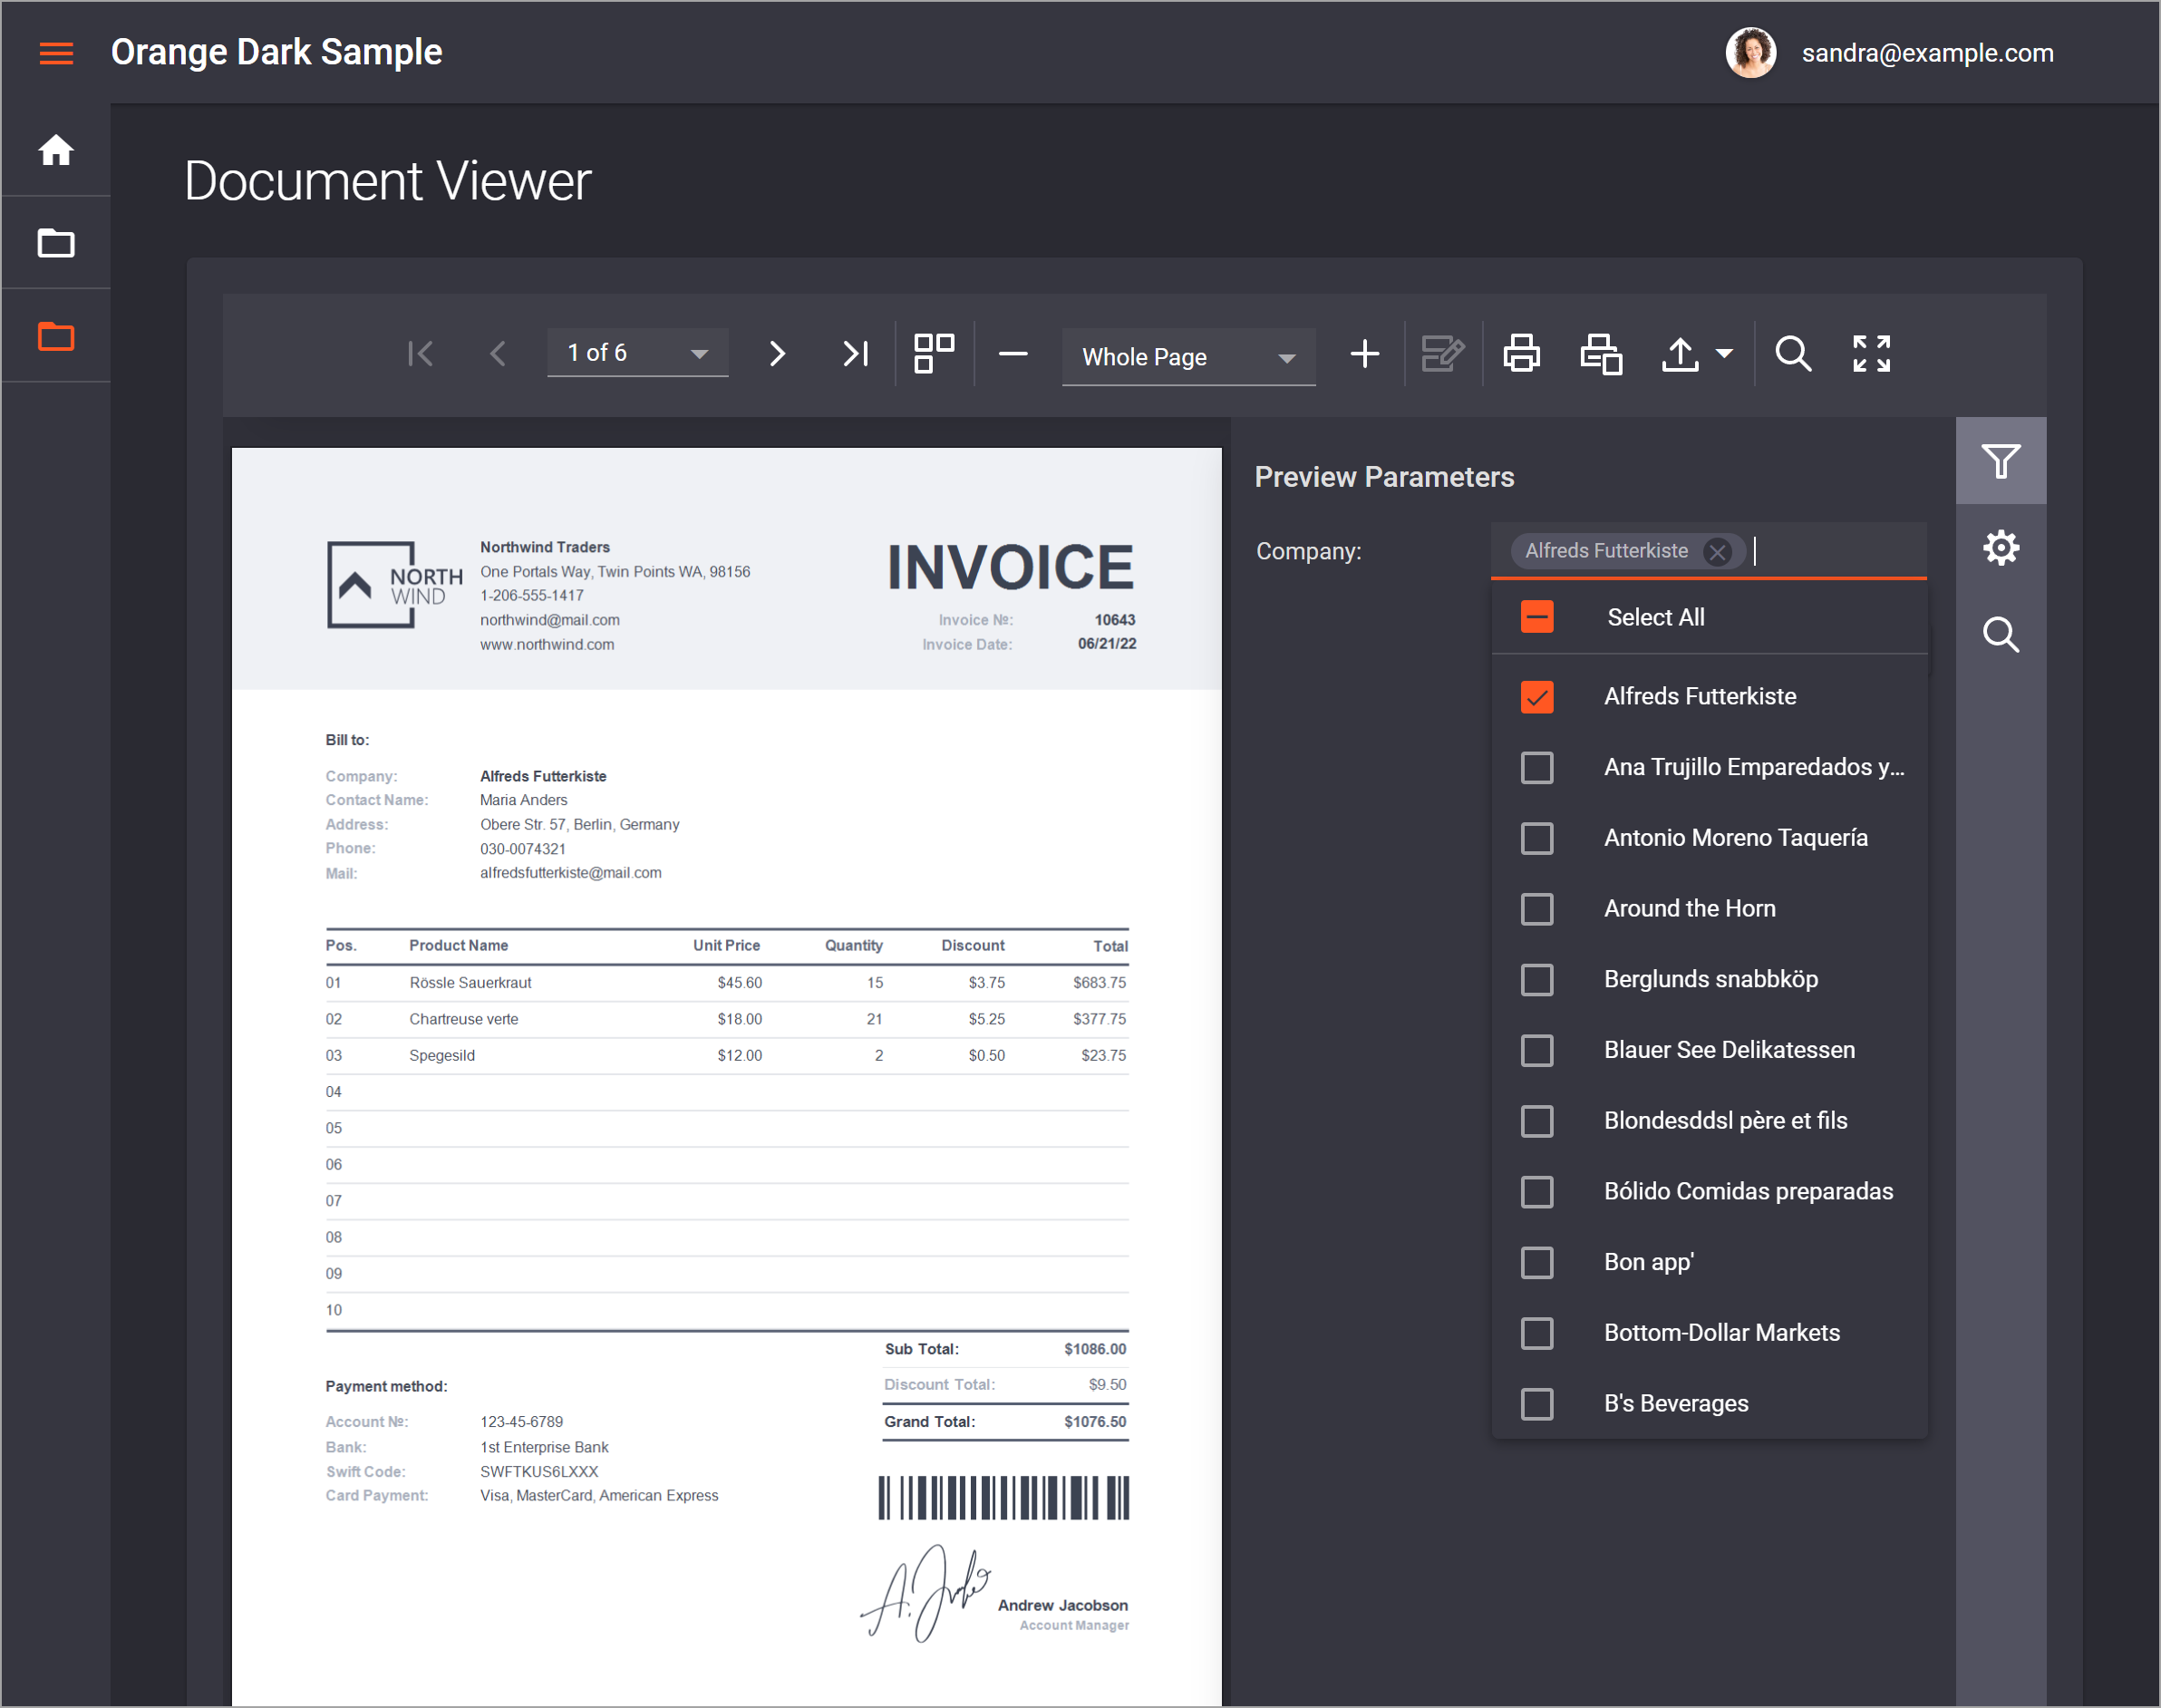
Once complete, the application should appear as follows:
Your Feedback Matters
Free DevExpress Products - Get Your Copy Today
 Dmitry Tokmachev (DevExpress)