Here’s what we’ve done so far:
- In part 1, we introduced the challenge, discussed hardware options, and revealed the prototype.
- In part 2,
we wrote our first features (before the keyboard even arrived!) to help
us enter paired delimiters like braces, parens, and quotes.
- In part 3,
we reviewed the keyboard, created our layout, labeled the keys, bound
the features we wrote in part 2, and added new related features that
added or removed braces automatically for child nodes of if statements.
Making the Brace Keys Even Smarter
I
believe I might have some kind of obsessive compulsive behavior. Once I
start thinking about something I want to fix, I obsess about it more
and more until I finally have to fix it. And yesterday we built a
feature that added or removed surrounding braces to orphan child
statements. And while functionality was good, accessibility was overly
complicated. We essentially bound a toggling feature to two different shortcuts.
That’s not good. It increases our mental burden because we have to
remember which of the two keys adds or removes braces. I want to remove
this burden and make it so either of the two brace keys can be hit, and I
want the software to intelligently invoke the appropriate refactoring
(if available), and if neither refactoring is available, we can fall
back to the default paired delimiter behavior we built in part 2.
So let’s open our CR_KeyFeatures plug-in. Remember to delete the previously-built CR_KeyFeatures.dll before opening (see “Updating and Rebuilding in Future Sessions" in part 2 for steps on how to do this).
We’re going to add a ContextProvider so we can improve our shortcut binding, and make it appear even smarter. Here’s how to do it:
- Open up the designer for the Plugin1.cs file.
- In the Toolbox, find the ContextProvider control (tip – type a part of the control name into the search box at the top).
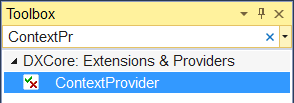
- Drop the ContextProvider on the Plugin1 design surface.
- Fill out the following properties for the new ContextProvider:
| Property | Value |
| (Name) | ctxBraceRefactoringAvailable |
| Description | Satisfied if one of the two brace refactorings are available (Remove Redundant Block Delimiters or Add Block Delimiters). |
| ProviderName | System\Refactorings\Brace Refactoring is Available |
- Double-click the ContextProvider to generate an event handler for the ContextSatisfied event. Add this code:
    const string STR_RemoveRedundantBlockDelimiters = "Remove Redundant Block Delimiters";
    const string STR_AddBlockDelimiters = "Add Block Delimiters";
    const string STR_SystemRefactoringIsAvailable = "System\\Refactoring is Available({0})";
    const string STR_Refactor = "Refactor";

    private bool RemoveRedundantBlockDelimitersIsAvailable
    {
      get
      {
        return CodeRush.Context.Satisfied(String.Format(STR_SystemRefactoringIsAvailable, STR_RemoveRedundantBlockDelimiters)) == ContextResult.Satisfied;
      }
    }

    private bool AddBlockDelimitersIsAvailable
    {
      get
      {
        return CodeRush.Context.Satisfied(String.Format(STR_SystemRefactoringIsAvailable, STR_AddBlockDelimiters)) == ContextResult.Satisfied;
      }
    }

    private void ctxBraceRefactoringAvailable_ContextSatisfied(ContextSatisfiedEventArgs ea)
    {
      CodeRush.Context.ClearCache();
      CodeRush.Source.ParseIfTextChanged();
      ea.Satisfied = RemoveRedundantBlockDelimitersIsAvailable || AddBlockDelimitersIsAvailable;
    }
- Next, let’s drop an Action onto the design surface. We’re going to create a single command that will apply the brace refactoring that is available.
- Fill out the following properties for the new Action:
| Property |
Value |
| Name |
actSmartBraceRefactoring |
| ActionName |
SmartBraceRefactoring |
| Description |
Adds or removes braces as needed. |
- Add the following code:
 private void actSmartBraceRefactoring_Execute(ExecuteEventArgs ea)
    {
      if (RemoveRedundantBlockDelimitersIsAvailable)
        CodeRush.Command.Execute(STR_Refactor, STR_RemoveRedundantBlockDelimiters);
      else if (AddBlockDelimitersIsAvailable)
      {
        CodeRush.Command.Execute(STR_Refactor, STR_AddBlockDelimiters);
        CodeRush.Command.Execute("Edit.LineUp");    // Put the caret on the previous line.
        CodeRush.Command.Execute("Edit.LineEnd");    // Put the caret after the opening brace (so Remove Redundant Block Delimiters is immediately available).
      }
    }
- Nice. Now, let’s try it out. Run your plug-in to start up a new instance of Visual Studio.
Now this works like I want it to. If I want to add or remove
redundant braces, I simply hit either brace key. If I want to embed a
selection in braces, I simply hit either brace key (the key I hit
determines the active part of the selection). If I want to add new
braces I simply hit either brace key (the key I hit determines whether I
want the caret inside the braces or after them). Context
differentiates.
Six different powerful but related features. Two keys. Simple.
Recent Edits Navigation
Two of the features I use in Visual Studio frequently are the
View.NavigateForward and View.NavigateBackward commands. In my install
these keys are bound to Ctrl+- (Ctrl+Minus key) and Ctrl+Shift+- (Ctrl+Shift+Minus key). I want to improve these features in a two small ways:
- I want to make them more accessible (improving both
discoverability and efficiency) by featuring them prominently on the
keyboard, with a dedicated key for each direction.
- I want to improve the feature with a LocatorBeacon so your eyes and brain find the target location with less cognitive effort.
So to do this we need two Actions that will effectively wrap Visual
Studio’s view navigation commands. Here are the steps in detail:
- Open up the designer for the Plugin1.cs file.
- From the Visual Studio Toolbox window, drop an Action onto the Plugin1 design surface.
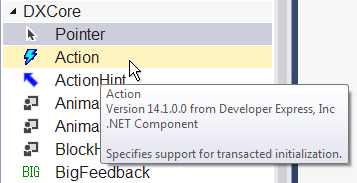
- Fill out the following properties for the new Action:
| Property |
Value |
| Name |
actNavViewBack |
| ActionName |
NavViewBack |
| Description |
Jumps to previous edit points in the code. |
- Double-click the Action to generate a handler for its Execute event. Add this code to the handler:
 private void actNavViewBack_Execute(ExecuteEventArgs ea)
 {
   DropMarkerIfNecessary();
   showBeaconAfterNextMove = true;
   CodeRush.Command.Execute("View.NavigateBackward");
 }
- Drop another Action onto the Plugin1.cs design surface.
- Fill out the following properties for this second Action:
| Property |
Value |
| Name |
actNavViewForward |
| ActionName |
NavViewForward |
| Description |
Jumps to later edit points in the code. |
- Double-click the Action to generate a handler for its Execute event. Add this code to the handler:
private void actNavViewForward_Execute(ExecuteEventArgs ea)
{
  DropMarkerIfNecessary();
  showBeaconAfterNextMove = true;
  CodeRush.Command.Execute("View.NavigateForward");
}
- Activate the Plugin1.cs design surface.
- On the Toolbox, find and drop a LocatorBeacon control onto the design surface.
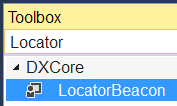
Tip: Type “Locator” into the search box at the top of the Toolbox.
The LocatorBeacon control draws those animated circles on the
editor when collecting markers, and are useful for bringing your eyes
into the right spot (especially when working with large monitors).
- Fill out the following properties for this LocatorBeacon:
| Property |
Value |
| (Name) |
locatorBeacon1
|
| Duration |
500 |
- I want this locatorBeacon to be green so it is distinctive. Inside the PlugIn1.cs source file, navigate to the InitializePlugIn method. Add the following line of code to the end of the method:
public override void InitializePlugIn()
{
  base.InitializePlugIn();

  locatorBeacon1.Color = DevExpress.DXCore.Platform.Drawing.Color.FromArgb(0x41, 0xBF, 0x79);
}
- Activate and then Click the Plugin1.cs design surface. The Properties window should show the main form selected.
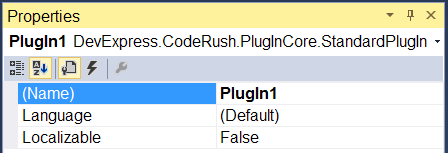
- Now click the Events icon.
Plugin design surfaces give you access to scores of Visual Studio and
CodeRush events. There are two events we want to listen to.
- Double-click the CaretMoved event. Add the following code to show our new locatorBeacon when needed:
private void PlugIn1_CaretMoved(CaretMovedEventArgs ea)
{
  if (showBeaconAfterNextMove)
  {
    locatorBeacon1.Start(ea.NewPosition.TextView, ea.NewPosition.Line, ea.NewPosition.Offset);
    showBeaconAfterNextMove = false;
  }
  else if (justShowedBeacon)
    justShowedBeacon = false;
  else
    customerMovedCaret = true;
}
- Activate the Plugin1.cs design surface. Make sure the Properties window is listing events.
- Double-click the CommandExecuted event.
Add the following code to immediately show the locator beacon after
either Visual Studio view navigation commands are invoked:
private void PlugIn1_CommandExecuted(CommandExecutedEventArgs ea)
{
  if (showBeaconAfterNextMove)
    if (ea.CommandName == "View.NavigateForward" || ea.CommandName == "View.NavigateBackward")
    {
      showBeaconAfterNextMove = false;
      justShowedBeacon = true;
      TextView active = CodeRush.TextViews.Active;
      if (active != null)
        locatorBeacon1.Start(active, active.Caret.Line, active.Caret.Offset);
    }
}
Section Navigation
So at the top left of the keyboard, I have four keys with icons
representing member sections for Fields, Methods, Properties, and
Events. I want these keys to instantly take me to the corresponding
section of the active class. I anticipate this will be useful for
creating new classes and also examining and understanding classes built
by others. So if I hit the Methods button, it should take me to the
start of the first method in the active class. Hitting that key a second
time should take me to the end of that group of methods. Hitting the
method key a third time should take me to the start of the next group of
methods found in the file. Holding down the Shift key and hitting the
Methods button should take me in the reverse direction.
To build this feature, follow these steps:
- Open up the designer for the Plugin1.cs file.
- From the Visual Studio Toolbox window, drop an Action onto the Plugin1 design surface.


- Fill out the following properties for the new Action:
|
Property
|
Value |
| (Name) |
actSectionJumpNext |
| ActionName |
SectionJumpNext |
| Description |
Jumps to the next
specified section (pass the section name as a parameter – can be
Methods, Properties, Fields, Events, or Constructors). |
- Now we need to add a parameter. Double-click the Parameters “(Collection)” value to bring up the Parameter Collection Editor.
- Click the Add button. Specify the following properties for the parameter and click OK:
|
Property
|
Value |
| Description |
The section to jump to. |
| Name |
section |
| Optional |
False |
| Type |
String |
- Good. Now we need another Action to handle the jump back in the reverse direction. To save time, let’s copy this action and paste it back on the plug-in’s design surface. Change the following properties (text in red shows changes from the original Action):
|
Property
|
Value |
| (Name) |
actSectionJumpPrevious |
| ActionName |
SectionJumpPrevious |
| Description |
Jumps to the previous specified section (pass the section name as a parameter – can be Methods, Properties, Fields, Events, or Constructors). |
The parameter remains the same.
- Double-click the actSectionJumpNext Action to generate an event handler for the Execute event. Add this code:
private void actSectionJumpNext_Execute(ExecuteEventArgs ea)
{
  var parameter = actSectionJumpNext.Parameters.GetString("section");
  TargetSections targetSection = GetTargetSection(InitialCase(parameter));

  JumpToNextSection(targetSection);
}
- Reactivate the Plugin1.cs design surface. Double-click the actSectionJumpPrevious Action to generate an event handler for the Execute event. Add this code:
private void actSectionJumpPrevious_Execute(ExecuteEventArgs ea)
{
  var parameter = actSectionJumpPrevious.Parameters.GetString("section");
  TargetSections targetSection = GetTargetSection(InitialCase(parameter));

  JumpToPreviousSection(targetSection);
}
- Add the following support code:
public enum TargetSections
{
  Unknown,
  Fields,
  Constants,
  Methods,
  Properties,
  Constructors,
  Events,
  Types
}

static string InitialCase(string targetSection)
{
  if (targetSection == null || targetSection.Length < 1)
    return targetSection;
  return char.ToUpper(targetSection[0]) + targetSection.Substring(1).ToLower();
}

static TargetSections GetTargetSection(string targetStr)
{
  if (targetStr.StartsWith("Field"))
    return TargetSections.Fields;
  else if (targetStr.StartsWith("Method"))
    return TargetSections.Methods;
  else if (targetStr.StartsWith("Constructor"))
    return TargetSections.Constructors;
  else if (targetStr.StartsWith("Event"))
    return TargetSections.Events;
  else if (targetStr.StartsWith("Propert"))
    return TargetSections.Properties;
  else if (targetStr.StartsWith("Const"))
    return TargetSections.Constants;
  else if (targetStr.StartsWith("Type"))
    return TargetSections.Types;
  else
    return TargetSections.Unknown;
}

static List<LanguageElementType > GetTypesToFind(TargetSections targetSection)
{
  List<LanguageElementType > typesToFind = new List<LanguageElementType>();
  if (targetSection == TargetSections.Constructors)
    typesToFind.Add(LanguageElementType.Method);
  else if (targetSection == TargetSections.Events)
    typesToFind.Add(LanguageElementType.Event);
  else if (targetSection == TargetSections.Fields)
  {
    typesToFind.Add(LanguageElementType.Variable);
    typesToFind.Add(LanguageElementType.InitializedVariable);
  }
  else if (targetSection == TargetSections.Constants)
    typesToFind.Add(LanguageElementType.Const);
  else if (targetSection == TargetSections.Types)
  {
    typesToFind.Add(LanguageElementType.TypeDeclaration);
    typesToFind.Add(LanguageElementType.Delegate);
    typesToFind.Add(LanguageElementType.Enum);
  }
  else if (targetSection == TargetSections.Methods)
    typesToFind.Add(LanguageElementType.Method);
  else if (targetSection == TargetSections.Properties)
    typesToFind.Add(LanguageElementType.Property);
  return typesToFind;
}

static void AddRange(List<SourceRange> existingRanges, SourceRange sourceRange, SourcePoint end)
{
  sourceRange.End = end;
  existingRanges.Add(sourceRange);
}

static List<SourceRange> GetExistingRanges(TargetSections targetSection, TypeDeclaration activeType)
{
  bool lookingForConstructor = targetSection == TargetSections.Constructors;

  List<LanguageElementType> typesToFind = GetTypesToFind(targetSection);

  bool lookingForNextSectionStart = true;
  SourceRange sourceRange = SourceRange.Empty;
  Member lastMatchingMember = null;
  List<SourceRange > existingRanges = new List<SourceRange>();
  foreach (Member member in activeType.AllMembers)
  {
    bool foundMatchingMember = typesToFind.Contains(member.ElementType);
    if (foundMatchingMember && lookingForConstructor)
    {
      Method method = member as Method;
      if (method != null && method.IsConstructor)
        foundMatchingMember = false;
    }
    if (foundMatchingMember)
    {
      lastMatchingMember = member;
      if (lookingForNextSectionStart)
      {
        sourceRange.Start = member.Range.Start;
        lookingForNextSectionStart = false;
      }
    }
    else if (!lookingForNextSectionStart)
    {
      AddRange(existingRanges, sourceRange, lastMatchingMember.Range.End);

      lookingForNextSectionStart = true;
      sourceRange = SourceRange.Empty;
      lastMatchingMember = null;
    }
  }

  if (!lookingForNextSectionStart)
    AddRange(existingRanges, sourceRange, lastMatchingMember.Range.End);
  return existingRanges;
}

static SourcePoint GetPreviousTarget(List<SourceRange> existingRanges)
{
  SourcePoint target = SourcePoint.Empty;
  int activeLine = CodeRush.Caret.SourcePoint.Line;
  bool targetIsInPreviousRange = false;
  for (int i = existingRanges.Count - 1; i >= 0; i--)
  {
    SourceRange thisRange = existingRanges[i];
    if (targetIsInPreviousRange)
      return thisRange.End;

    int startLine = thisRange.Start.Line;
    int endLine = thisRange.End.Line;
    if (activeLine == startLine)
      targetIsInPreviousRange = true;
    else if (activeLine <= endLine && activeLine > startLine)
      return thisRange.Start;
  }

  if (targetIsInPreviousRange || target == SourcePoint.Empty)
  {
    // We need to loop from the beginning back around to the end...
    if (existingRanges.Count > 0)
      return existingRanges[existingRanges.Count - 1].End;
  }

  return target;
}

static SourcePoint GetNextTarget(List<SourceRange> existingRanges)
{
  SourcePoint target = SourcePoint.Empty;
  int activeLine = CodeRush.Caret.SourcePoint.Line;
  bool targetIsInNextRange = false;
  foreach (SourceRange existingRange in existingRanges)
  {
    if (targetIsInNextRange)
      return existingRange.Start;

    int startLine = existingRange.Start.Line;
    int endLine = existingRange.End.Line;

    if (activeLine == endLine)
      targetIsInNextRange = true;
    else if (activeLine >= startLine && activeLine < endLine)
      return existingRange.End;
  }

  if (targetIsInNextRange || target == SourcePoint.Empty)
  {
    // We need to loop back around to the beginning...
    if (existingRanges.Count > 0)
      return existingRanges[0].Start;
  }

  return target;
}

void SectionJump(SourcePoint target)
{
  if (target != SourcePoint.Empty)
  {
    DropMarkerIfNecessary();
    showBeaconAfterNextMove = true;
    CodeRush.Caret.MoveTo(target);
  }
}

void JumpToNextSection(TargetSections targetSection)
{
  TypeDeclaration activeType = CodeRush.Source.ActiveType as TypeDeclaration;
  if (activeType == null)
    return;

  SectionJump(GetNextTarget(GetExistingRanges(targetSection, activeType)));
}


void JumpToPreviousSection(TargetSections targetSection)
{
  TypeDeclaration activeType = CodeRush.Source.ActiveType as TypeDeclaration;
  if (activeType == null)
    return;

  SectionJump(GetPreviousTarget(GetExistingRanges(targetSection, activeType)));
}
This code is a bit sophisticated. It first collects the ranges of
member groups inside the current class. So for example, there may be
several groups of methods in a class – maybe organized by visibility,
instance/static, functionality, or perhaps not organized at all. For the
purposes of this code, a member range is defined as the distance
between the start and end of a single member (or a group of two or more
adjacent members of the same type). After collecting all those ranges,
it then calculates the next position based on the desired movement
direction (Previous or Next) and also based on the current position.
Wrapping from the end of the last group back to the beginning of the
first group is supported.
Bonus Actions
There are two more Actions I’ve added to the plug-in. One, called ShowURL, displays the specified web site inside the Visual Studio browser as a document.
The other, SendKeys, will send the keys in the
specified key string to the active window. Key strings can contain
individual characters (e.g., a-z, A-Z, 0-9, punctuation, etc.), and can
also optionally include any of the elements of the Keys enum (placed in
square brackets). For example, “// Hello World[Enter]”.
Last Minute Request – The Pizza Key
I’m not sure why this is, but often I get requests that some might
consider crazy (or surely a joke). For example, this comment came in
yesterday:

Great question, Josh! Well, as I said from the beginning, this was
always expected to be a work in progress – something I would refine over
time. And thanks to you, my keyboard now has a pizza key:
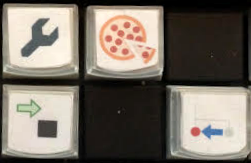
The pizza key now replaces the Events icon since it was unlikely to get frequent use. If you want to print this out, here’s the image:
(click picture above to get to full size image)
The first time you press the Pizza key, you will see this window:
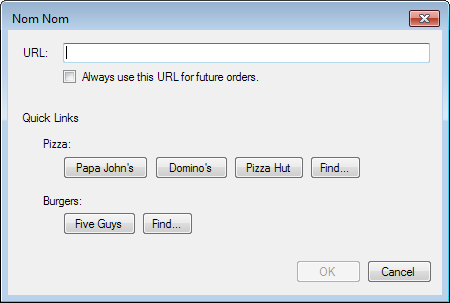
There are very likely some locale issues here in the Quick Links to
food chains that may not be in your area, however you can get full
source to this plug-in and change those Quick Links if you like. And
there are always the Find buttons…. Ultimately, when you decide upon a
place you want, you can specify its online ordering URL in the textbox
here and always have it only a single click away.
Yummy!
Tomorrow
OK, that’s it for today. Next time we’ll wrap up all the feature shortcut binding and complete the series.
Free DevExpress Products - Get Your Copy Today
The following free DevExpress product offers remain available. Should you have any questions about the free offers below, please submit a ticket via the
DevExpress Support Center at your convenience. We'll be happy to follow-up.