Hello! I wanted to start a series describing our fabulous reporting suite by looking at it from three different angles:
- Data – where does the report information reside?
- Layout – how do we want to present the data within the report pages?
- Presentation – what client side technology will we be using for visualizing the reports?
The distinction between #2 and #3 is subtle yet extremely important. Our reporting suite is agnostic when it comes to #1 and #2 but very specific when it comes to #3. Laying out the report elements on the report itself should be completed (or at least prototyped) before the report is shown in any of our supported environments (WinForms, ASP.NET MVC, ASP.NET WebForms, Silverlight, WPF, and LightSwitch).
This particular installment will deal primarily with Data and Presentation. We will be looking at using an XPOCollection as the source of the data and then showing how to visualize the report in WinForms and ASP.NET.
Data
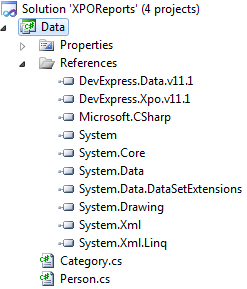
The first thing to do is create a class library project to house the XPO objects themselves.

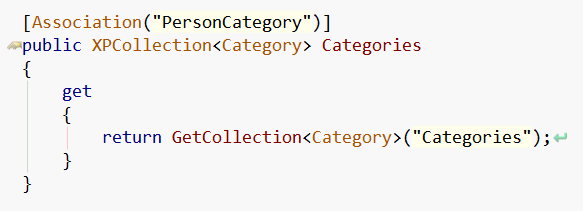
This project has two classes that inherit from XPObject that have a many-to-many association between them. For more details on XPO we have a great Getting Started tutorial if you would like more information.

The class view above shows the type of data that I added to the Person XPO class. In addition the Category class has a Name and a Description. There is also a many-to-many between Persons and Categories.

Layout
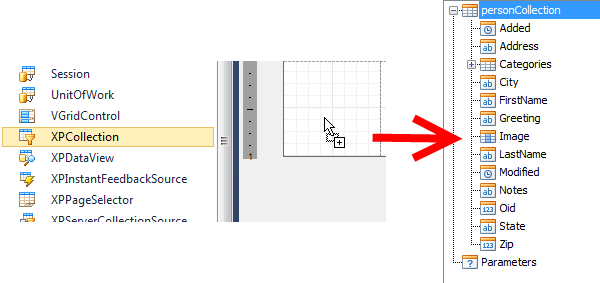
The next thing I did was to add a new class library project to house the actual reports. Once you add a report and add a reference to our XPO library we need to instruct the report to use XPO as its data source. The easiest way to do this is to add an XPCollection to the report’s design surface:

Once this is done you will have all of the available fields in order to begin laying out the report. We will not spend too much time here. The key is to get some fields on the design surface in order to make sure the whole process is indeed working.
Presentation – WinForms
Now its time to add a third project – the WinForms viewer project. Usually I add a button to the existing form and on its click event instantiate and show the report. I thought I would try to add a little more value by showing how to create a custom report viewer form. On the main form drag a PrintBarManager onto the form’s surface:

Once this is added you should see all of the elements available in our standard report viewer dialog. Lastly we need to hook up this new report viewer to our report:

The key element here is to set the print control’s printing system to the reports printing system. This will ensure that both items are talking about the same things when generating the report. The result:

If XPO is left on its own here it will (by default) create an access database to house anything you might end up saving. Now on to ASP.NET!
Presentation – ASP.NET
In ASP.NET things are a bit different. In the WinForms project XPO did a lot of the heavy lifting that it simply cannot do in ASP.NET. In this case all we have to do is tell ASP.NET where the database resides. Once we create a new ASP.NET project and add references to the data and reports assembly we add the Access database to the App_Data folder and specify the following in the Application_Startup (in the Global.asax; see docs for more details):
void Application_Start(object sender, EventArgs e)
{
    // Code that runs on application startup
    string conn = AccessConnectionProvider.GetConnectionString(
        Server.MapPath("~\\App_Data\\data.mdb"));
    XPDictionary dict = new ReflectionDictionary();

    // Initialize the XPO dictionary.
    dict.GetDataStoreSchema(typeof(Person).Assembly);
    IDataStore store = XpoDefault.GetConnectionProvider(conn,
        AutoCreateOption.DatabaseAndSchema);
    XpoDefault.DataLayer = new ThreadSafeDataLayer(dict, store);
}
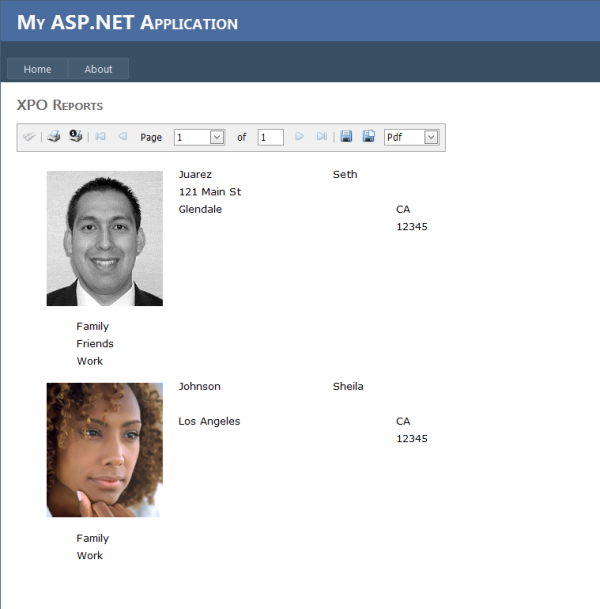
On the Default.aspx page I switch to Design mode and drop a ReportToolbar and a ReportViewer on to the design surface. If we added the references properly we should be able to select the report right on the ReportViewer’s design surface:

We do the same thing with the ReportToolbar except in this case we are selecting the target report viewer. That should be it!

Summary
Hope this was helpful! The main idea was that the data, the layout, and the presentation were all separate logical concepts (and in fact separate projects). If these concepts are kept separate there is nothing keeping you from swapping out data representations as well as client representations (i.e. now we want a Silverlight XPO report etc).
As always, if there are any comments and/or questions, feel free to get a hold of me!
Seth Juarez
Email: sethj@devexpress.com
Twitter: @SethJuarez
Want The Best Reporting Tool Ever?
Get The No-Compromise Reporting Tool for WinForms, ASP.NET, Silverlight and WPF! - Native integration with DevExpress WinForms and ASP.NET Controls, unequalled design-time productivity, industrial-grade features. Try a fully-functional version of DXperience for free now: http://www.devexpress.com/Downloads/NET/
Let us know what you think of our Reporting Suite by rating it in the VS Gallery!

Free DevExpress Products - Get Your Copy Today
The following free DevExpress product offers remain available. Should you have any questions about the free offers below, please submit a ticket via the
DevExpress Support Center at your convenience. We'll be happy to follow-up.