Since we’re on a reporting binge this week I thought I would mention a couple of new features we are adding to the reporting core.
Cascading Parameters
Sometimes parameters depend on the values of other parameters. While this was technically possible before, it required a bit of coding. In v14.2 we are adding the ability to have cascading parameters.

Notice how the rightSideParameter uses the leftSideParameter value to filter the set of data that will be shown. The resulting parameter behaves as a sub-parameter (of sorts):
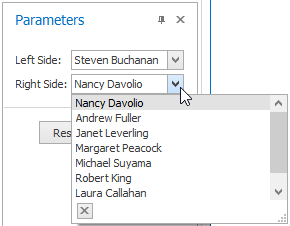
Steve is now nowhere to be found in the cascaded parameter. This approach could also be used to create a master-detail type dependency within the parameters themselves!
Sub Bands
This feature solves a ton of issues when it comes to having conditional data within a given band. Consider the scenario where you have a collection of items but certain items have additional detail and/or elements that need to be rendered. A concrete example:

When a student is older than 35 there is additional information that needs to be shown. This can include additional fields, a block of text, pretty much a new band that contains stuff (technical term). How would this be done currently? With a lot of work. With the introduction of sub-bands this task becomes super simple!
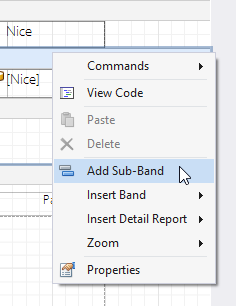
This sub-band is part of the parent band but can be conditionally, well, anything. It can be colored a certain way, have a different font, or be hidden altogether. In our case we want to show additional information when the Student is over 35:

In this case we set the visibility of the sub band to false (by default) and add a formatting style rule to make the appropriate checks:
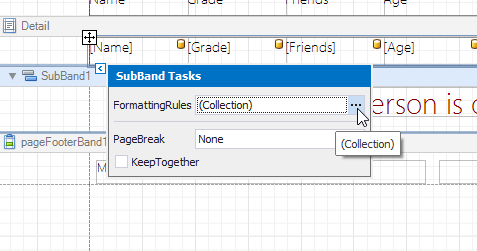
and the rule:
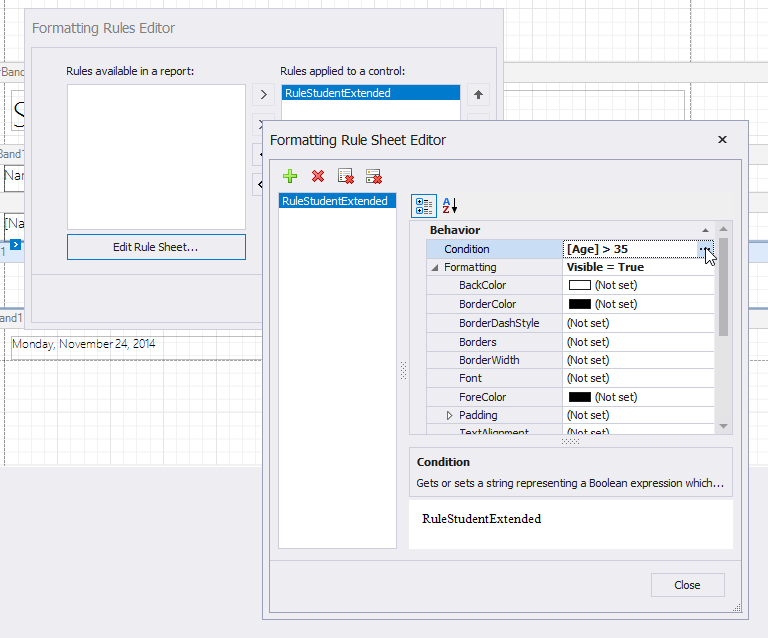
The result is exactly what we were looking to do:
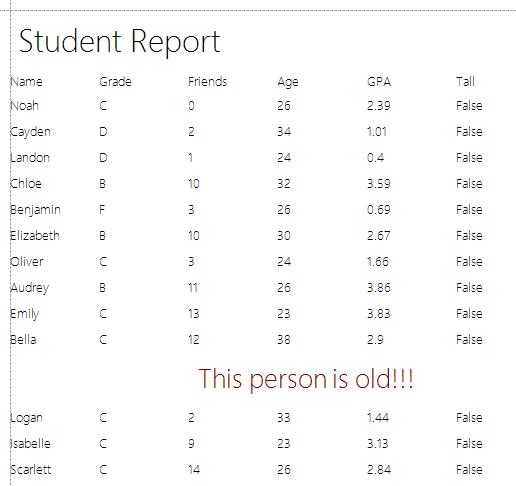
With this feature you could even create alternate versions of how the data should be visualized per row and use conditional styling to enable the sub band. Technically speaking you can have as many bands as you like!
Horizontal Anchoring
Take a look at this gem:

That’s right – we have finally added horizontal anchoring to our report controls!

In the case above, I set the the top table to anchor to both the left and the right (while the bottom table’s horizontal anchoring is set to None).
Table Improvements
I’m going to be honest here, working with tables in our reporting suite is not all that fun. Let me correct that, was not that fun. We are introducting a number of table improvements which should help a ton!
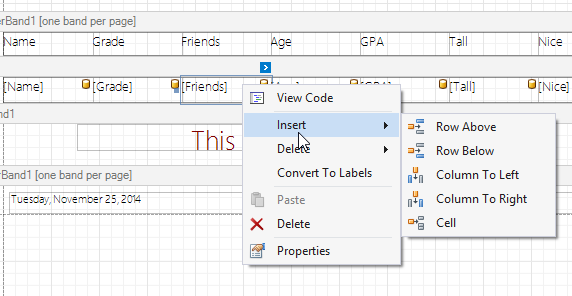
- The ‘Insert Column’ command now inserts a new column (having its width equal to that of the current cell) and shifts the table relative to the current cell in the corresponding direction (to the left, or to the right from the current cell). This new behavior is similar to that of the ‘Insert Row’ command.
- The ‘Insert Row Above’ command now inserts a new row about the current cell and changes the layout of the top part of the table. If there is sufficient empty space between the table and the band’s top edges, the table’s bottom part is left intact.
- Cell insertion has not been affected, except that the newly added cells now inherit the appearance properties of a source cell. The following properties were affected: BackColor, BorderColor, BorderDashStyle, Borders, BorderWidth, Font, ForeColor, Padding, and TextAlignment.
- The ‘Delete Column’ command now deletes a column and correspondingly changes the table width (by shifting the existing columns to the right from the one that is being deleted). Selecting a column and removing it by pressing the DELETE key has the same effect on the table layout (as opposed to the previous implementation when this resulted in cell removal and then resizing of cells located to the right from the current cell).
The following new features have also been implemented.
- Pressing and holding the SHIFT key while resizing a column, changes the table width in the corresponding direction (the columns to the right from the current column are shifted to the left).

- Pressing and holding the CTRL key while resizing a column, changes the width of cells in the corresponding side of this column proportionally (to maintain their width relative to the overall table width), leaving the table dimensions intact.

Final Thoughts
Lest I forget! We have also added support to design-time report zooming when using the mouse wheel in conjunction with the control button. While a simple feature, I think it goes along with standard conventions and will help ease of use at design time.
Overall I think v14.2 is a really strong release for our analytics’ components. I hope you do too!
As always, if there are any comments and/or questions, feel free to get a hold of me!
Seth Juarez
Email: sethj@devexpress.com
Twitter: @SethJuarez
Free DevExpress Products - Get Your Copy Today
The following free DevExpress product offers remain available. Should you have any questions about the free offers below, please submit a ticket via the
DevExpress Support Center at your convenience. We'll be happy to follow-up.