This blog post provides a walk-through for the process of integrating XtraReports into your LightSwitch application to show a report preview for individual data records.
To solve this task, do the following.
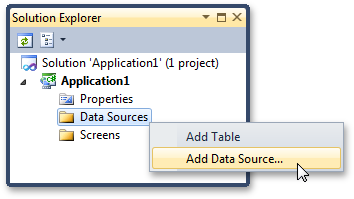
1. Start a new LightSwitch application or open an existing one. Add a data source to the application.
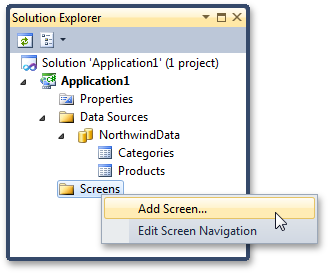
In this example, we will create a Categories-Products table relation from a sample Northwind database to create a hierarchical report.

2. Add a new screen to your application.
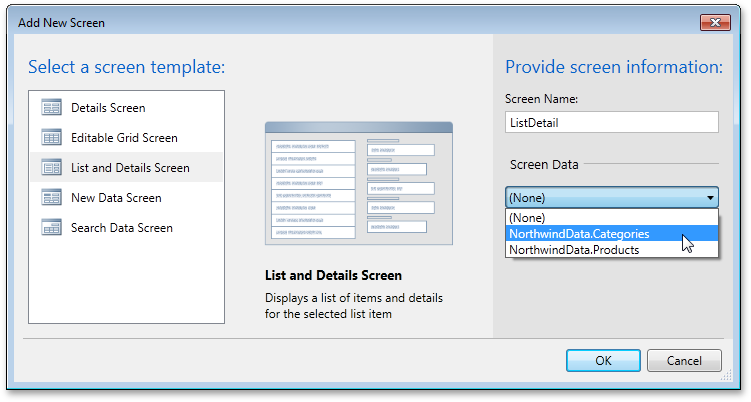
Choose a List and Detail Screen and set its data source to NorthwindData.Categories.
3. Double-click Properties in the Solution Explorer and add an XtraReports extension to the application.

4. Choose to add another data source in the Solution Explorer, but this time choose WCF RIA Service in the invoked wizard.
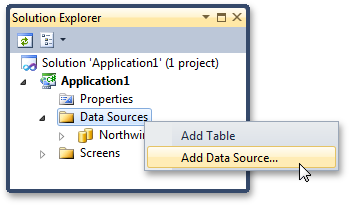
Then, choose XtraReportsService and click Next. On the last wizard page, check to select all available Entities and click Finish.
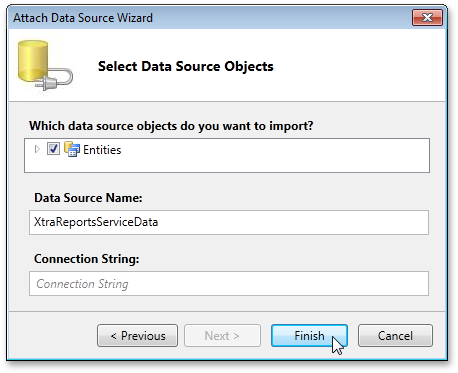
Note: we do not recommend you changing the default data source name (XtraReportsServiceData), because of the risk that your application will not work.
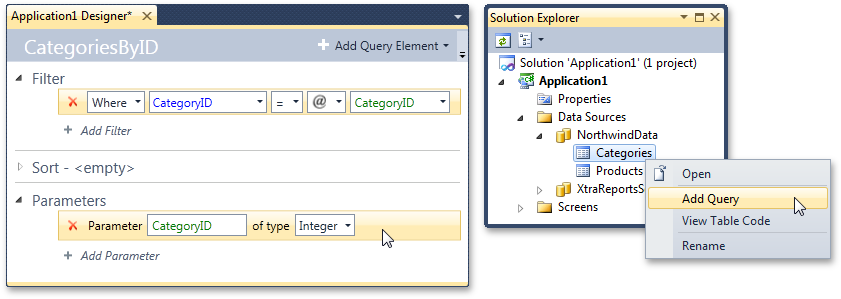
5. Create a LightSwitch query, in which categories are selected based on an integer parameter.
6. To add an XtraReport to the application, switch to the File View in the Solution Explorer, select Server and press CTRL+SHIFT+A.
In the invoked dialog, choose XtraReport Class v11.1 and click Add.
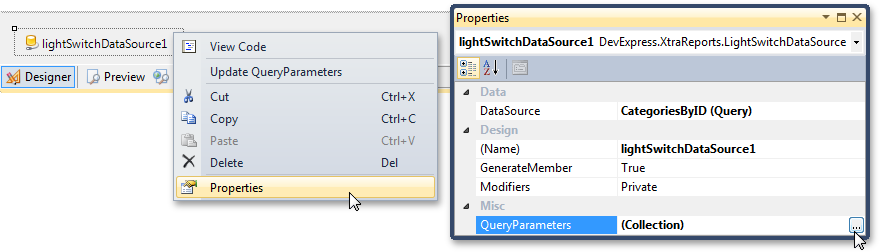
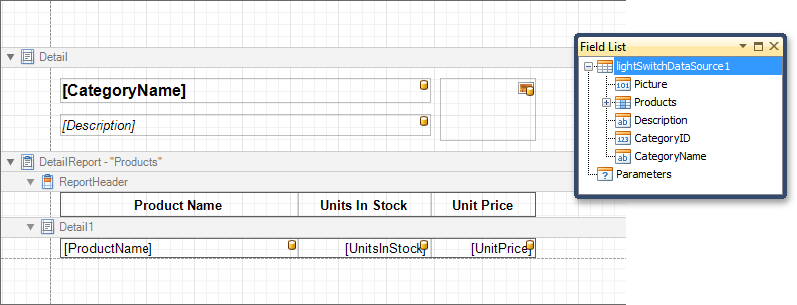
7. Re-build the solution and bind the report to the created query.

To access the query's parameters, right-click lightSwitchDataSource1 and click Properties. Then, click the ellipsis button for the QueryParameters property.
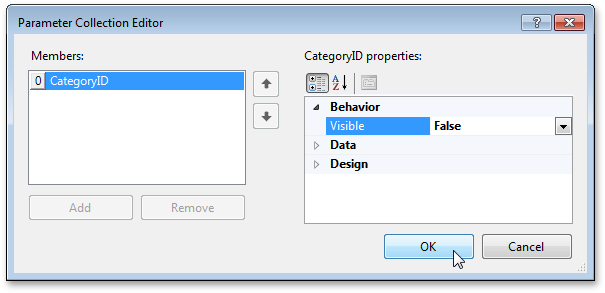
In the invoked dialog, disable the parameter's Visible property.
Then, adjust the report layout as required. To learn how you can create a master-detail report, see How to: Create a Master-Detail Report using Detail Report Bands.
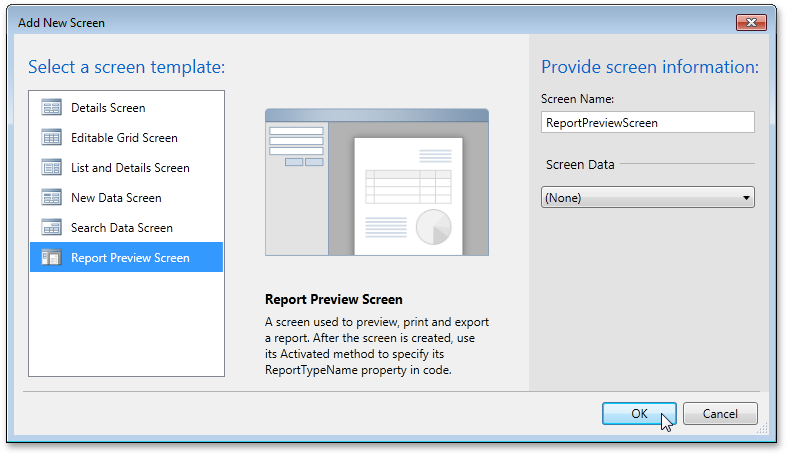
8. Switch back to the Logical View in the Solution Explorer and add another screen to the application.
At this time, select Report Preview Screen and click OK.
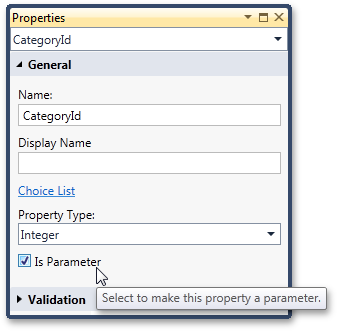
In the opened screen designer, click "Add Data Item...". In the invoked editor, choose Local Property, set its Type to Integer and Name to CategoryId.

After the local property is created, press F4 and enable its Is Parameter option in the invoked Properties window.
9. Now, click Write Code to switch to the screen's code behind, and in the body of the CustomizeReportPreviewModel method, assign the value of the parameter that is passed to the report from the query to the value of the created local property.
namespace LightSwitchApplication {
    public partial class ReportPreviewScreen {
        public void CustomizeReportPreviewModel(DevExpress.Xpf.Printing.ReportPreviewModel model) {
            model.Parameters["CategoryID"].Value = CategoryId;
        }
        partial void ReportPreviewScreen_Activated() {
            this.ReportTypeName = "XtraReport1";
        }
    }
}
Namespace LightSwitchApplication
Partial Public Class ReportPreviewScreen
Public Sub CustomizeReportPreviewModel(ByVal model As DevExpress.Xpf.Printing.ReportPreviewModel)
model.Parameters("CategoryID").Value = CategoryId
End Sub
Private Sub ReportPreviewScreen_Activated()
Me.ReportTypeName = "XtraReport1"
End Sub
End Class
End Namespace10. Switch back to the CategoriesListDetail screen designer and add a button (named ShowPrintPreview) to the command bar of the Categories list.
Handle its Execute method to pass the parameter name to the method that shows the report preview screen.

In addition, you can check whether or not this value is null in the button's CanExecute method body.
namespace LightSwitchApplication {
    public partial class CategoriesListDetail {
        partial void ShowPrintPreview_Execute() {
            Application.ShowReportPreviewScreen(Categories.SelectedItem.CategoryID);
        }
        partial void ShowPrintPreview_CanExecute(ref bool result) {
            result = Categories.SelectedItem != null;
        }
    }
}
Namespace LightSwitchApplication
Partial Public Class CategoriesListDetail
Private Sub ShowPrintPreview_Execute()
Application.ShowReportPreviewScreen(Categories.SelectedItem.CategoryID)
End Sub
Private Sub ShowPrintPreview_CanExecute(ByRef result As Boolean)
result = Categories.SelectedItem IsNot Nothing
End Sub
End Class
End Namespace
Run the application, choose a category and click Show Print Preview.
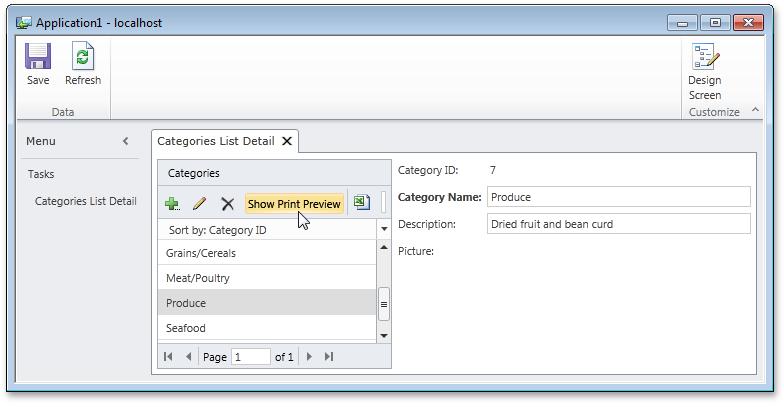
As a result, a report showing the category details is displayed in a separate screen.

Free DevExpress Products - Get Your Copy Today
The following free DevExpress product offers remain available. Should you have any questions about the free offers below, please submit a ticket via the
DevExpress Support Center at your convenience. We'll be happy to follow-up.