This blog post outlines the process of adding a Document Preview for WPF to
an End-User Report Designer for Windows Forms. The complete application is
available in our Code Central at
How to embed a Document Preview for WPF into the End-User Report Designer for Windows Forms.
To solve this task, do the following.
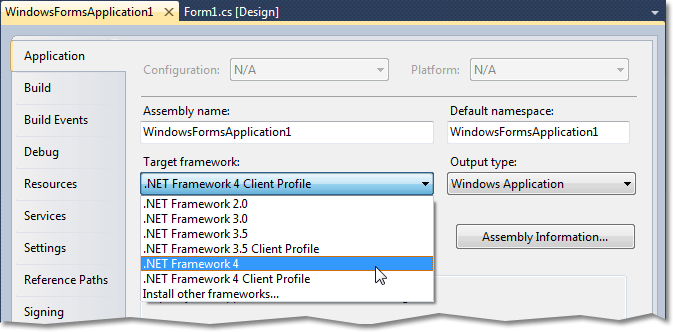
1. Create a new Windows Forms application and to make it possible to create an
End-User Designer, change its target framework to the full profile of the
.NET Framework 4.
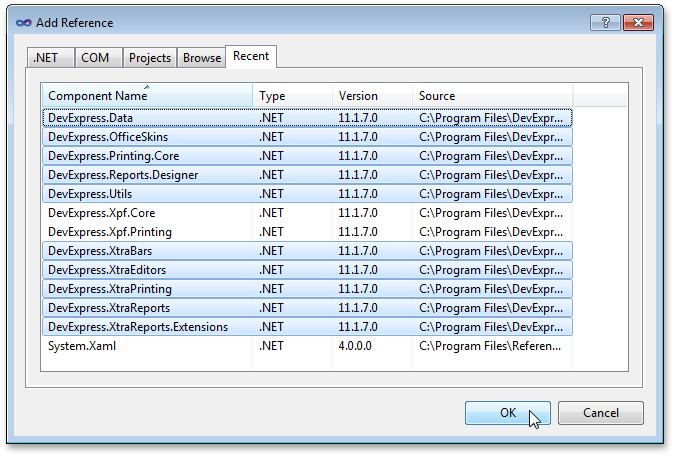
Add the following assemblies to the project's reference list.
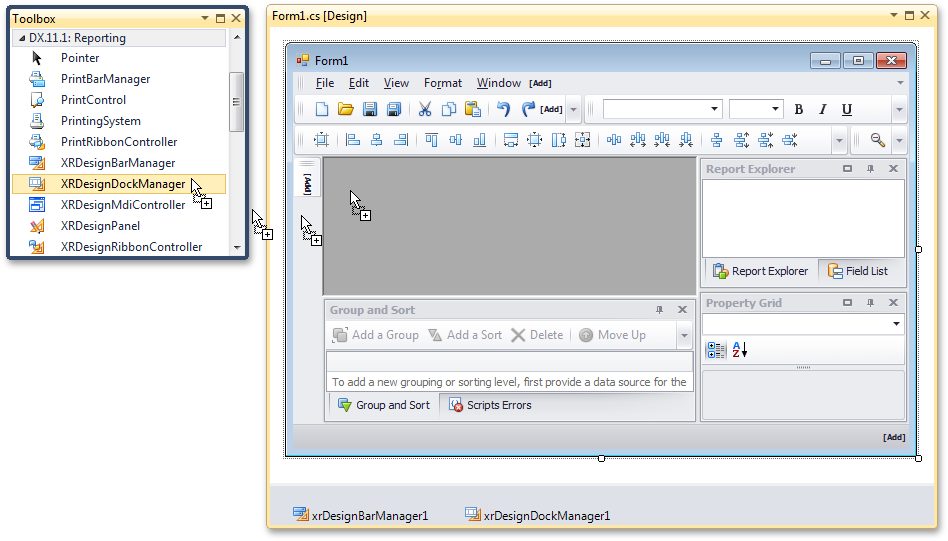
2. Next, let's create a custom End-User Designer form, by assembling it from its
constituent user interface elements.
To do this, drop an XRDesignBarManager onto the main form of your
application. After adding this control, two other components are auto-added to
the form: XRDesignMdiController and XRTabbedMdiManager. To
simplify this example, we will remove them, and will instead use an
XRDesignPanel to conform to a single-document interface.
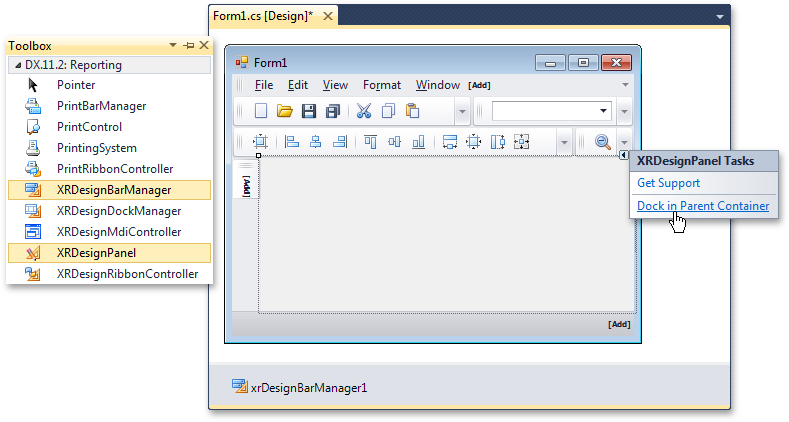
After this, make sure to disable the IsMdiContainer property of the
main form.
3. Then, drop an XRDesignDockManager control onto the main form’s
surface.
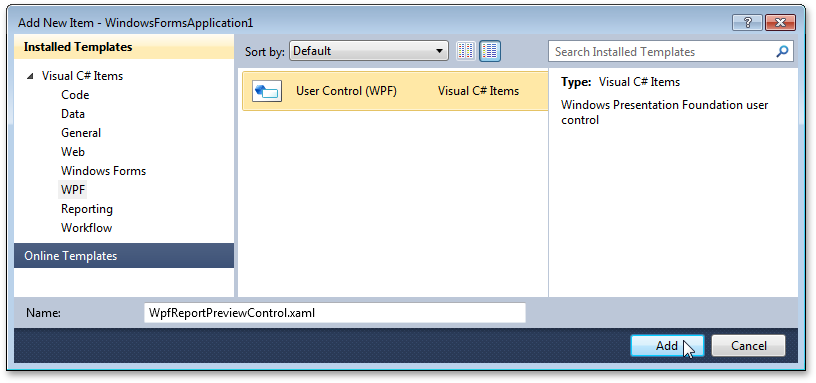
4. Now, let's provide a WPF report preview to the Designer.
To do this, add a new WPF user control (named WpfReportPreviewControl)
to your application.
5. After you have created WpfReportPreviewControl, write the following code into
it, which returns a ReportPreviewModel object.
using System.Windows.Controls;
using DevExpress.XtraReports;
// ...

namespace WindowsFormsApplication1.WPF {
    public partial class WpfReportPreviewControl : UserControl {
        public IReport Report {
            get { return ((ReportPreviewModel)preview.Model).Report; }
            set { ((ReportPreviewModel)preview.Model).Report = value; }
        }
        public WpfReportPreviewControl() {
            InitializeComponent();
        }
    }
}
6. At design time, drop a DocumentPreview control onto the created
WpfReportPreviewControl ...
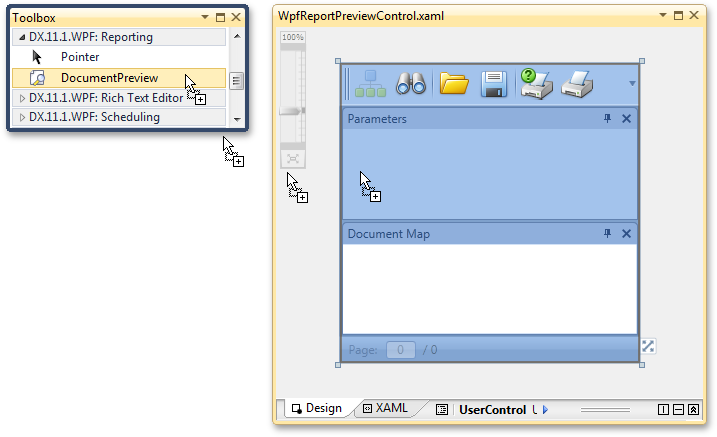
... and then assign a ReportPreviewModel instance that we have previously
created in code to its Model property.
<dxp:DocumentPreview Name="preview">
    <dxp:DocumentPreview.Model>
        <local:ReportPreviewModel />
    </dxp:DocumentPreview.Model>
</dxp:DocumentPreview>
7. Add the DevExpress.Xpf.Core and the DevExpress.Xpf.Printing
assemblies to the project's reference list.
8. Then, add a Windows Forms user control to the application.

9. At design time, drop an ElementHost control onto its surface.
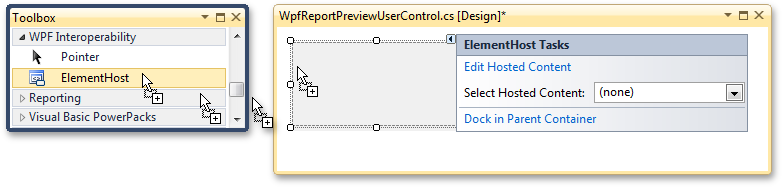
10. Click its smart tag, and in its actions list, set the SelectHostedContent
property to the created WPF user control.

11. In its code, define the Report property for the Windows Forms user
control.
public partial class WpfReportPreviewUserControl : UserControl {
    public IReport Report {
        get { return wpfReportPreviewControl1.Report; }
        set { wpfReportPreviewControl1.Report = value; }
    }
    // ...
}
12. Now, just add two more classes to the application:
- BarButtonTabPage.cs that inherits from the XtraTabControl.TabPage and provides the functionality to the WPF Preview page. You can add this page to the Design Panel in its DesignHostLoaded event handler;
- Helper.cs that will store a report in a stream and assign it to the Report property of the WPF Preview in the button's Click event handler.
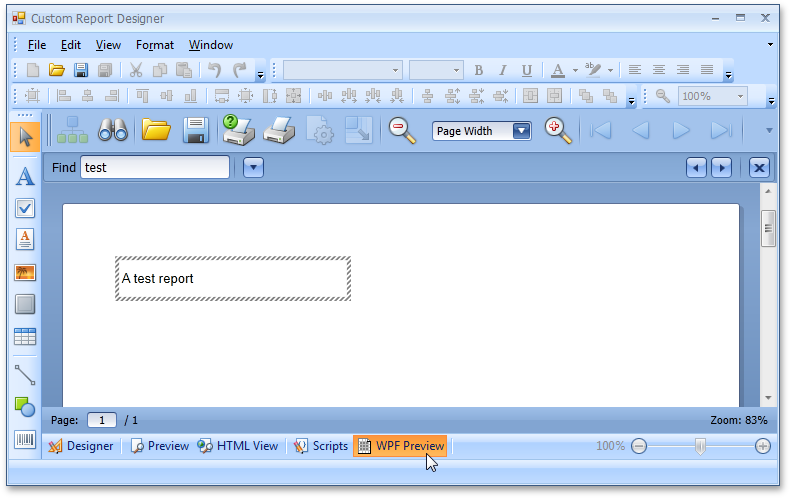
The following image shows the result.
You can view the full code of the application and download it from our Code Central at How to embed a Document Preview for WPF into the End-User Report Designer for Windows Forms.
Free DevExpress Products - Get Your Copy Today
The following free DevExpress product offers remain available. Should you have any questions about the free offers below, please submit a ticket via the
DevExpress Support Center at your convenience. We'll be happy to follow-up.