Adding Custom Menu Items to Visual Studio, and Mouse Support for the Clipboard History Plug-in

Welcome to Part 6 of the series showing how to build plug-ins for Visual Studio using DXCore.
So far we've:
- Built the plug-in framework.
- Created the ClipboardHistory class.
- Created a simple UI.
- Added a cursor and support for the keyboard.
- Added form positioning code and dynamic update ability.
In today's post we'll add an item to Visual Studio's Edit menu so developers can easily discover and access the Clipboard History, and we'll add mouse support so developers can select clipboard entries with the mouse.
Adding a Custom Entry to the Edit Menu
To further integrate our new feature into Visual Studio, and to improve discoverability, we should add a new menu item to Visual Studio's Edit menu. Fortunately this is pretty easy.
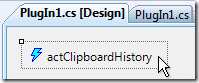
Activate Plugin1.cs [Design] and then click the actClipboardHistory control.
In the Properties grid, change the following properties:
| Property | Value | Comments |
| ButtonText | Clipboard History | This is the text of the menu item. |
| ParentMenu | Edit | Specify the name of the parent menu toolbar. |
| Position | 15 | This menu item will show up at position 15, which falls after the existing Paste menu item. This number is achieved somewhat through trial and error, as some menus will contain menu items that are not visible under all conditions. |
Next, let's add an image to the menu item. In the Properties grid, select the Image property and then click the "..." button to the right.

The Select Resource dialog will appear.
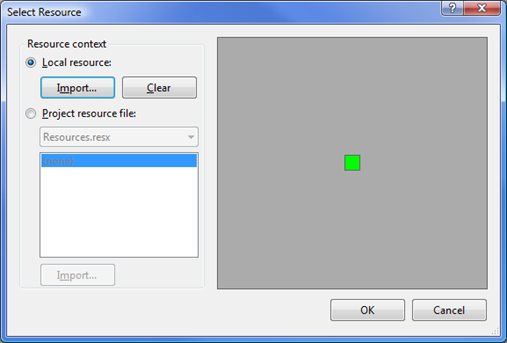
Click the Import... button.
Select an image to use for this menu item entry. It should be 16 pixels by 16 pixels, and for backwards compatibility with previous versions of Visual Studio, we recommend using only the original 16 Windows colors, with the addition of one more color that can be used to indicate transparency (the default transparency color is very close to lime green, 0, 254, 0). Here's the image I created for this step:
![]()
That's all we need to do. Save your work and get ready to test....
Testing the New Menu Item
Click Run....

In the second instance of Visual Studio, open the Edit menu...
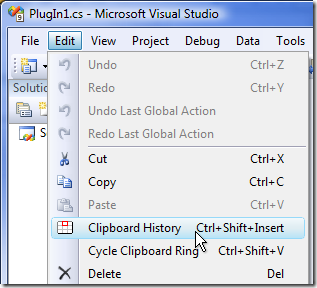
Nice! Now our new feature is easier to discover. Notice the shortcut binding we added to the DXCore appears automatically here next to the menu item.
Adding Mouse Support
Since we have just added a menu item, there's now a chance that developers may bring this form up using the mouse. And so it follows that we should add mouse support. :-)
Here's how I'd like it to work: A single-click should select the clipboard history element, while a double-click should close the form and paste that entry into the code.
But I also want a click and drag on each CodeView's scroll bars to still drag the scroll bars as expected. For this reason I've decided to implement mouse support on the form level rather than try to hook up individual MouseDown and MouseDoubleClick event handlers on the CodeViews and the Panel borders.
Unfortunately, trapping mouse messages at the form level is not as easy in Windows Forms as it is in WPF. But it's not impossible. We just need to implement an IMessageFilter and listen to the mouse click & double-click windows messages.
First, our form needs to be an implementer of IMessageFilter...
public partial class FrmClipHistory : Form, IMessageFilter
Next, we need to add and remove the message filter in the ShowClipboardHistory method:
public static void ShowClipboardHistory()
{
if (_FrmClipHistory != null)
return;
_FrmClipHistory = new FrmClipHistory();
PasteOnClose = false;
try
{
Application.AddMessageFilter(_FrmClipHistory);
CreateViews();
PositionViews();
UpdateViews();
ShowCursor();
PositionForm();
_FrmClipHistory.ShowDialog(CodeRush.IDE);
}
finally
{
CleanUpViews();
Application.RemoveMessageFilter(_FrmClipHistory);
if (_FrmClipHistory != null)
_FrmClipHistory.Dispose();
_FrmClipHistory = null;
}
if (PasteOnClose)
Paste();
}
And finally, here's the filter implementation...
bool IMessageFilter.PreFilterMessage(ref Message m)
{
bool isDoubleClick;
if (m.Msg == (int)WindowMessage.WM_LBUTTONDOWN)
isDoubleClick = false;
else if (m.Msg == (int)WindowMessage.WM_LBUTTONDBLCLK)
isDoubleClick = true;
else // Not a message we're interested in.
return false;
Control target = Control.FromHandle(m.HWnd);
if (target is WheelPanel) // WheelPanel is the child of the CodeView that holds the text.
target = target.Parent;
if (target != null)
for (int i = 0; i <= ClipboardHistory.LastIndex; i++)
if (_Borders[ i ] == target || _CodeViews[ i ] == target)
{
MoveCursorTo(i);
if (isDoubleClick)
CloseAndPaste();
return true;
}
return false;
}
Note that the WheelPanel type reference in the code above refers to the control inside the CodeView that displays the actual text. This check allows clicks to the scrollbars to get through.
MoveCursorTo and its overload look like this:
private static void MoveCursorTo(int index)
{
int newRow = index / ClipboardHistory.ColumnCount;
int newColumn = index % ClipboardHistory.ColumnCount;
MoveCursorTo(newRow, newColumn);
}
private static void MoveCursorTo(int newRow, int newColumn)
{
HideCursor();
_CursorRow = newRow;
_CursorColumn = newColumn;
KeepCursorInBounds();
ShowCursor();
}
And that's it!
Run & test to verify mouse interaction works as expected.
Tomorrow we'll learn how to persist the clipboard settings across Visual Studio versions. See you then!
Free DevExpress Products - Get Your Copy Today
Mark Miller (DevExpress)