If you've used our WinForms Grid in the past, you already know that with a single call to the ExportToXlsx, method you can export the contents of the grid and generate a Microsoft Excel document. In this post, I want to quickly discuss use of our updated Excel Data Export engine and its numerous customization options. In particular, I want to show you how to customize cell values, add a header/footer and get you some code examples so you can implement similar solutions in your WinForms apps.
Excel Data Export - Header Customization
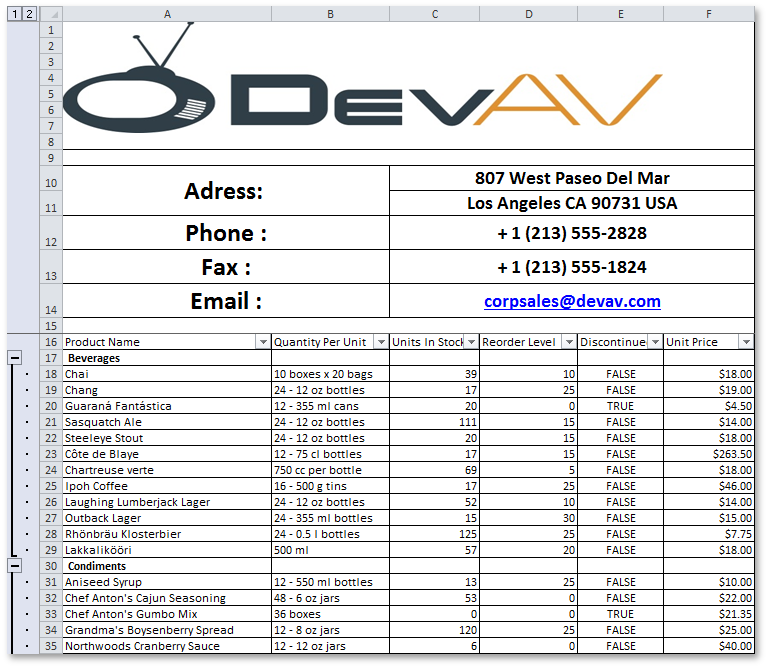
To add a header and display personalized information, such as company name, logo and contact information, we need to handle the CustomizeSheetHeader event. The methods (AddRow, MergeCells and InsertImage) provided by its event arguments allow us to add rows to the output, merge cells, insert images, etc.
void
options_CustomizeSheetHeader(ContextEventArgs e){
// ...
var file =
System.Reflection.Assembly.GetExecutingAssembly().GetManifestResourceStream("GridReportBlog.Resources.1.jpg");
if(file != null){
var imageToHeader = new
Bitmap(Image.FromStream(file));
var imageToHeaderRange = new XlCellRange(new
XlCellPosition(0, 0), new XlCellPosition(5, 7));
e.ExportContext.MergeCells(imageToHeaderRange);
e.ExportContext.InsertImage(imageToHeader, imageToHeaderRange);
}
// ...
}
Resulting output below...
Excel Data Export - Cell Customization
Let's now take a look at the CustomizeCell event and how we can use it to replace values in a Boolean column with the check mark symbols. "☑" and "☐"
XlCellAlignment aligmentForDiscontinued = new
XlCellAlignment() {
HorizontalAlignment = XlHorizontalAlignment.Center,
VerticalAlignment = XlVerticalAlignment.Center
};
void options_CustomizeCell(CustomizeCellEventArgs
e){
if(e.ColumnFieldName == "Discontinued"){
if(e.Value is bool){
e.Handled = true;
e.Formatting.Alignment = aligmentForDiscontinued;
e.Value = ((bool) e.Value) ? "☑" :
"☐";
}
}
}
Resulting output below...

Excel Data Export - Footer Customization
Finally, to add a footer to the exported file, we'll need to use CustomizeSheetFooter event. As you can see below, we've added two new rows to the output document and specified formatting using XlFormattingObjects.
void options_CustomizeSheetFooter(ContextEventArgs
e){
e.ExportContext.AddRow();
var firstRow = new CellObject();
firstRow.Value = @"The report is
generated from the NorthWind database.";
var rowFormatting =
CreateXlFormattingObject(true, 18);
rowFormatting.Alignment.HorizontalAlignment =
XlHorizontalAlignment.Left;
firstRow.Formatting = rowFormatting;
e.ExportContext.AddRow(new[]{ firstRow });
// ...
}

Hopefully this quick tutorial will help you get started with our Excel Data Export engine and help you better integrate your WinForms app with Microsoft Excel.
Free DevExpress Products - Get Your Copy Today
The following free DevExpress product offers remain available. Should you have any questions about the free offers below, please submit a ticket via the
DevExpress Support Center at your convenience. We'll be happy to follow-up.