Creating an Options Page for the Clipboard History, our DXCore/Visual Studio Plug-in

Welcome to Part 8 of the series showing how to build plug-ins for Visual Studio using DXCore.
So far we've:
- Built the plug-in framework.
- Created the ClipboardHistory class.
- Created a simple UI.
- Added a cursor and support for the keyboard.
- Added form positioning code and dynamic update ability.
- Added a custom menu item and mouse support.
- Added clipboard history persistence across sessions.
In today's rather ambitious post (brace for impact), we'll add a user-friendly options page to the DevExpress Options dialog so developers can easily customize features of the clipboard history.
Customizing Behavior
So, we've done a pretty good job up to this point of implementing a relatively useful clipboard history feature. Now I think it's time to make it easier for developers to customize behavior.
For example, we need a setting to determine if the clipboard history should be persisted between sessions (currently the default behavior) or not. And it might be nice to have an option to let developers change the color of the cursor from the currently very bright and very saturated red to something perhaps a bit more aesthetically pleasing. And I'm also starting to think that it might be really nice if we allowed developers to change the dimensions of the history from the current hard-coded 3x3 to something else (like 1x4, or perhaps 5x5).
So we need an options page. Traditionally, adding an options page to any application is a painful experience. Thankfully, the DXCore makes this significantly easier. Here's an overview of what we'll need to accomplish:
- Run the options page wizard
- Layout controls
- Add runtime behavior code for controls if necessary
- Prepare the options page (set values on the controls based on settings in storage)
- Optionally specify default values (enables the "Restore Defaults" button)
- Commit changes (transfer values on the controls to storage)
- Read settings when necessary (read settings from storage and apply to feature behavior)
The Options Page Wizard
In the Solution Explorer tool window, right-click the project and choose Add | New Item....
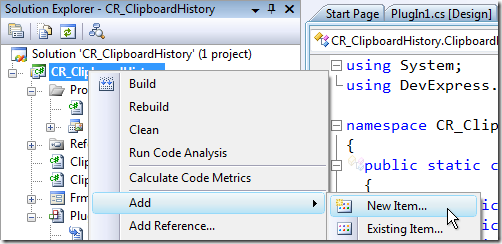
The Add New Item dialog appears.
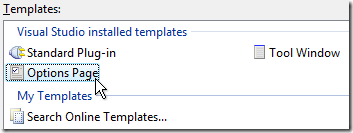
Select the DXCore category.

Select the Options Page template.
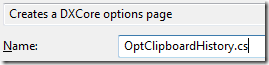
Specify a meaningful name. As you've already seen I like to prefix my form names with "Frm", and I like to similarly prefix my options pages with "Opt". So we can call this file "OptClipboardHistory.cs".
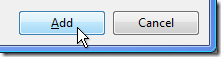
Click Add.
The New Options Page dialog will appear. There are three options to set here. We'll leave User Level at its default (New User). This option determines when the page will be seen (the Options dialog has three different user levels -- at Expert level all options pages are visible).
Let's change the Category. This list is populated with all the existing categories. If you have CodeRush installed, then you already have an Editor\Clipboard category, and you can select it from the list:
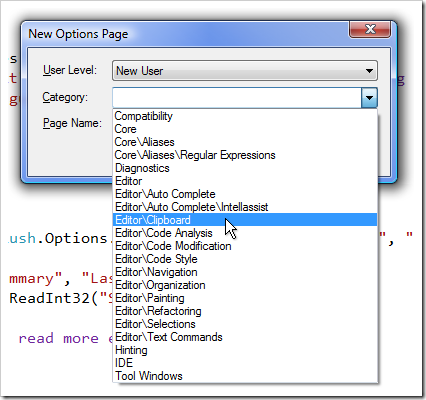
If you don't see this entry, you can enter "Editor\Clipboard " into the Category text box.
For the Page Name, specify "History".
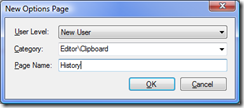
Click OK. Astute readers will notice the similarity between the category and page name specified in this form, and the code used to get a new DecoupledStorage instance in the ClipboardHistory's Save and Load methods:
DecoupledStorage settings = CodeRush.Options.GetStorage("Editor\\Clipboard", "History")
This is not a coincidence. To make things easier, I wanted to use a single storage instance for both the options, and the persisted entries. It's also possible to have different DecoupledStorage instances pointing to different settings locations, but I think this will be a bit easier.
Click OK.
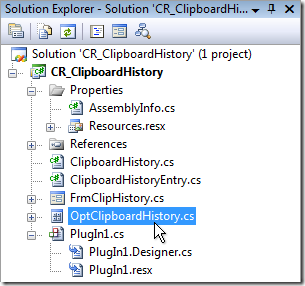
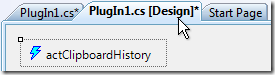
The new options page is now part of our project:
And an Options Page design surface is activated in the editor.

| Why can't I resize the options page at design-time? |
| At runtime, options pages can be resized, but at design-time, the ability to resize is disabled. The size of this options page is the minimum size that it will be when it appears in the DXCore Options dialog. So everything needs to fit in this space. If you need more room for your options controls, you might consider a second options page, or more traditional strategies for dealing with space constraints, such as scroll bars or perhaps a tab control. Note that even though the options page is a fixed-size at design-time, controls on your options page can resize or move as the options page is resized at runtime, simply by setting the Anchor property accordingly. |
Next, we need to layout the controls that we want to appear on this page.
Control Layout and Runtime Behavior
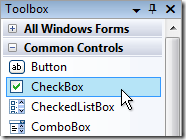
In the Toolbox, select a standard Checkbox...
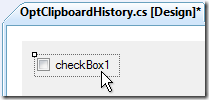
and drop it onto the options page...
and set these properties:
| Property | Value |
| (Name) | ckbPersistHistory |
| Text | Persist clipboard history across Visual Studio sessions |
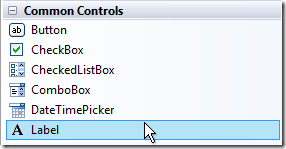
Next, let's drop a label...
and position it under the checkbox...

and set its Text property to "Selector Color:".
Next, we need a color picker. The DXCore actually ships with a custom color picker control, however it is not installed onto the Toolbox by default (at least not yet, as of version 3.0.8). So if you don't see a ColorPicker control in the DXCore section of the Toolbox, we'll need to add it. Here's how:
In the Toolbox, right-click the DXCore category title and select "Choose Items...".

After a few moments, the Choose Toolbox Items dialog will appear.
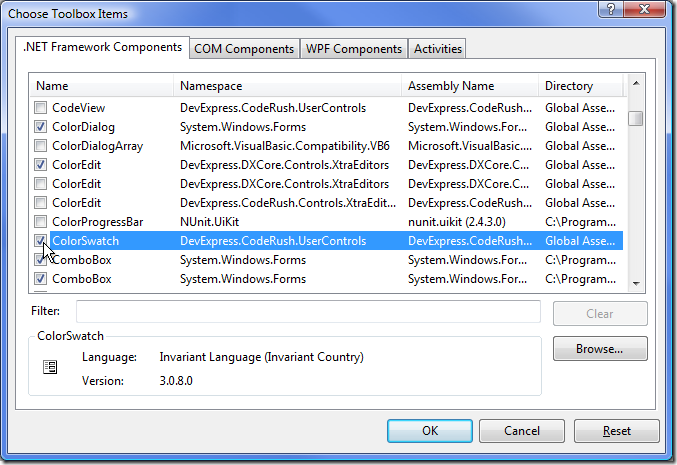
Scroll down and place a check in the box to the left of the ColorSwatch control (in the DevExpress.CodeRush.UserControls namespace), and click OK.
Now, in the Toolbox, select the ColorSwatch control...

and drop it on the options page, to the right of our label. Change the following properties in the ColorSwatch:
| Property | Value |
| (Name) | clrSelector |
| Color | Red |
To compile with the ColorSwatch, we'll need to add an assembly reference to our project.
Right-click the References folder of our project, and choose Add Reference....
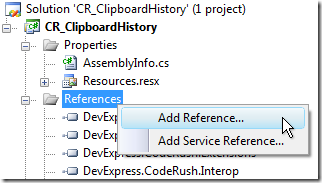
Select the DevExpress.DXCore.Controls.Data assembly...
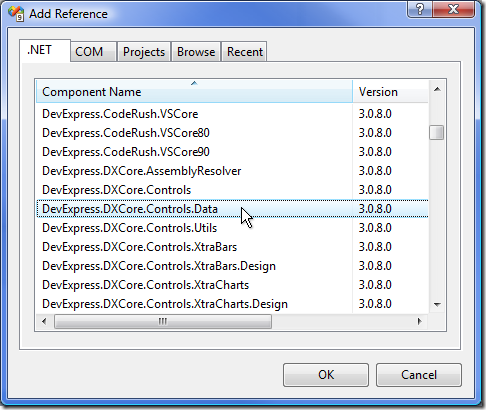
Click OK.
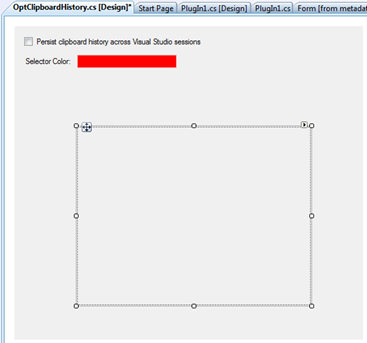
Next, let's create a preview panel, to show the impact of the changes before we make them. We can put TrackBars above and to the left of the panel, to make it quick and easy to change the number of rows and columns that we'll track.
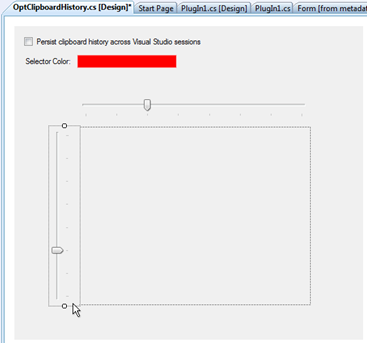
Drop a Panel onto the options page, and size it so it looks something like this:
Change the following properties in the Panel:
| Property | Value |
| (Name) | pnlPreview |
Next, select a TrackBar control...
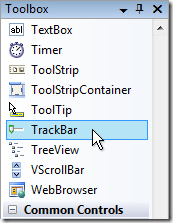
and drop it above the Panel.

Change the following properties in the new TrackBar:
| Property | Value |
| (Name) | trkColumnCount |
| Maximum | 8 |
| Minimum | 1 |
| Value | 3 |
Now we need another TrackBar, just like this one. Click this control on the options page to ensure it has focus, and press Ctrl+C to copy it to the clipboard, and then Ctrl+V to paste it onto the form.
Change the following properties in the newly-pasted TrackBar:
| Property | Value |
| (Name) | trkRowCount |
| Orientation | Vertical |
Move and size this vertical TrackBar so it lines up with the left side of the preview Panel.
Make sure the top and left edges of the preview Panel are not obscured by the TrackBar controls.
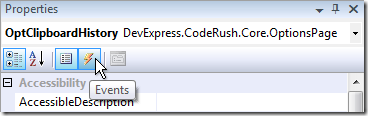
Important: Ctrl+Click on the horizontal TrackBar so both TrackBars are selected.
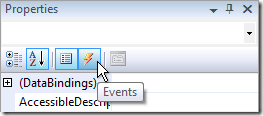
Click the Events button on the Properties grid.
Select the Scroll event (don't double-click), then type "DimensionsChanged"...
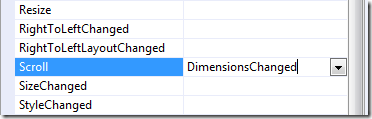
and press Enter. In the code, add a call to refresh our preview panel:
private void DimensionsChanged(object sender, EventArgs e)
{
pnlPreview.Refresh();
}
On the options page design surface, click the clrSelector ColorSwatch control to select it.
In the Properties grid, click the Events button.
Double-click the ColorChange event to generate a handler for it. Add a call here as well to pnlPreview.Refresh...
private void clrSelector_ColorChange(object sender, EventArgs e)
{
pnlPreview.Refresh();
}
For symmetry on the form, I want to invert the range that trkRowCount runs through. Instead of the bottom position resulting in a value of 1, and the top position resulting in a value of 8, I want those values returned to be the reverse of that (e.g., 1-8 from top to bottom). In the code I've created a simple NumRows property that performs this inversion:
private int NumRows
{
get { return 1 + trkRowCount.Maximum - trkRowCount.Value; }
set { trkRowCount.Value = 1 + trkRowCount.Maximum - value; }
}
And for symmetry in the code, I've created a similar property for NumColumns, although this property does not invert the TrackBar values since this TrackBar is already running through the range of values I want (e.g., 1-8 from left to right):
private int NumColumns
{
get { return trkColumnCount.Value; }
set { trkColumnCount.Value = value; }
}
On the options page design surface, double-click the Panel to create a new handler for it's Paint event. Now it's time to write some code to show the preview. I've come up with something like this:
private void pnlPreview_Paint(object sender, PaintEventArgs e)
{
int width = pnlPreview.ClientRectangle.Width / NumColumns - 2;
int height = pnlPreview.ClientRectangle.Height / NumRows - 2;
for (int row = 0; row < NumRows; row++)
for (int column = 0; column < NumColumns; column++)
{
Rectangle thisRect = new Rectangle(2 + column * width, 2 + row * height, width - 2, height - 2);
e.Graphics.FillRectangle(Brushes.White, thisRect);
thisRect.Inflate(-1, -1);
using (Pen borderPen = new Pen(Color.LightGray, 2))
e.Graphics.DrawRectangle(borderPen, thisRect);
}
Rectangle selectionRect = new Rectangle(2, 2, width - 2, height - 2);
using (Pen selectionPen = new Pen(clrSelector.Color, 2))
e.Graphics.DrawRectangle(selectionPen, selectionRect);
}
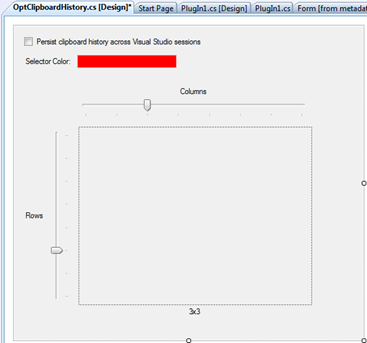
Activate the options page design surface one more time. Let's drop two more Labels on the options page...
and set their Text properties to "Rows" and "Columns", and center them next to the TrackBars, like so...

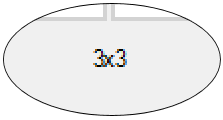
We'll drop one final Label to show column and row counts...
and center it below the preview panel.
Change the following properties in the newly-dropped Label:
| Property | Value |
| (Name) | lblDimensions |
| Text | 3x3 |
Your final UI should look like this:
| Can I use third-party controls in my plug-in? |
|
You can, but it's really only safe to do this if you're the only developer who will use your plug-in. If you expect to share plug-ins with other developers who might not have a license to your third-party control, we recommend using only the standard .NET controls, or controls that ship with the DXCore (the controls located in the "DXCore..." groups of the Toolbox). |
Inside our DimensionsChanged event handler, let's add one more line of code to update the Text on this recently dropped label:
private void DimensionsChanged(object sender, EventArgs e)
{
pnlPreview.Refresh();
lblDimensions.Text = String.Format("{0}x{1}", NumColumns, NumRows);
}
We still need to add the code to actually persist settings corresponding to these controls, but I think now would be a good time to save our work and test this interactive behavior to make sure it's working just like we want it to.
Testing the Dimension Preview
Click Run.

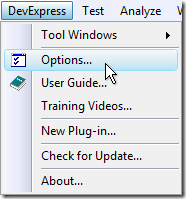
In the second instance of Visual Studio, from the DevExpress menu, select Options....
In the tree view on the left, open the Editor\Clipboard folder, and select the History options page:
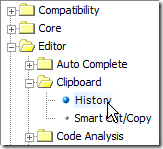
This location corresponds to the Category and Page Name fields specified when we created this options page.
Remember this step?
Now interact with our new options page. Change the Selector Color, and drag the TrackBar thumbs to change the preview grid's dimensions.
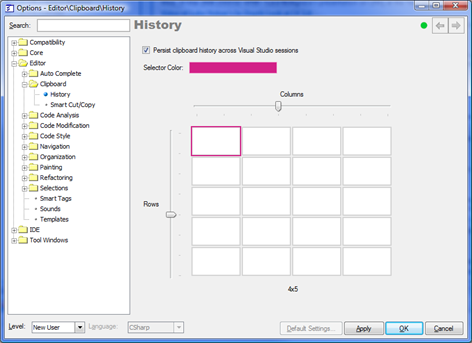
I like the interactive preview. It delivers a satisfying level of discoverability, and conveys the impact the TrackBars have on the dimensions of the clipboard history.
Note that if you make changes to this page and click OK and then view the Options dialog once again, your previous changes are not preserved.
Let's fix that right now (close down that second instance of Visual Studio if you still have it running).
Saving and Loading Settings
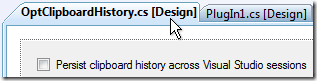
Let's start with code to save the settings. Activate the OptClipboardHistory.cs [Design] file...
Click the options page itself (so no controls are selected).
In the Properties grid, click the Events button.
The OptionsPage design surface exposes a number of interesting events, in addition to the events you might expect from a form.
Click the Categorized button to see these events grouped together.
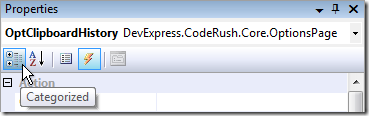
In the CodeRush category, create a handler for the CommitChanges event.

The CommitChanges event is called when the options page has been modified (or simply shown and the OptionPage's AutoModify property is set to true) and the OK or Apply button has been clicked. Like many of the DXCore events, CommitChanges comes with its own EventArgs descendant that passes useful properties and/or methods to our handler.
In our handler, we'll write code that transfers values in the controls to storage. One of the properties available in the event arguments is called Storage. The Storage property allows you to read and write values to and from the DecoupledStorage instance associated with this options page. Storage WriteXxxxx methods expect two strings to identify the section and the key to write, and a third parameter which is the value to write. There are a wide variety of ReadXxxx and WriteXxxx methods to read and write many different types.
So with that in mind, add the following code to the CommitChanges event handler, to transfer values from the controls on our options page out to storage:
private void OptClipboardHistory_CommitChanges(object sender, OptionsPageStorageEventArgs ea)
{
ea.Storage.WriteBoolean("Settings", "PersistClipboardHistory", ckbPersistHistory.Checked);
ea.Storage.WriteColor("Settings", "SelectorColor", clrSelector.Color);
ea.Storage.WriteInt32("Settings", "RowCount", NumRows);
ea.Storage.WriteInt32("Settings", "ColumnCount", NumColumns);
}
Next, let's add the code to read settings from DecoupledStorage back into the controls on our options page....
Activate OptClipboardHistory.cs [Design] once more...
Add a handler for the PreparePage event...

Inside our PreparePage event handler, add code similar to the following:
private void OptClipboardHistory_PreparePage(object sender, OptionsPageStorageEventArgs ea)
{
ckbPersistHistory.Checked = ea.Storage.ReadBoolean("Settings", "PersistClipboardHistory", true);
clrSelector.Color = ea.Storage.ReadColor("Settings", "SelectorColor", Color.Red);
NumRows = ea.Storage.ReadInt32("Settings", "RowCount", 3);
NumColumns = ea.Storage.ReadInt32("Settings", "ColumnCount", 3);
}
The third parameter for each of these ReadXxxxx calls is the default value to return if the storage item is not found (which could happen the first time this plug-in is loaded).
Testing Options Page Persistence
Click Run.
In the second instance of Visual Studio, from the DevExpress menu, select Options....
The Editor\Clipboard\History options page should already be selected from the last time we ran (if not, activate this page).
Change the settings on this options page.
Click OK.
Whenever you close down the options dialog, any options pages that were created get destroyed. So to test the persistence of our settings, all we need to do is simply open the options dialog again. I am noticing one problem...
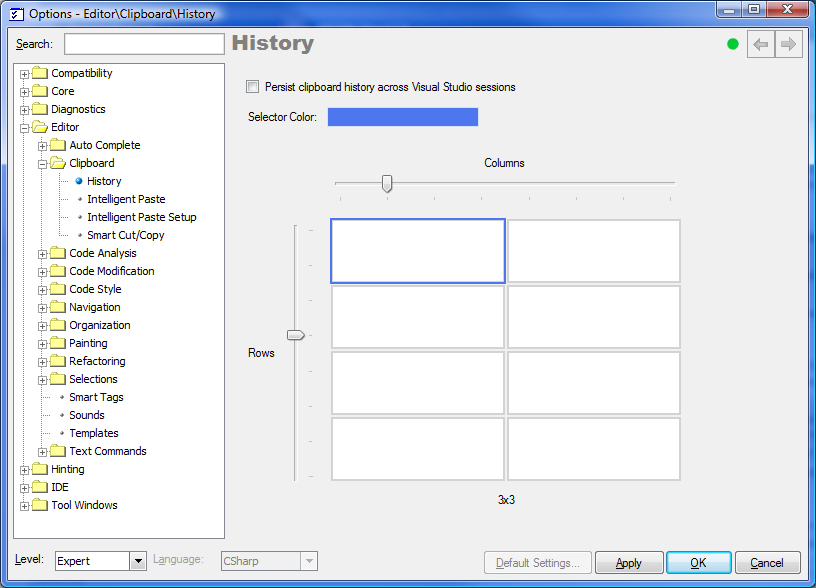
Notice that the text of the dimensions label still reads "3x3" (instead of the 2x4 I changed it to the first time). This makes sense because this text is only updated in the Scroll event for the TrackBars, and all we're doing in our PreparePage event handler is assigning a value to the NumRows and NumColumns properties, which simply pass that on to the Value property of both TrackBars. No scrolling involved, whatsoever. We'll fix that in a moment.
There's one other important missing component to these settings. Note that even though we've changed the settings to persist clipboard history across Visual Studio sessions, and we've changed the selector color and the dimensions of the clipboard history, and even though those settings are persisted, they still have no impact on our actual UI.
If you press Ctrl+Shift+Insert to bring up the Clipboard History, you'll still see the original 3x3 dimensions and the red selector color.
So let's stop the debugging session and address these issues.
First, let's extract the line of code from DimensionsChanged that sets the lblDimensions.Text property into its own method, called UpdateDimensions:
private void UpdateDimensions()
{
lblDimensions.Text = String.Format("{0}x{1}", NumColumns, NumRows);
}
private void DimensionsChanged(object sender, EventArgs e)
{
pnlPreview.Refresh();
UpdateDimensions();
}
Then, let's add a call to UpdateDimensions from our PreparePage event handler:
private void OptClipboardHistory_PreparePage(object sender, OptionsPageStorageEventArgs ea)
{
ckbPersistHistory.Checked = ea.Storage.ReadBoolean("Settings", "PersistClipboardHistory", true);
clrSelector.Color = ea.Storage.ReadColor("Settings", "SelectorColor", Color.Red);
NumRows = ea.Storage.ReadInt32("Settings", "RowCount", 3);
NumColumns = ea.Storage.ReadInt32("Settings", "ColumnCount", 3);
UpdateDimensions();
}
Good. That should fix the "3x3" problem. Next, let's figure out how to get those persisted settings into something that changes the behavior of our Clipboard History plug-in.
Reading Settings from Storage
There are two times when we should read settings from storage in our plug-in:
- When the plug-in first initializes.
- When the options change.
So let's go back to PlugIn1.cs, and inside the InitializePlugIn method, add a call to LoadSettings (which we'll implement in a moment).
public override void InitializePlugIn()
{
base.InitializePlugIn();
LoadSettings();
ClipboardHistory.Load();
}
It is important that the LoadSettings call comes before the ClipboardHistory.Load call, since the LoadSettings call will determine whether we'll actually read the history of clipboard entries stored on disk (this step is performed in ClipboardHistory.Load).
Whenever the DevExpress Options dialog is up and the OK or Apply buttons are clicked, the OptionsChanged event is fired.
We need to listen to this event, so let's add a handler.
Activate the PlugIn1.cs [Design] surface.
Click the design surface itself (so no controls are selected).

Switch to the Events view of the Properties grid.
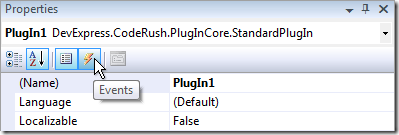
Create a handler for the OptionsChanged event.
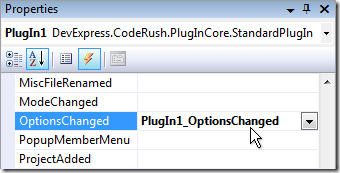
As mentioned above, the OptionsChanged event is fired whenever the OK or Apply buttons on the Options dialog are clicked. But how can we tell if the options that changed included our Clipboard History options page? Fortunately the OptionsChanged event passes an OptionsPages parameter that answers this question.
Inside the handler we can add the following code:
private void PlugIn1_OptionsChanged(OptionsChangedEventArgs ea)
{
if (ea.OptionsPages.Contains(typeof(OptClipboardHistory)))
LoadSettings();
}
Now it's time to implement that LoadSettings method.
In the previously discussed Persisting History Across Sessions section, we used the following code to create a DecoupledStorage instance:
using (DecoupledStorage settings = CodeRush.Options.GetStorage("Editor\\Clipboard", "History"))
That code can still work for us now, since the storage path specified there happens to match the path to our new options page (which means both the clipboard history and our new custom settings will appear in a single file). However, since we now have an OptionsPage descendant (OptClipboardHistory), we can use this easier-to-read code instead:
using (DecoupledStorage settings = OptClipboardHistory.Storage)
Both lines of code will produce a DecoupledStorage instance, and will both provide access to the same settings.
Our LoadSettings method in PlugIn1.cs looks like this (it's somewhat similar to the code we wrote for the PreparePage handler of our OptionsPage a few steps back):
private void LoadSettings()
{
using (DecoupledStorage settings = OptClipboardHistory.Storage)
{
ClipboardHistory.PersistHistory = settings.ReadBoolean("Settings", "PersistClipboardHistory", true);
FrmClipHistory.SelectedBorderColor = settings.ReadColor("Settings", "SelectorColor", Color.Red);
ClipboardHistory.RowCount = settings.ReadInt32("Settings", "RowCount", 3);
ClipboardHistory.ColumnCount = settings.ReadInt32("Settings", "ColumnCount", 3);
}
}
Everything in that code block exists with the exception of that PersistHistory field in ClipboardHistory. Let's declare it:
public static class ClipboardHistory
{
public static bool PersistHistory = true;
public static int RowCount = 5;
public static int ColumnCount = 3;
Next, let's add the code to work with our new settings. Changes to the SelectedBorderColor should work automatically -- I'm not expecting any code changes necessary there. PersistHistory is easy. We just need to add a line of code to the top of the Save and Load methods inside ClipboardHistory.cs, like this:
public static void Save()
{
if (!PersistHistory)
return;
using (DecoupledStorage settings = CodeRush.Options.GetStorage("Editor\\Clipboard", "History"))
{
settings.WriteInt32("Summary", "LastIndex", LastIndex);
settings.WriteInt32("Summary", "Cursor", FrmClipHistory.CursorIndex);
for (int index = 0; index <= LastIndex; index++)
{
string indexStr = index.ToString();
ClipboardHistoryEntry entry = Entries[index];
settings.WriteString("Entries", "Text" + indexStr, entry.Text, true); // string is encoded
settings.WriteString("Entries", "Language" + indexStr, entry.Language);
}
}
}
and this:
public static void Load()
{
if (!PersistHistory)
return;
using (DecoupledStorage settings = CodeRush.Options.GetStorage("Editor\\Clipboard", "History"))
{
int lastIndex = settings.ReadInt32("Summary", "LastIndex", -1);
FrmClipHistory.CursorIndex = settings.ReadInt32("Summary", "Cursor", 0);
if (lastIndex > LastIndex) // Don't read more entries than we can support.
lastIndex = LastIndex;
for (int index = 0; index <= lastIndex; index++)
{
string indexStr = index.ToString();
string text = settings.ReadString("Entries", "Text" + indexStr, String.Empty, true); // string is encoded
string languageID = settings.ReadString("Entries", "Language" + indexStr, String.Empty);
Entries[index] = new ClipboardHistoryEntry { Text = text, Language = languageID };
}
}
}
Changes to ClipboardHistory's RowCount and ColumnCount fields are a little more involved. It seems to me the easiest solution is to add a method that creates the Entries array at the correct size, and call that whenever we change the dimensions. So inside our LoadSettings method, let's add this line of code:
private void LoadSettings()
{
using (DecoupledStorage settings = OptClipboardHistory.Storage)
{
ClipboardHistory.PersistHistory = settings.ReadBoolean("Settings", "PersistClipboardHistory", true);
FrmClipHistory.SelectedBorderColor = settings.ReadColor("Settings", "SelectorColor", Color.Red);
ClipboardHistory.RowCount = settings.ReadInt32("Settings", "RowCount", 3);
ClipboardHistory.ColumnCount = settings.ReadInt32("Settings", "ColumnCount", 3);
ClipboardHistory.BuildEntries();
}
}
At first I was thinking BuildEntries inside ClipboardHistory.cs would be simple, like this:
public static void BuildEntries()
{
Entries = = new ClipboardHistoryEntry[RowCount * ColumnCount];
LastIndex = numEntries - 1;
}
Then I realized that re-dimensioning the clipboard history through this options page would result in the loss of all previous entries. So to preserve as many entries as possible, I changed BuildEntries to look like this:
public static void BuildEntries()
{
int numEntries = RowCount * ColumnCount;
ClipboardHistoryEntry[] newEntries = new ClipboardHistoryEntry[numEntries];
int numEntriesToCopy = Math.Min(numEntries, Entries.Length);
for (int i = 0; i < numEntriesToCopy; i++)
newEntries[ i ] = Entries[ i ];
Entries = newEntries;
LastIndex = numEntries - 1;
}
Now, there's one more small challenge, and that's over in FrmClipHistory. At the top of that class, we have these two fields:
static CodeView[] _CodeViews = new CodeView[ClipboardHistory.LastIndex + 1];
static Panel[] _Borders = new Panel[ClipboardHistory.LastIndex + 1];
These static fields worked well when the size of the clipboard history wasn't changing. But now that the size is dynamic, we will need to update these as well.
First, let's change the CreateViews method, so it initializes these arrays correctly:
private static void CreateViews()
{
_CodeViews = new CodeView[ClipboardHistory.LastIndex + 1];
_Borders = new Panel[ClipboardHistory.LastIndex + 1];
for (int i = 0; i <= ClipboardHistory.LastIndex; i++)
{
_CodeViews[ i ] = new CodeView();
_CodeViews[ i ].Location = new Point(CursorBorder, CursorBorder);
_Borders[ i ] = new Panel();
_Borders[ i ].Controls.Add(_CodeViews[ i ]);
_FrmClipHistory.Controls.Add(_Borders[ i ]);
}
}
Second, for efficiency and readability, let's clean up those field declarations at the top of the form, removing their initialization, like this:
static CodeView[] _CodeViews;
static Panel[] _Borders;
Cool. Let's see how this works.
Testing Reading from Storage
I'm excited to try this out. We're almost done with the Clipboard History, and this options page will give developers a nice level of customization.
Click Run.
Now, you might be thinking we need to bring up the options page and change some settings to test. But we don't really need to do that, since our options have already been stored from the last test session we ran.
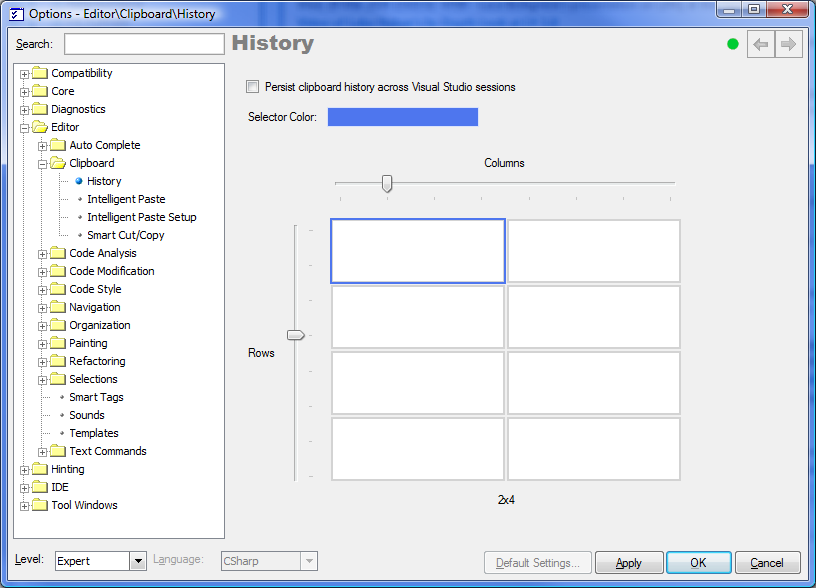
So instead of bringing up the options page, press Ctrl+Shift+Insert to bring up the Clipboard History form.
Excellent! This is really cool. The clipboard history is now 2x4, and the cursor selector color is blue, just as I set it from the last time I tested.
Let's push this a bit, and see what the extremes might look like. From the DevExpress menu, click Options....
The Editor\Clipboard\History options page should be selected. Increase the row and column dimensions to their maximum levels, change the color of the cursor, and click OK.
Then press Ctrl+Shift+Insert once more. This time the Clipboard History should look something like this:
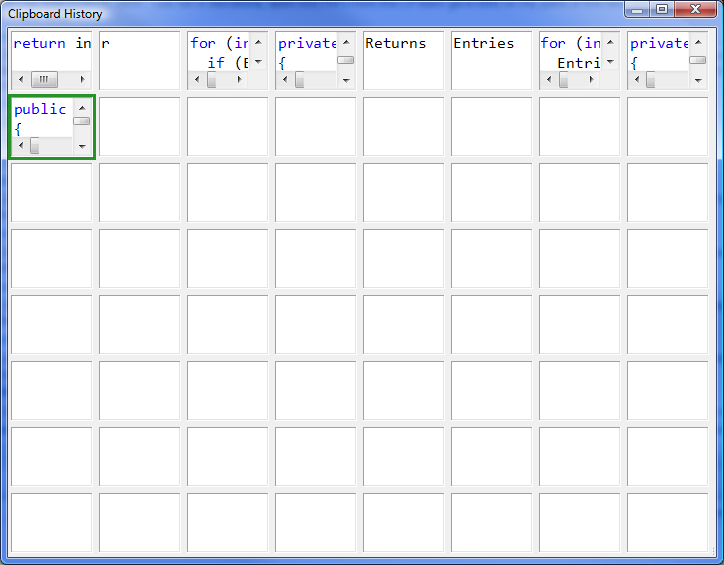
Wow! That's a lot of clipboard entries. Developers with large monitors might appreciate the ability to keep a history of entries that long.
Now might be a great time to interact with the Clipboard History options page and set the Clipboard History options to be the way you want them (I prefer something substantially smaller than 8x8).
Tomorrow, we'll add support for reverting to default settings, improve the quality of the code, and specify a custom title for the options page.
Free DevExpress Products - Get Your Copy Today
Mark Miller (DevExpress)